Implementing Facebook Login using Nodejs and Express
Implementing Facebook Login using Nodejs and Express
In this article, we will see how to implement facebook login in application using Nodejs and Express. Implementing Facebook Login using Nodejs and Express.
Facebook Login is widely used for authentication in lots of applications. Instead of asking user to register, application can simply using social websites to get the user information
Recent Article in Node.js,
Crafting multi-stage builds with Docker in Node.js
Building a Production – Ready Node.js App with TypeScript and Docker
Setting up Developer’s Account
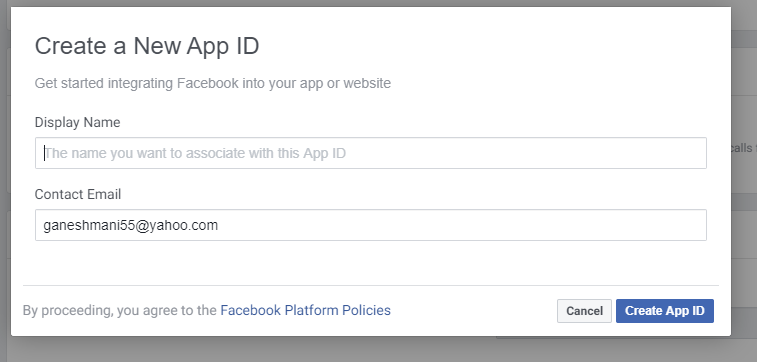
we need Facebook developer credentials for application development. So , go to https://developers.facebook.com, and create an application.

As a result, it creates an application an redirects to dashboard. After that, go to Settings -> Basic to get the app credentials.

Now, you have the application credentials. it’s time to write some code.
Implementation
passportjs is used for facebook authentication in Nodejs/Express application.
That is to say, Install the dependencies for application, such as
- express - Node.js Framework to run the web server.
- Passportjs - it is an authentication middleware for Node.js application.
- handlebars - Templating engine for Javascript application.
npm install --save express express-handlebars passport passport-facebookAdd the following code to setup the express server.
const express = require("express");

const app = express();

app.get("/", (req, res) => {
  res.send("Server");
});

app.listen(3000, () => {
  console.log("Server is Running in Port 3000");
});
You can run the application using the script node app.js.
After that, visit the url http://localhost:3000 to see the output.
Now, it is time to set up web page for button and data list after login. For that, we need handlebars. add the following code for handlebars initialization.
const express = require('express');
const exphbs = require('express-handlebars');

const app = express();.

app.engine('handlebars', exphbs());
app.set('view engine', 'handlebars');

app.get("/",(req,res) => {
   res.render('home');
});

app.listen(3000,() => {
 console.log("Server is Running in Port 3000");
});
it imports the express handlebars library and set it as the template engine for the express application.
After that, Create a folder called views in the root directory. Inside that, create a folder layout that contains the basic layout.
Meanwhile , If you are new to Handlebars. i recommend you to watch this tutotial

Views contains all the handlebar files. Firstly, add the following code in the main.handlerbars. it will create a basic html page for application. it can be reused in all the subsequent handlebar files.
<!DOCTYPE html>
<html>
  <head>
    <meta charset="utf-8" />
    <title>Example App</title>
    <link
      rel="stylesheet"
      href="https://cdnjs.cloudflare.com/ajax/libs/semantic-ui/2.4.1/semantic.min.css"
    />
  </head>

  <body>
    {{{body}}}
  </body>
</html>
After that, add the following code in home.handlebars, it creates an button element through which user can login.
<div class="ui one column stackable center aligned page grid">
    <div class="column twelve wide">
        <div class="ui facebook button">
            <i class="facebook icon"></i>
            <a href="/auth/facebook" style="color: white;">Login with Facebook</a>
        </div>
    </div>
</div>
Likewise , data.handlebars contains the user data after facebook login.
<div class="ui two column centered grid">
    <div class="column">

        <h2>Display Name : {{user.displayName}}</h2>
    </div>
</div>
Passportjs Implementation
Now, it’s time to integrate passport.js with express application.
Import the passport and passport-facebook package in the app.js
const passport = require("passport");
const FacebookStrategy = require("passport-facebook").Strategy;
secondly , initialize passport and passport sesstion.
app.use(passport.initialize());
app.use(passport.session());
passport.session() acts as a middleware to alter the req object and change the user value in the request session
Moreover , To store and retrieve in the session. the user value should be serialized.
passport.serializeUser(function (user, done) {
  done(null, user);
});

passport.deserializeUser(function (user, done) {
  done(null, user);
});
After that, we use the Passport Facebook Strategy to authenticate the application.
passport.use(
  new FacebookStrategy(
    {
      clientID: "Client ID",
      clientSecret: "Client Secret",
      callbackURL: "http://localhost:3000/auth/facebook/callback",
    },
    function (accessToken, refreshToken, profile, cb) {
      return cb(null, profile);
    }
  )
);
That is to say, Passport registers the Facebook Strategy for authentication. Mainly it takes ClientID and ClientSecret to register strategy.
As a result, we can use it as a middleware in express app routes.
Above all , when authentication is done, it will call the callback function with the user profile data.
As a result Once login is successfull, it calles the callback url with the user profile data. it sends the data to handlebars to display it in the dashboard.
app.get("/auth/facebook", passport.authenticate("facebook"));Complete Code
const express = require("express");

const exphbs = require("express-handlebars");
const passport = require("passport");
const FacebookStrategy = require("passport-facebook").Strategy;
let app = express();

app.engine("handlebars", exphbs());
app.set("view engine", "handlebars");

app.use(passport.initialize());
app.use(passport.session());

passport.serializeUser(function (user, done) {
  done(null, user);
});

passport.deserializeUser(function (user, done) {
  done(null, user);
});

passport.use(
  new FacebookStrategy(
    {
      clientID: "Client ID",
      clientSecret: "Client Secret",
      callbackURL: "http://localhost:3000/auth/facebook/callback",
    },
    function (accessToken, refreshToken, profile, cb) {
      return cb(null, profile);
    }
  )
);

app.get("/auth/facebook", passport.authenticate("facebook"));

app.get(
  "/auth/facebook/callback",
  passport.authenticate("facebook", { failureRedirect: "/" }),
  function (req, res) {
    console.log("req", req.user);
    res.render("data", {
      user: req.user,
    });
  }
);

app.get("/", (req, res) => {
  res.render("home", {
    user: req.user,
  });
});

app.listen(3000, () => {
  console.log("Server is Running in Port 3000");
});
Conclusion
To sum up , passport is a simplest way to implement social login in express application.
In conclusion, we learned how to implement facebook login in express application.