Deploying Node.js/Typescript application on AWS Elastic Beanstalk - Part 2
Deploying Node.js/Typescript application on AWS Elastic Beanstalk - Part 2
This is the second part of deploying the Node.js/Typescript application on AWS Elastic Beanstalk. If you want to learn the basics of AWS Elastic Beanstalk, you can read the previous part here
So far, we’ve learned how to deploy Nodejs applications on Elastic Beanstalk. But, when it comes to building modern nodejs applications. Reality is different from using a simple Javascript/Nodejs application. There is a lot of Nodejs framework that helps to build the modern applications.
Most of them have one thing in common nowadays using Typescript with Nodejs. Differen steps are involved to deploy the Typescript/Nodejs application to the production environment. Important to note is where do we compile typescript code and then deploy it.
There are two approaches to doing that. One is to manually compile the code and upload the compressed build into AWS Elastic Beanstalk. Another method is using AWS services such as AWS CodeBuild to compile and deploy the code to AWS Elastic Beanstalk.
I recommend implementing the second approach as it is scalable and similar to real-world scenarios. Before proceeding with this tutorial, we need to make some changes to the existing Elastic Beanstalk configuration to enable the database.
EBS Database Config
The only change in the previous Elastic Beanstalk configuration is enabling a database for the application. You can edit the existing environment.
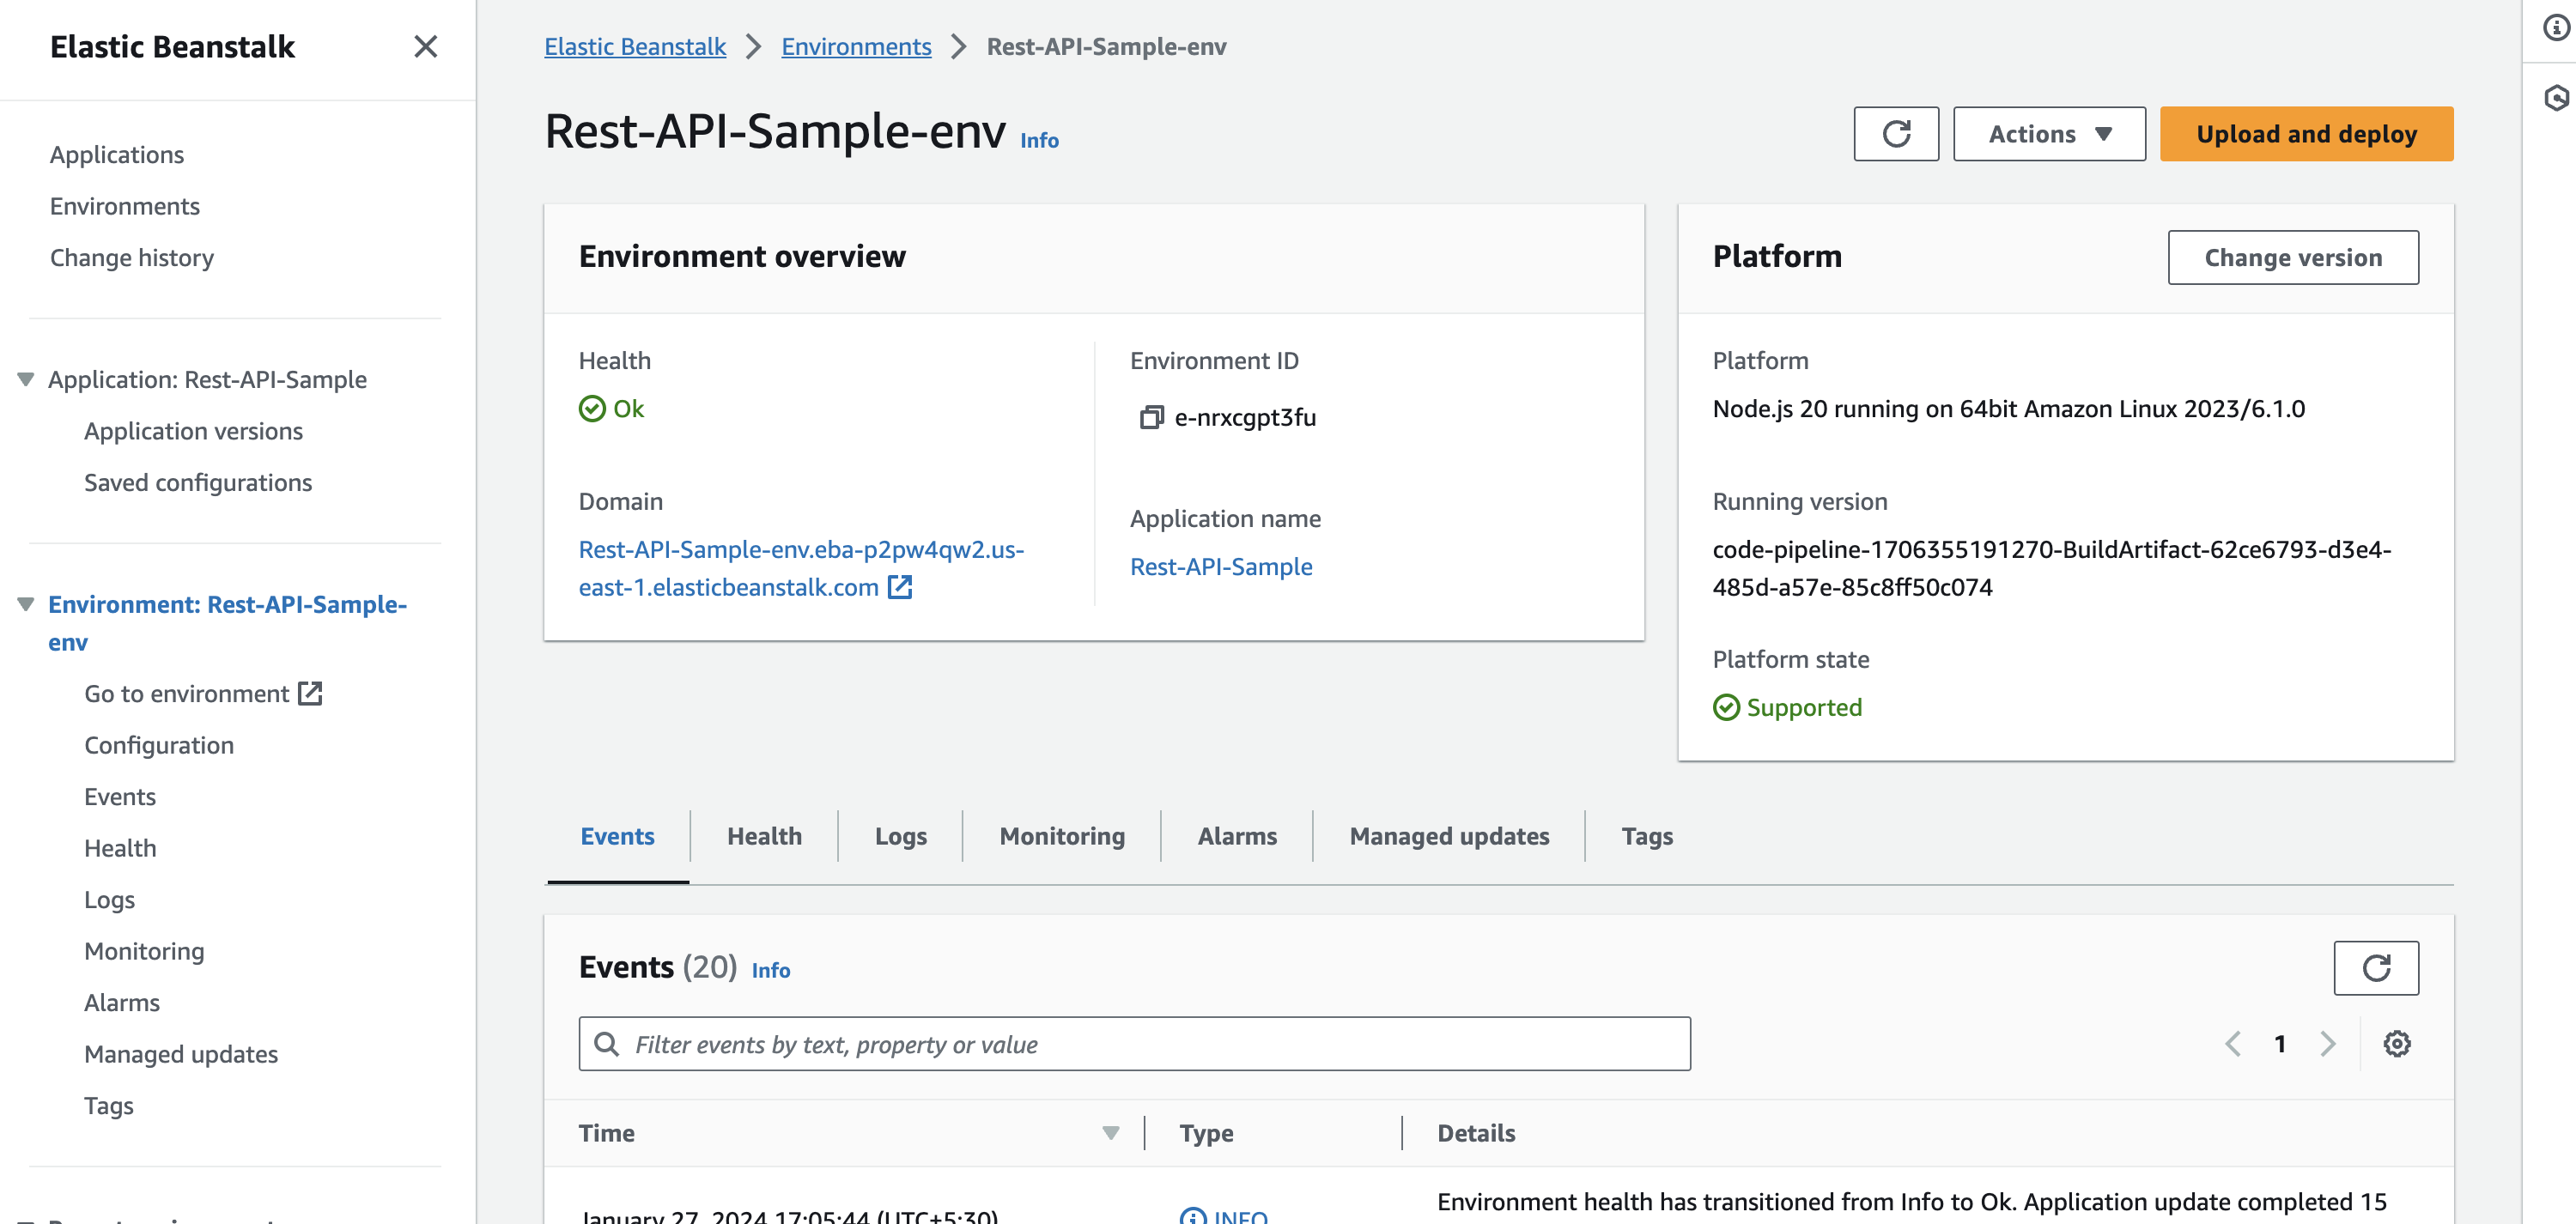
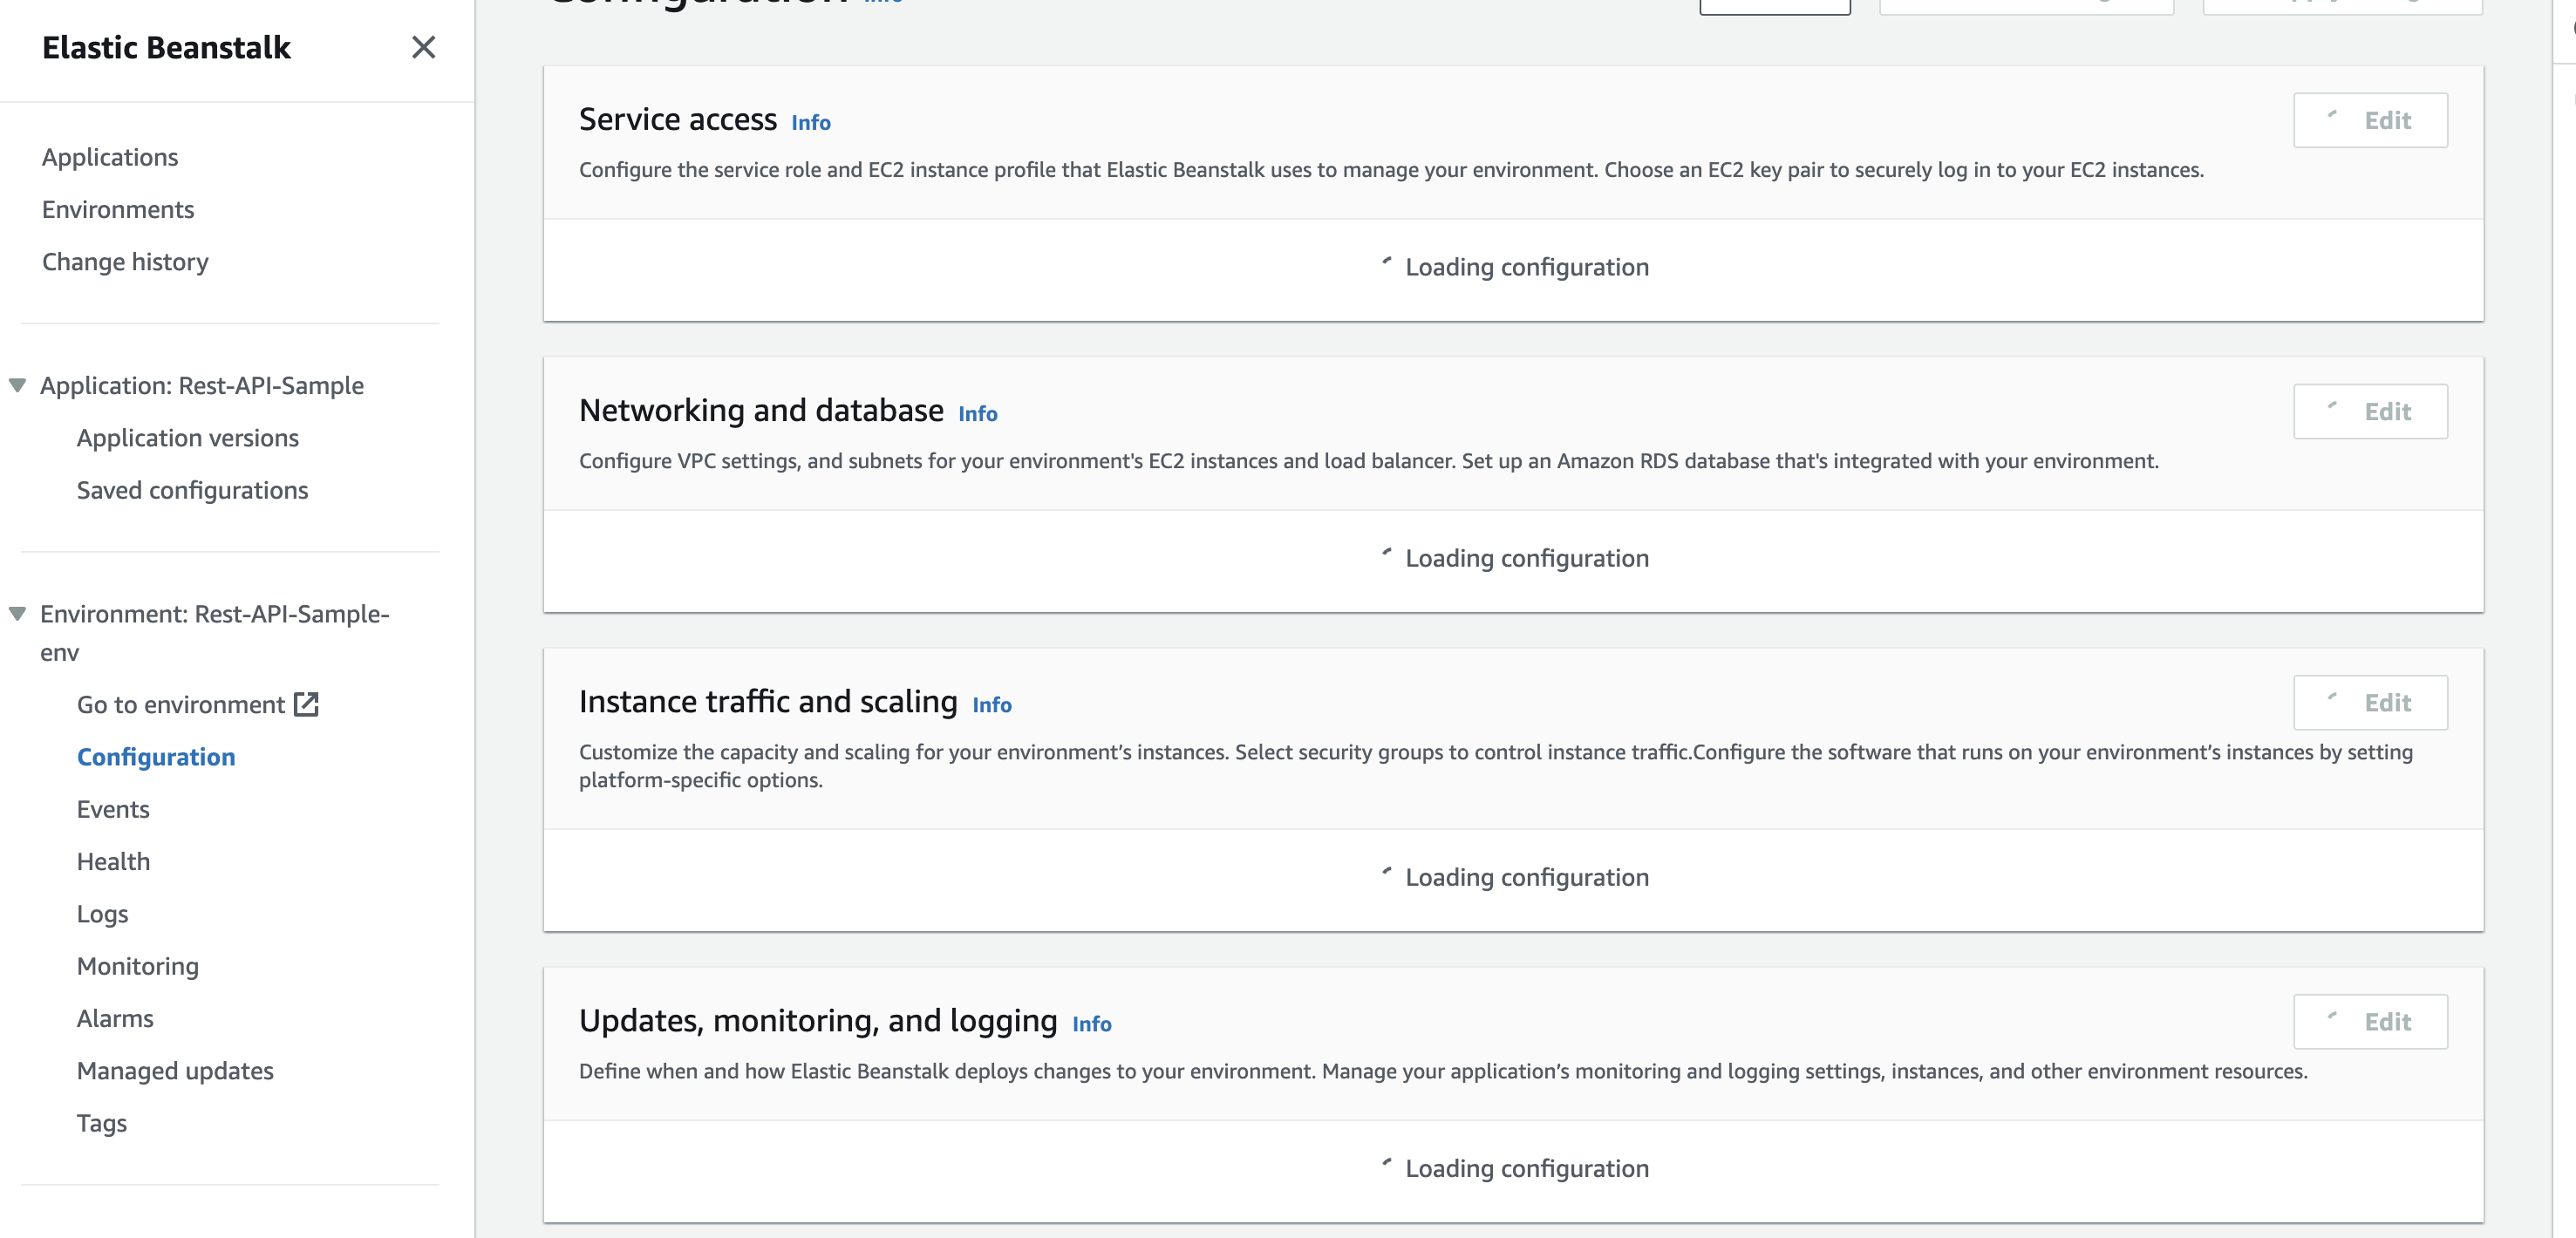
Click on the Configuration to see Service access, Networking, and database. Edit the database configuration and enable the database by setting username and password.
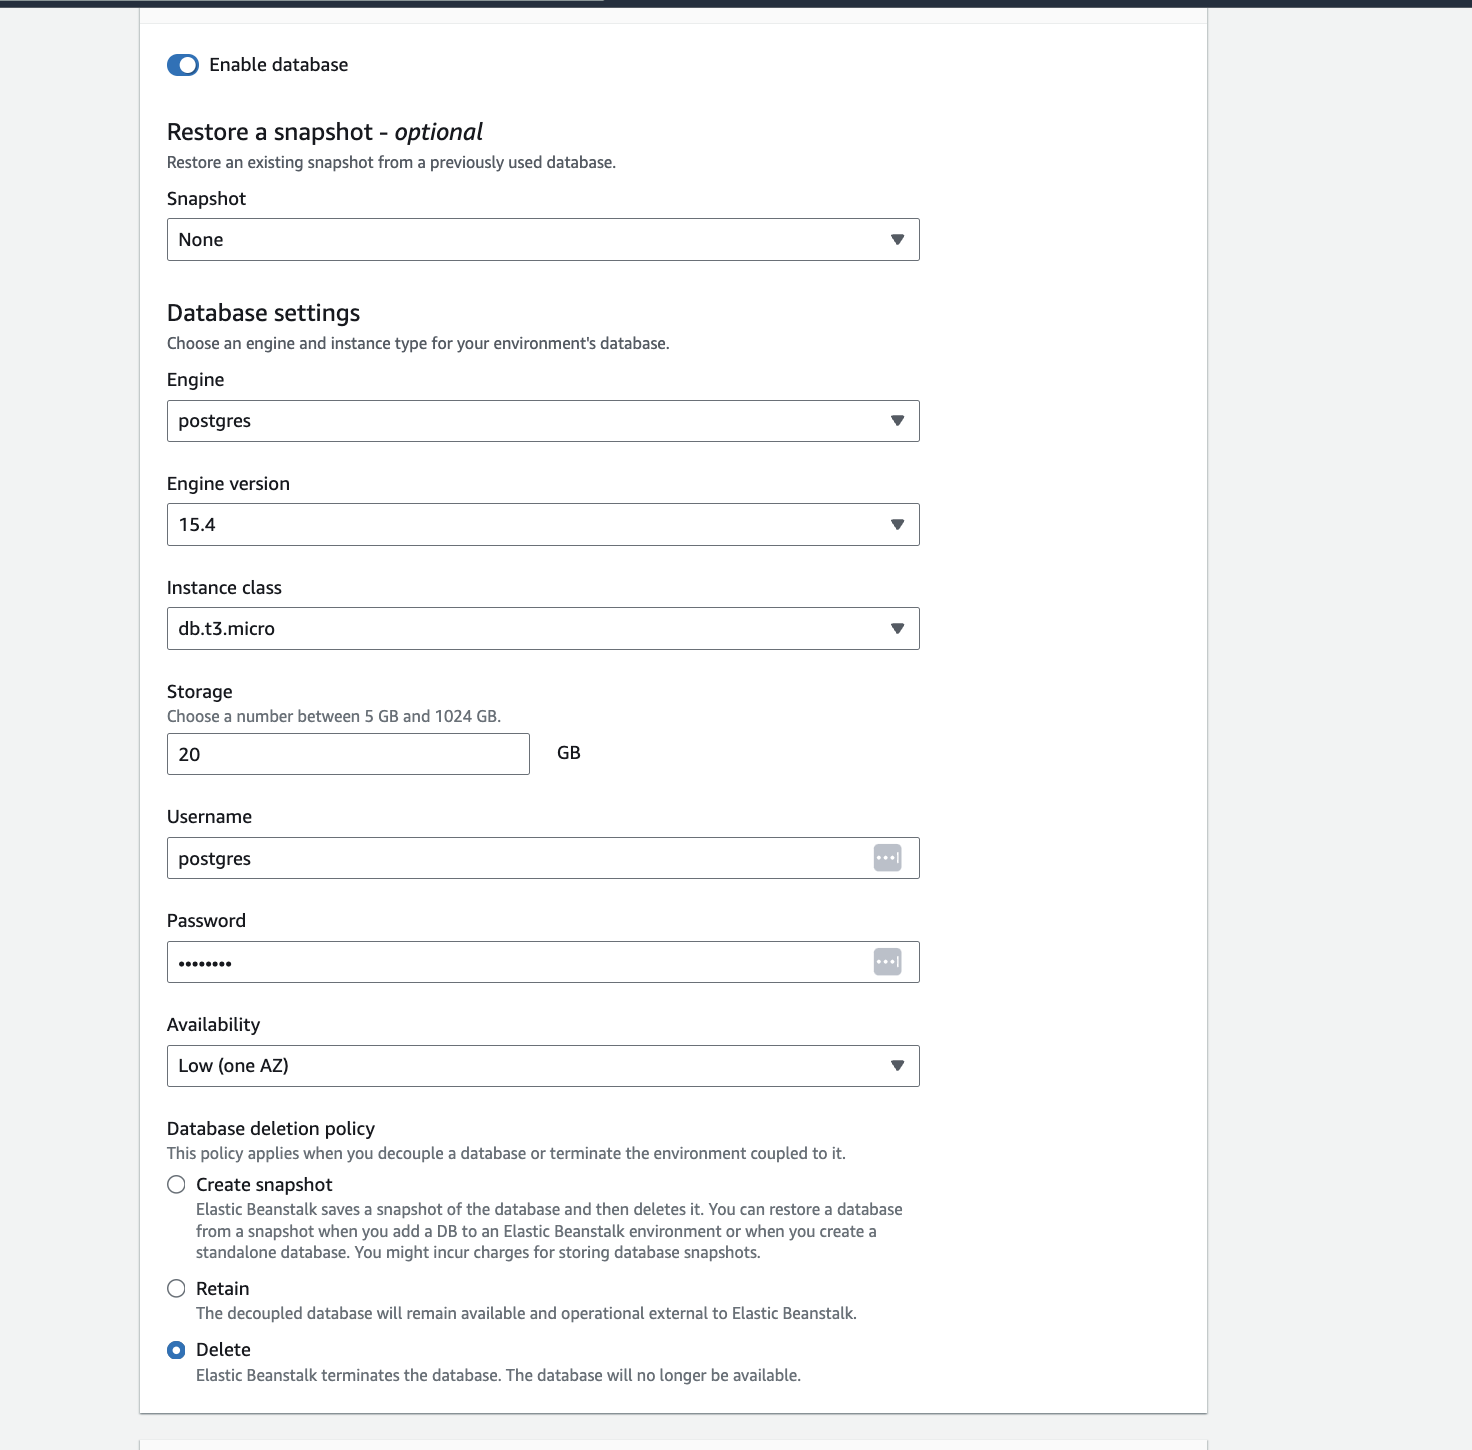
Once you complete the database configuration, you can continue deploying the Typescript application to Elastic Beanstalk.
This tutorial will use an application that uses Typescript, Postgres, and TypeORM. You can find the source code here.****
Architectural Flow
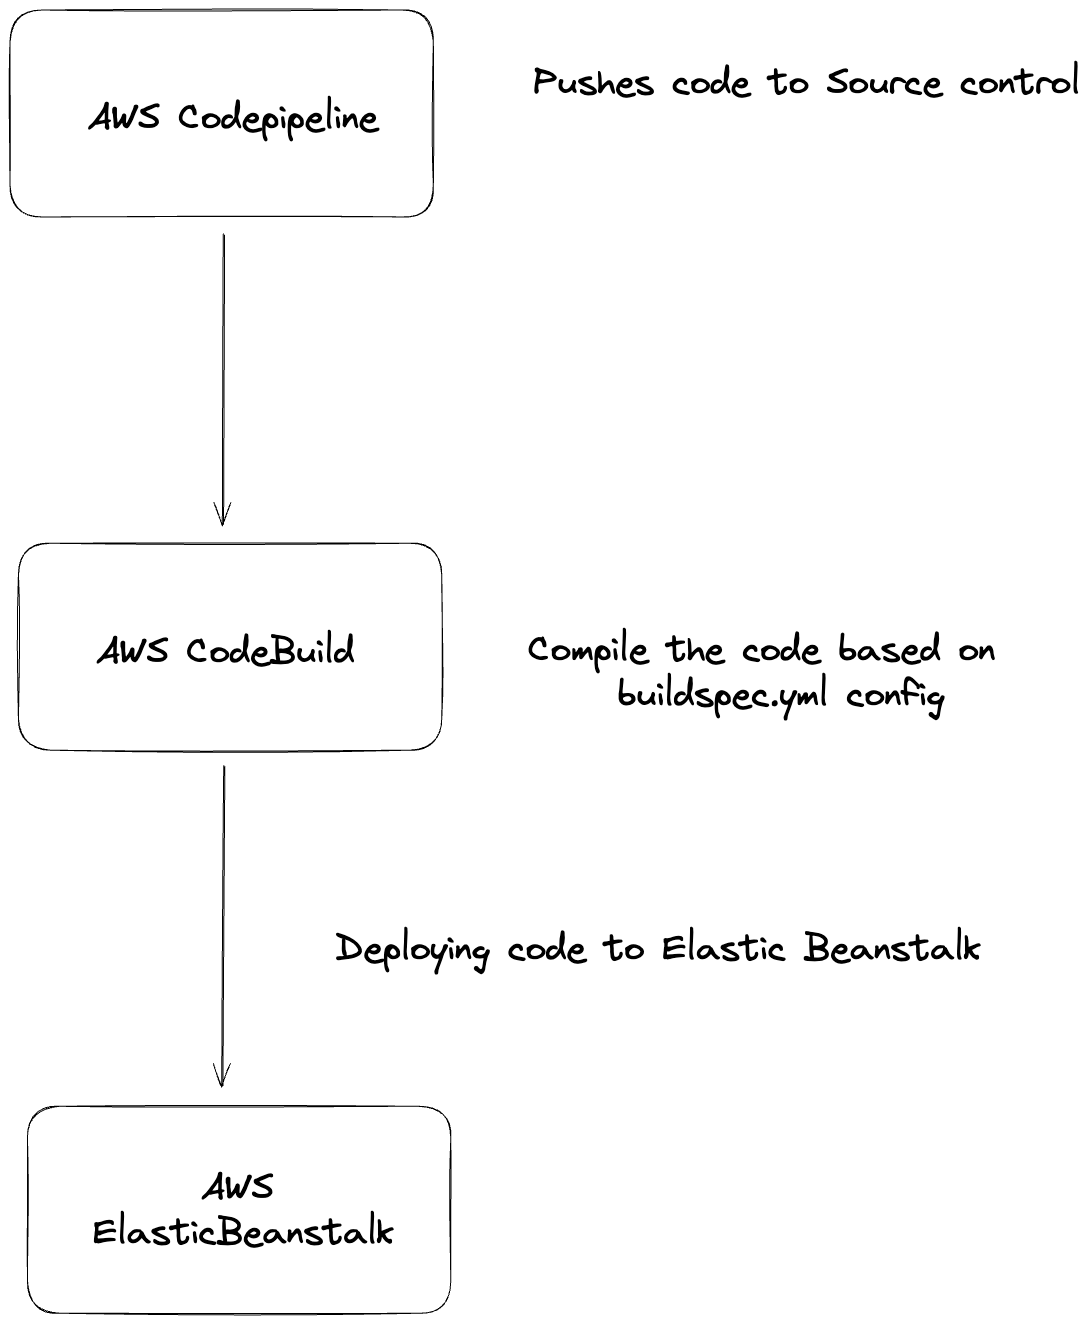
AWS CodePipeline and CodeBuild are CI/CD services that automate the build, test, and deploy of source code to AWS. Let’s configure AWS CodePipeline and CodeBuild to compile Typescript and deploy it to ElasticBeanstalk.****
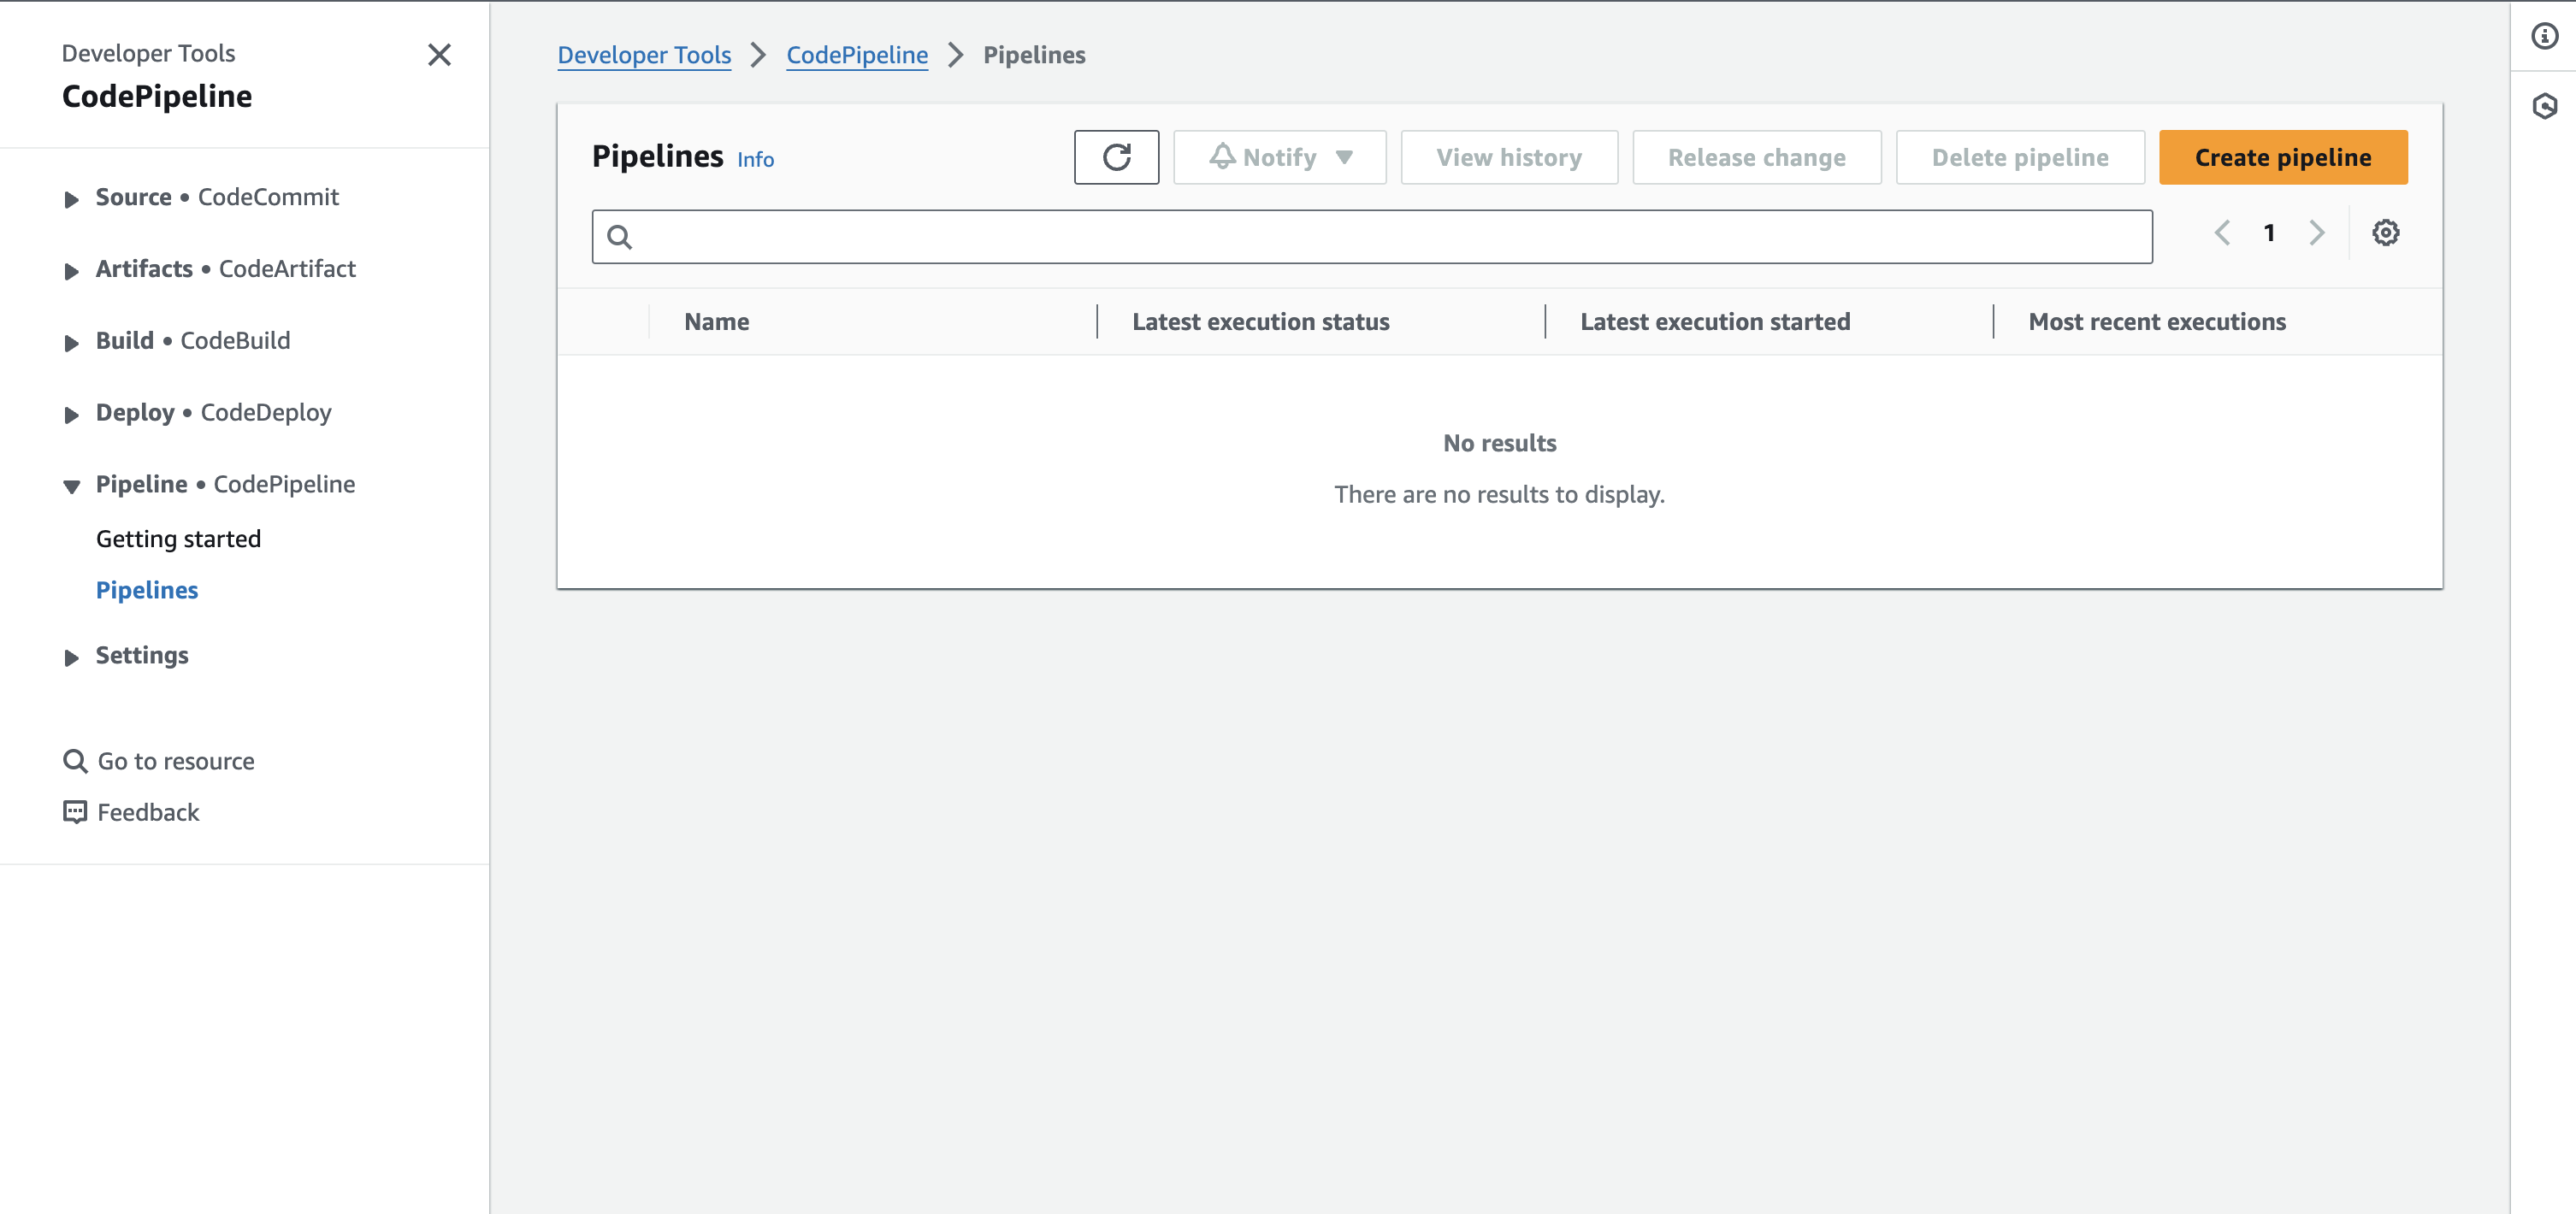
AWS CodePipeline
Let’s create a pipeline to automate the whole process.
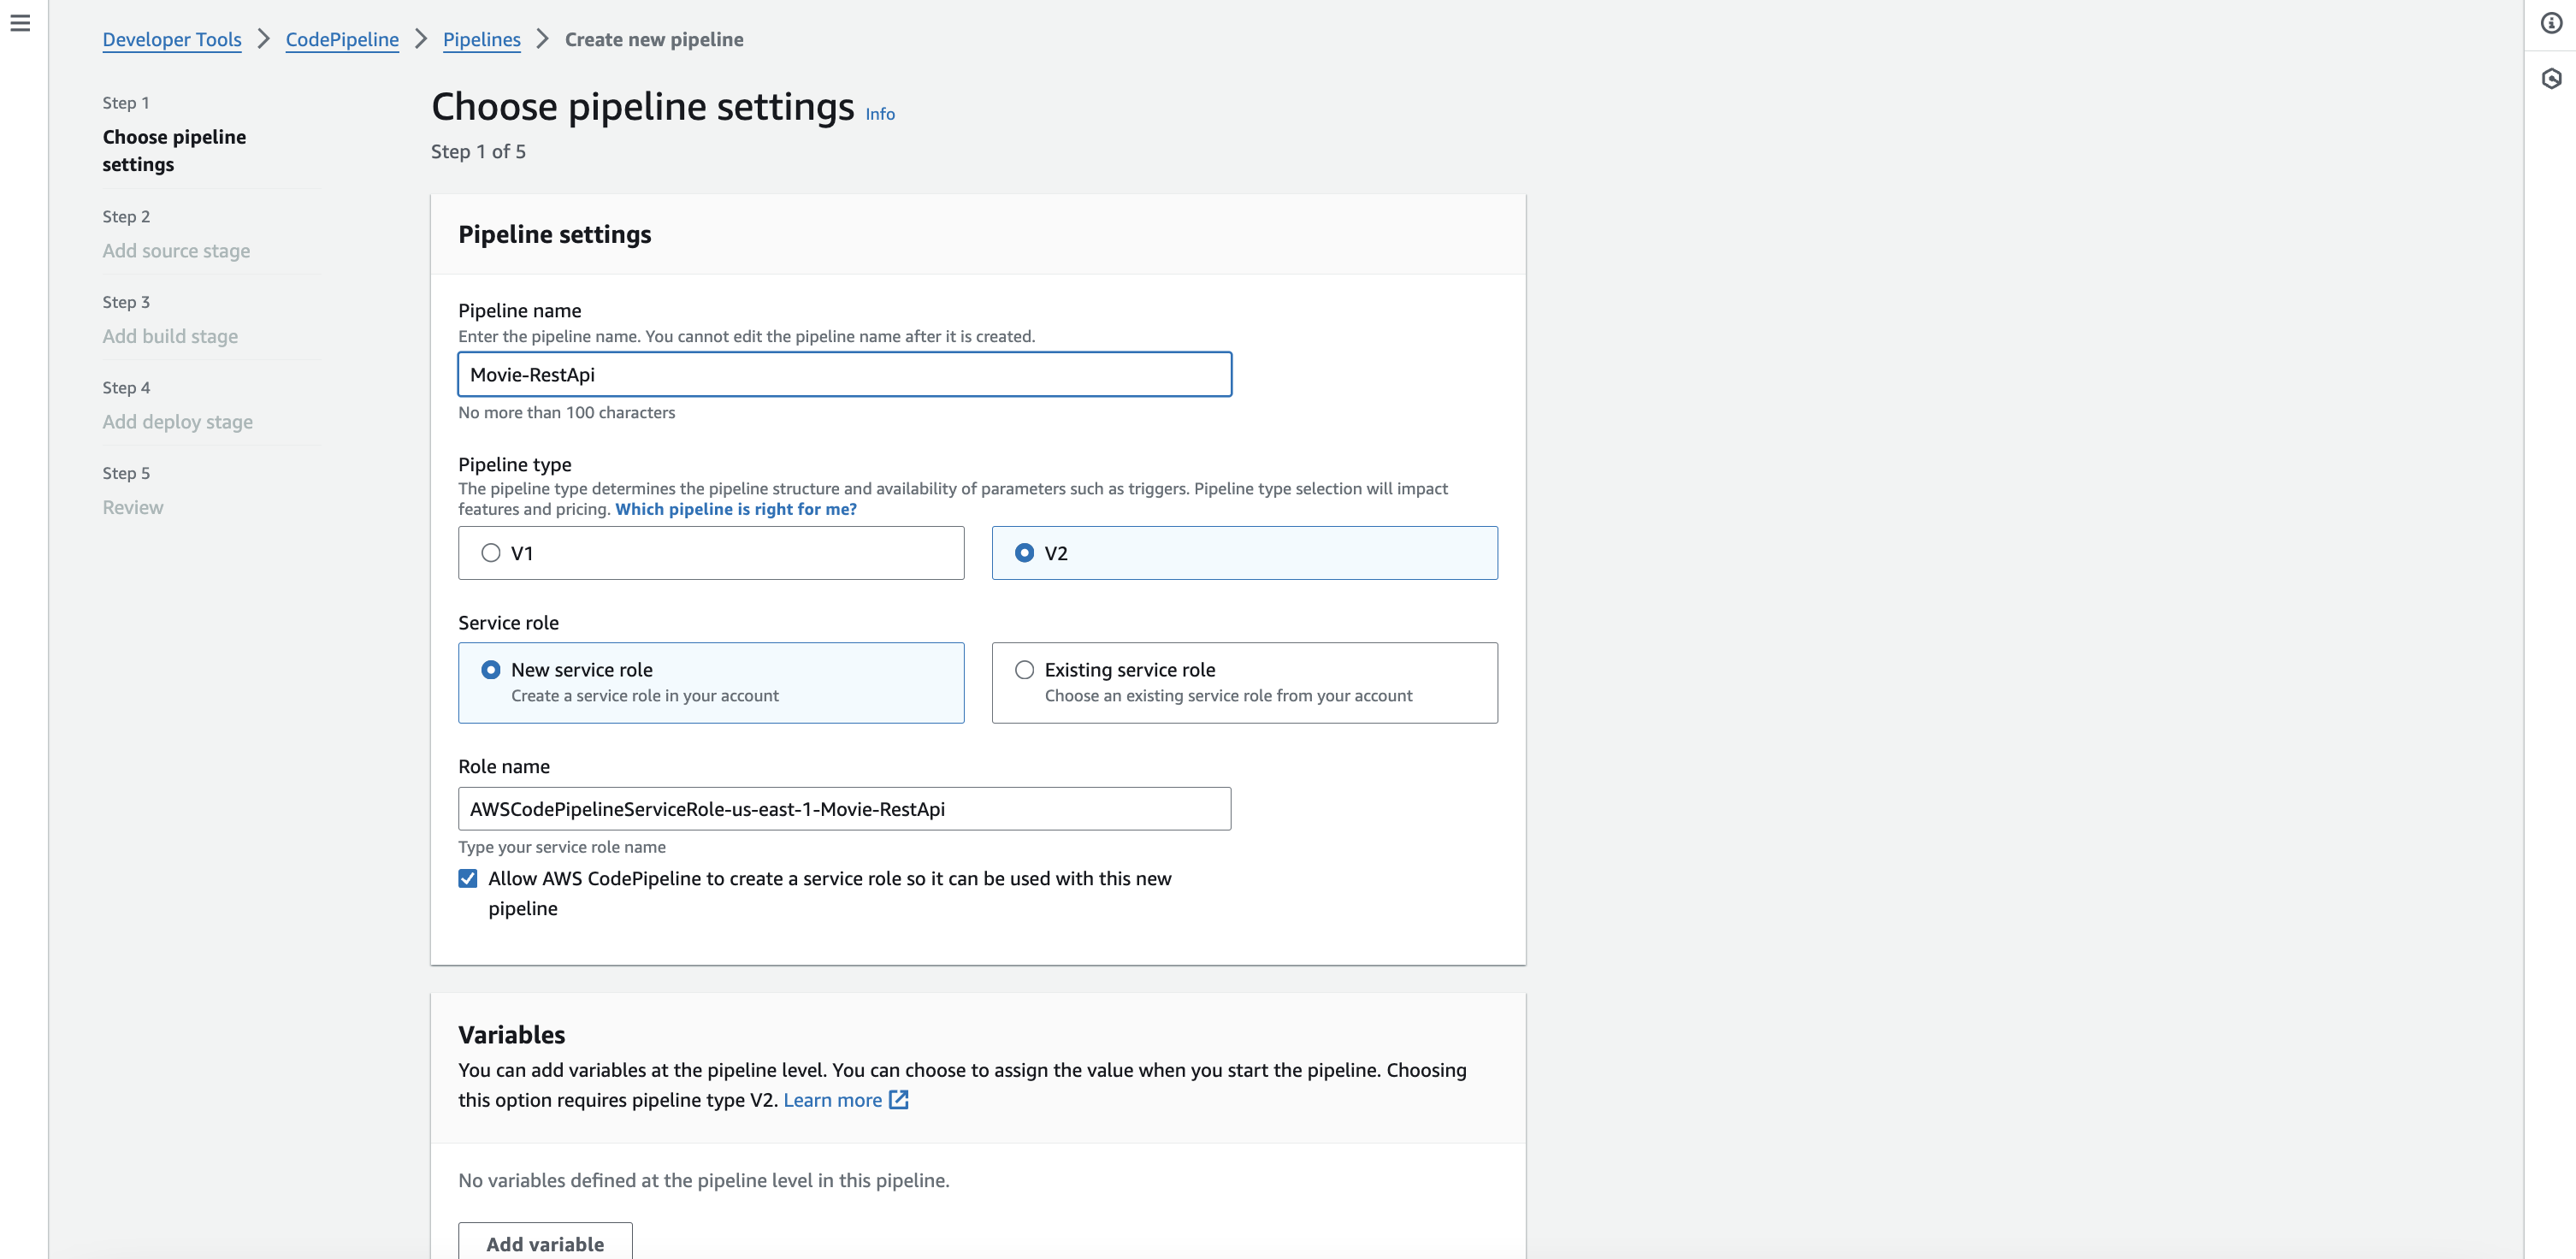
Select a pipeline name, type, and service role. For our case, we will use a new service role that authorizes the pipeline to access other AWS services.
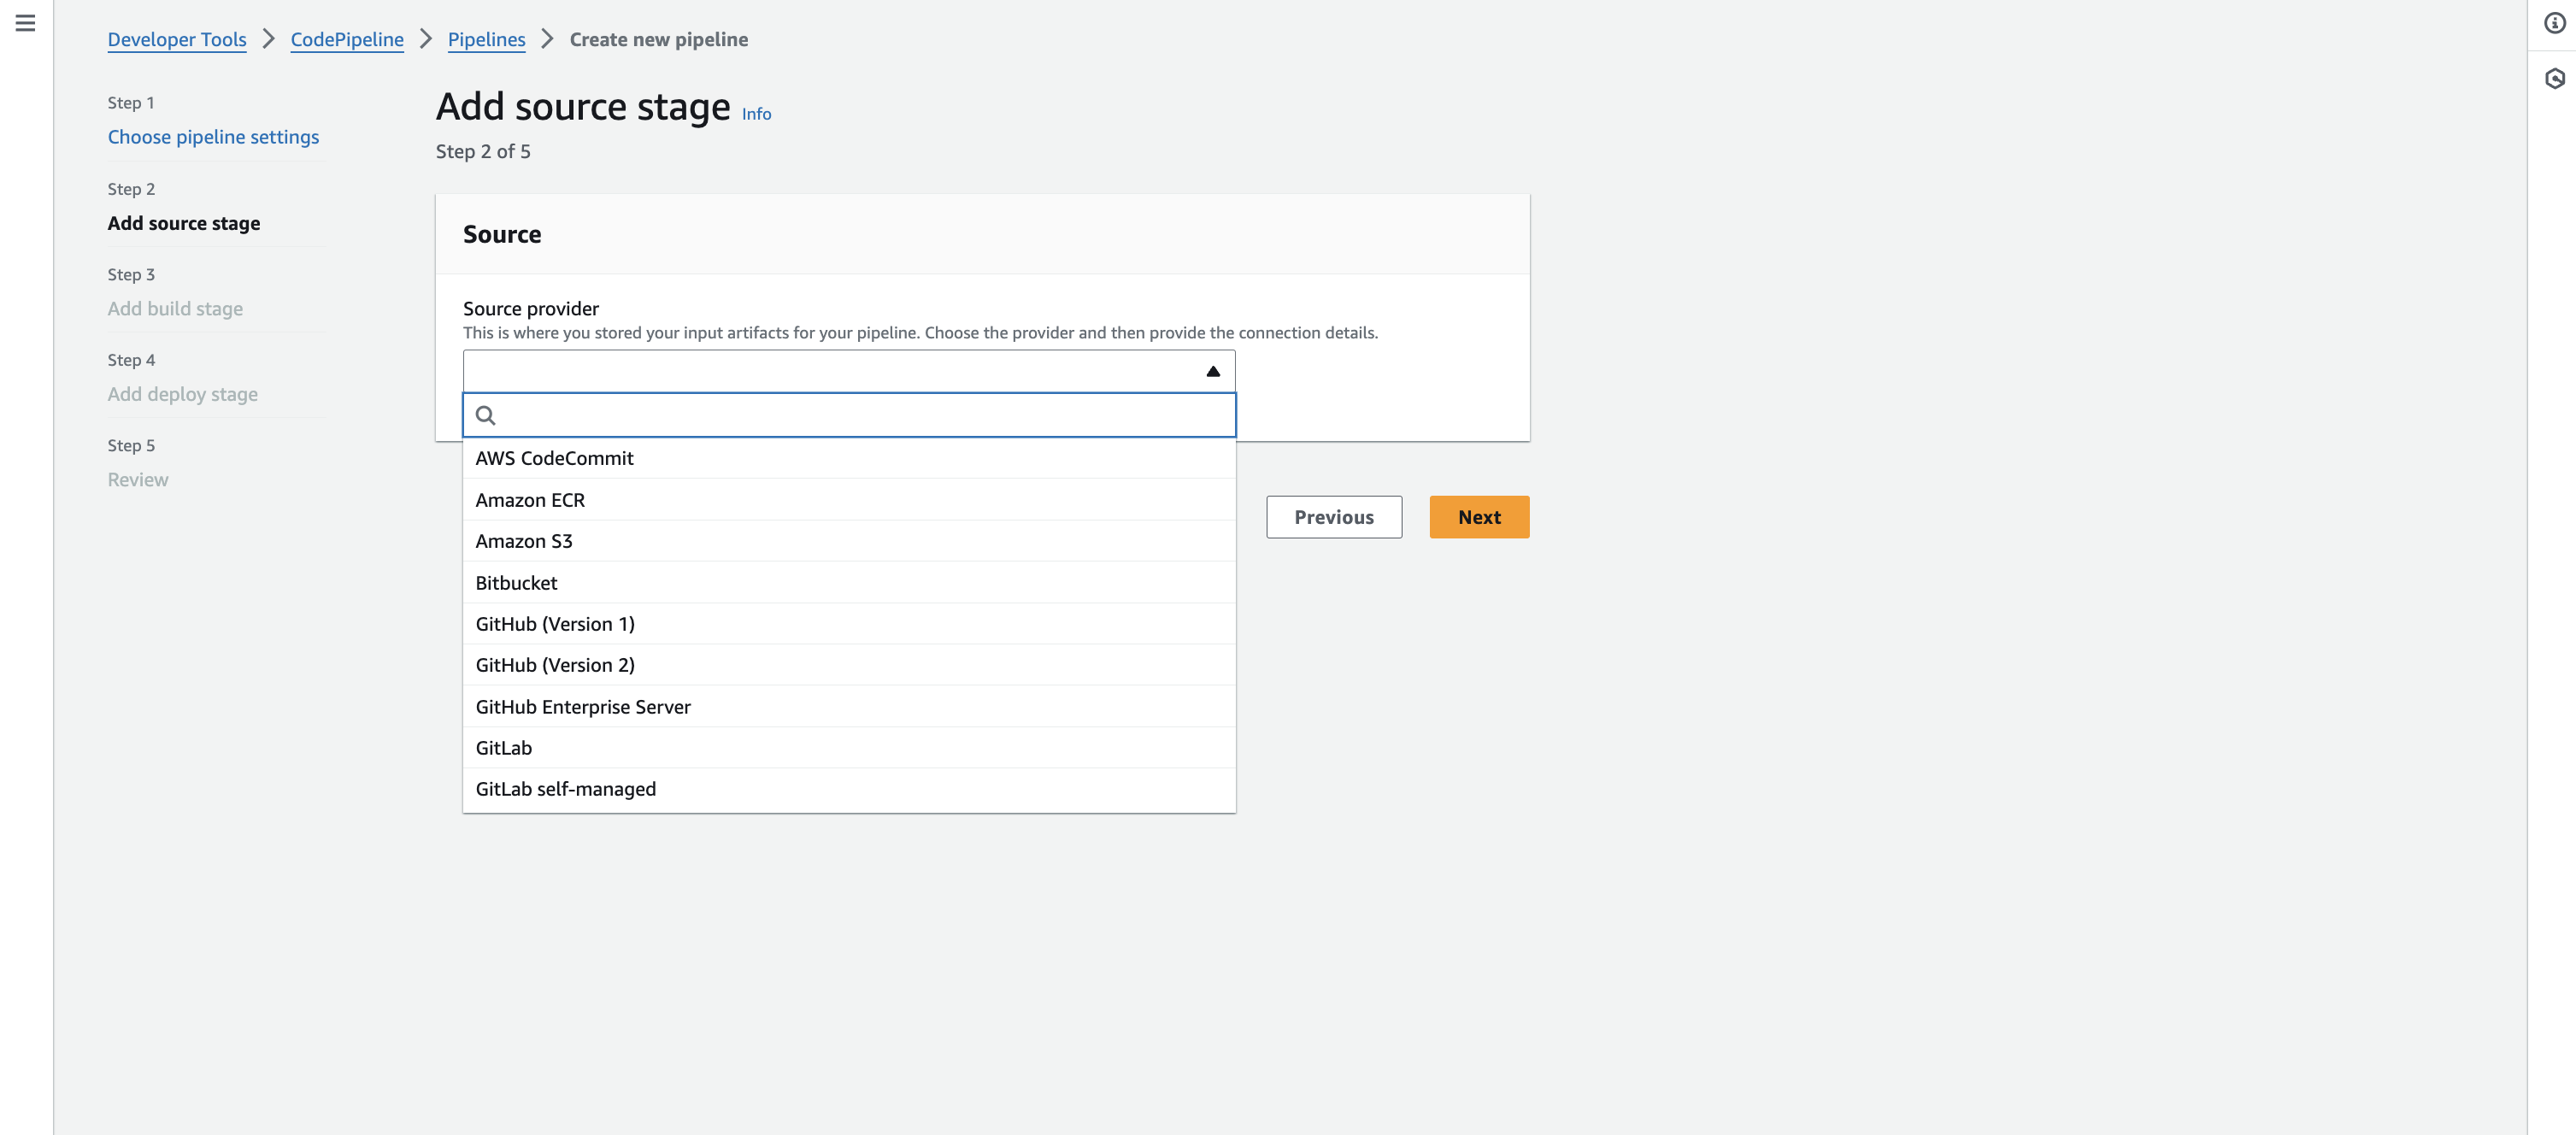
After that, you need to select a source provider. The source provider is a version control system(VCS) such as Github/Gitlab. So, whenever we push the code to GitHub, AWS picks up the changes and starts the pipeline.
Once you select the source provider, you need to connect with it and configure it to trigger the pipeline on the branch name and repository name.
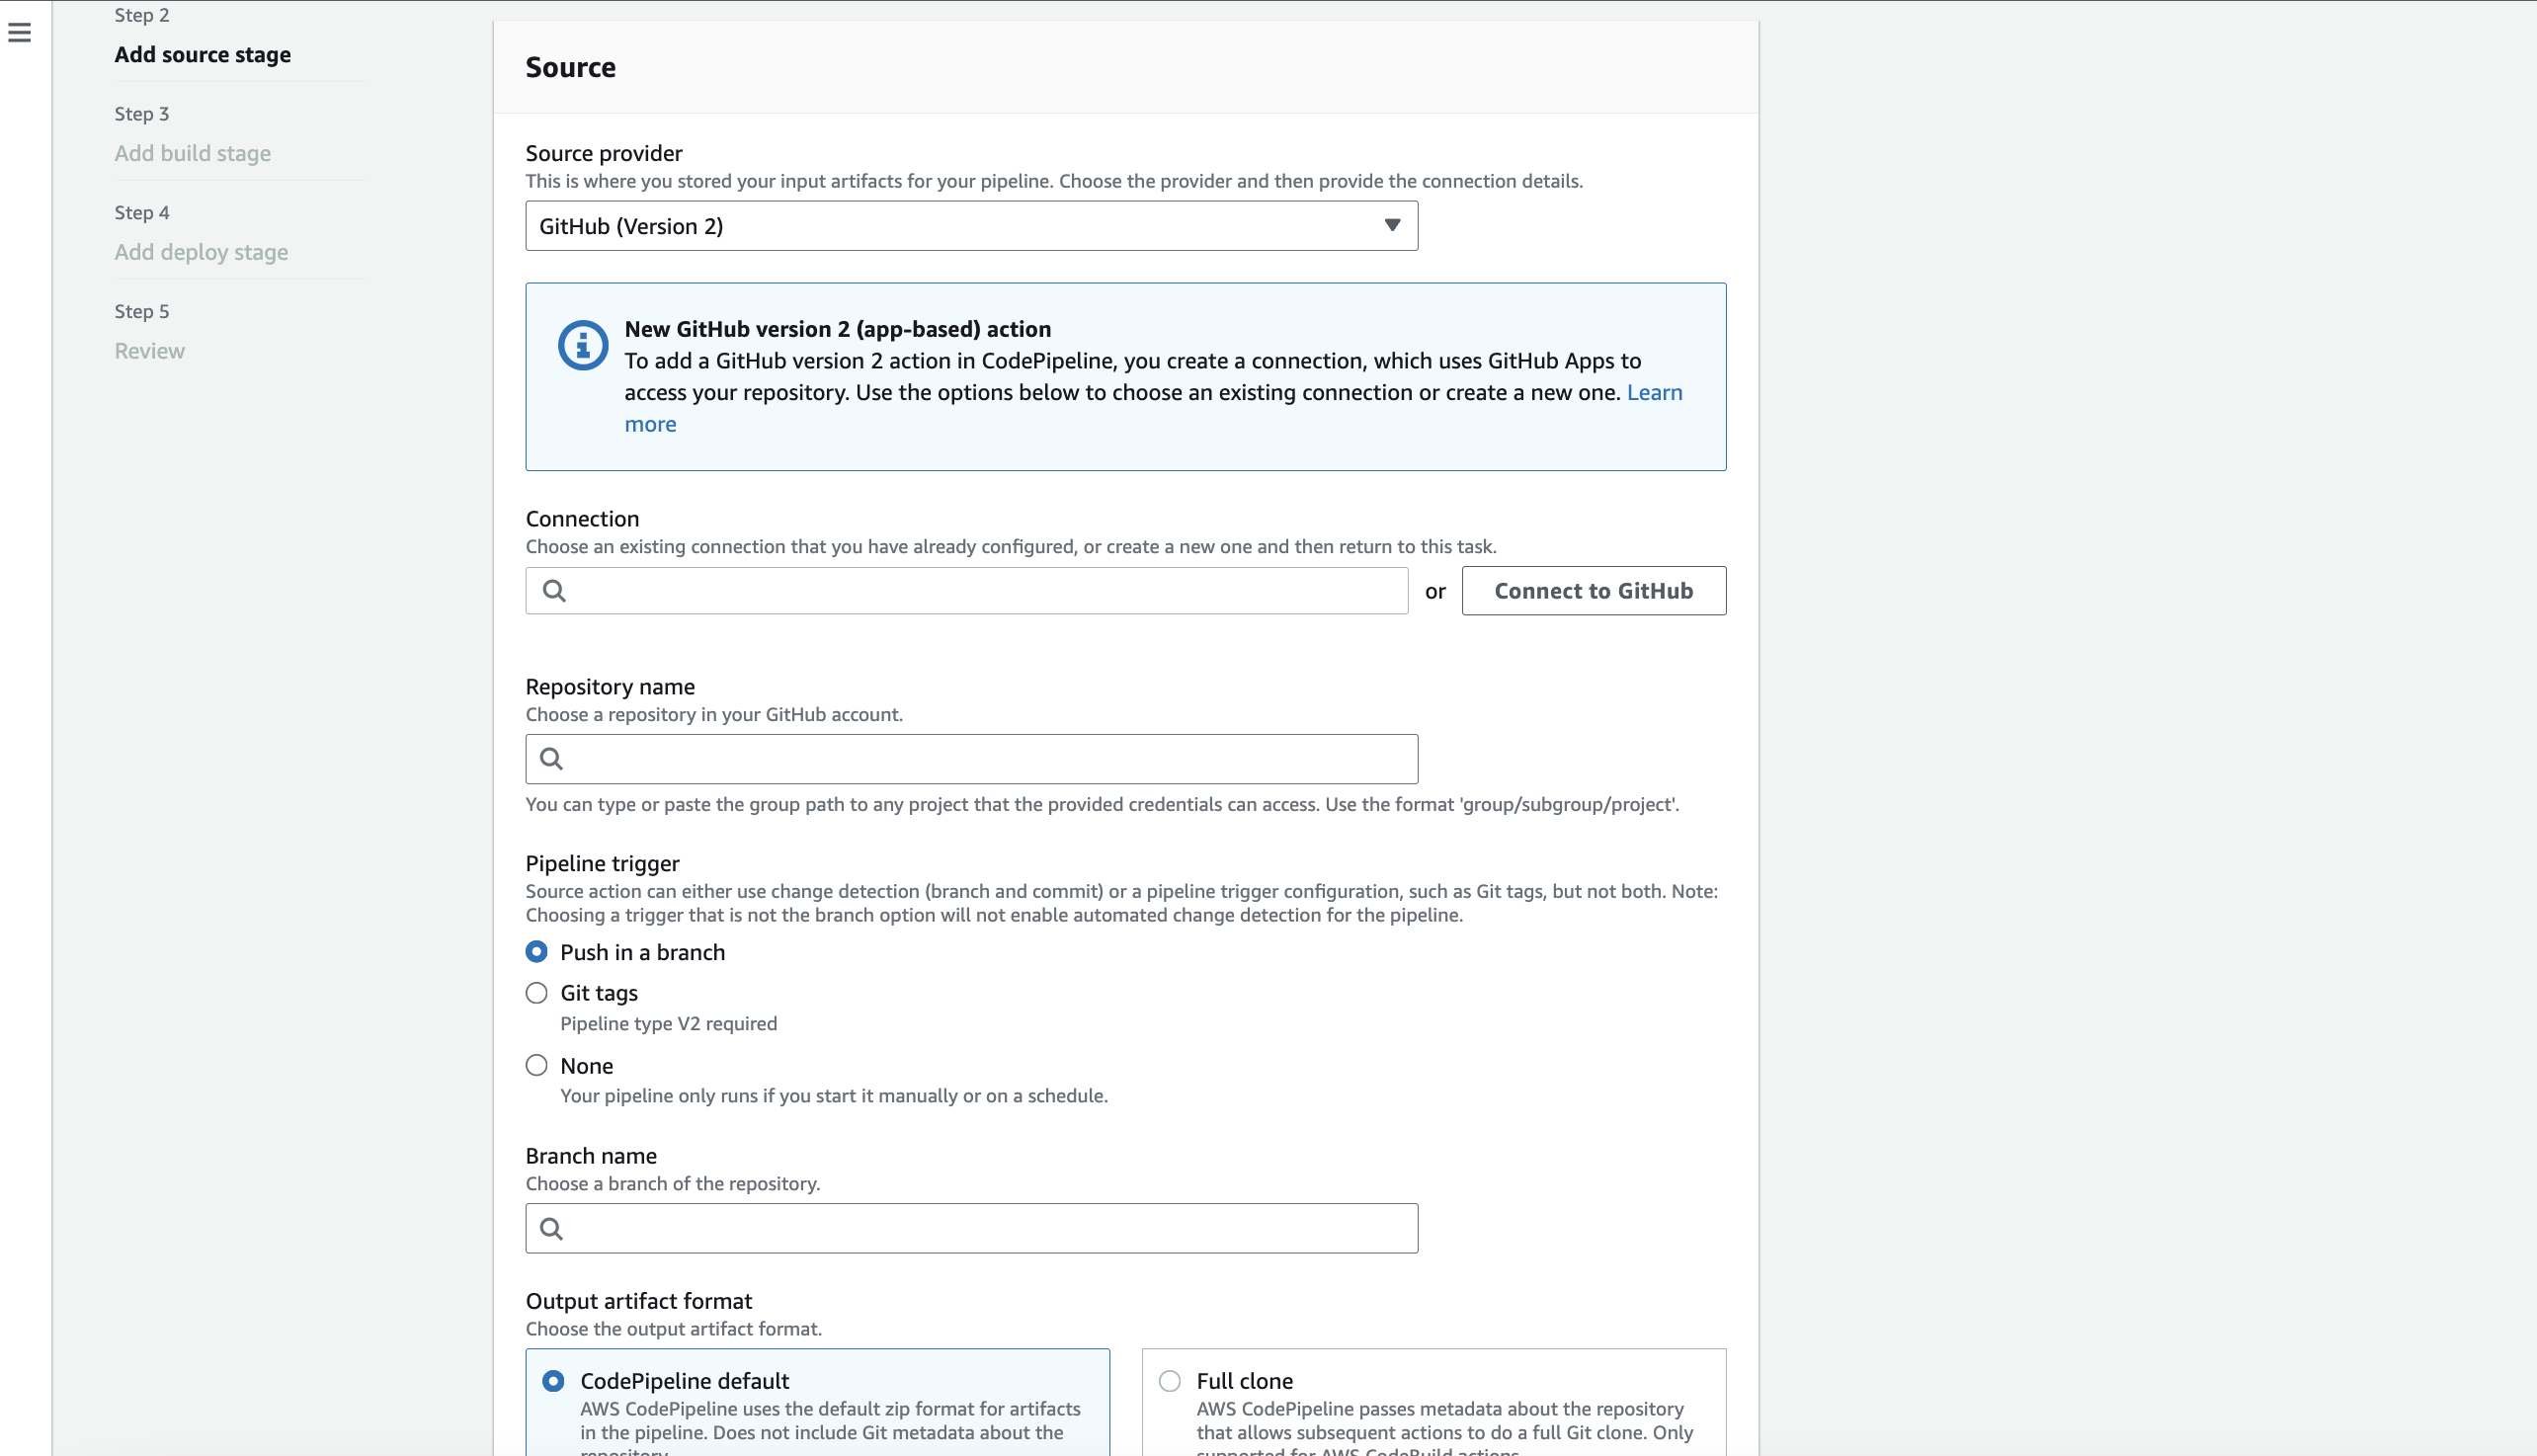
Here, we have GitHub selected to configure repository name and branch name. We can also configure the output format. But for our use case, it will be zip format which will contain the code and production dependancy.
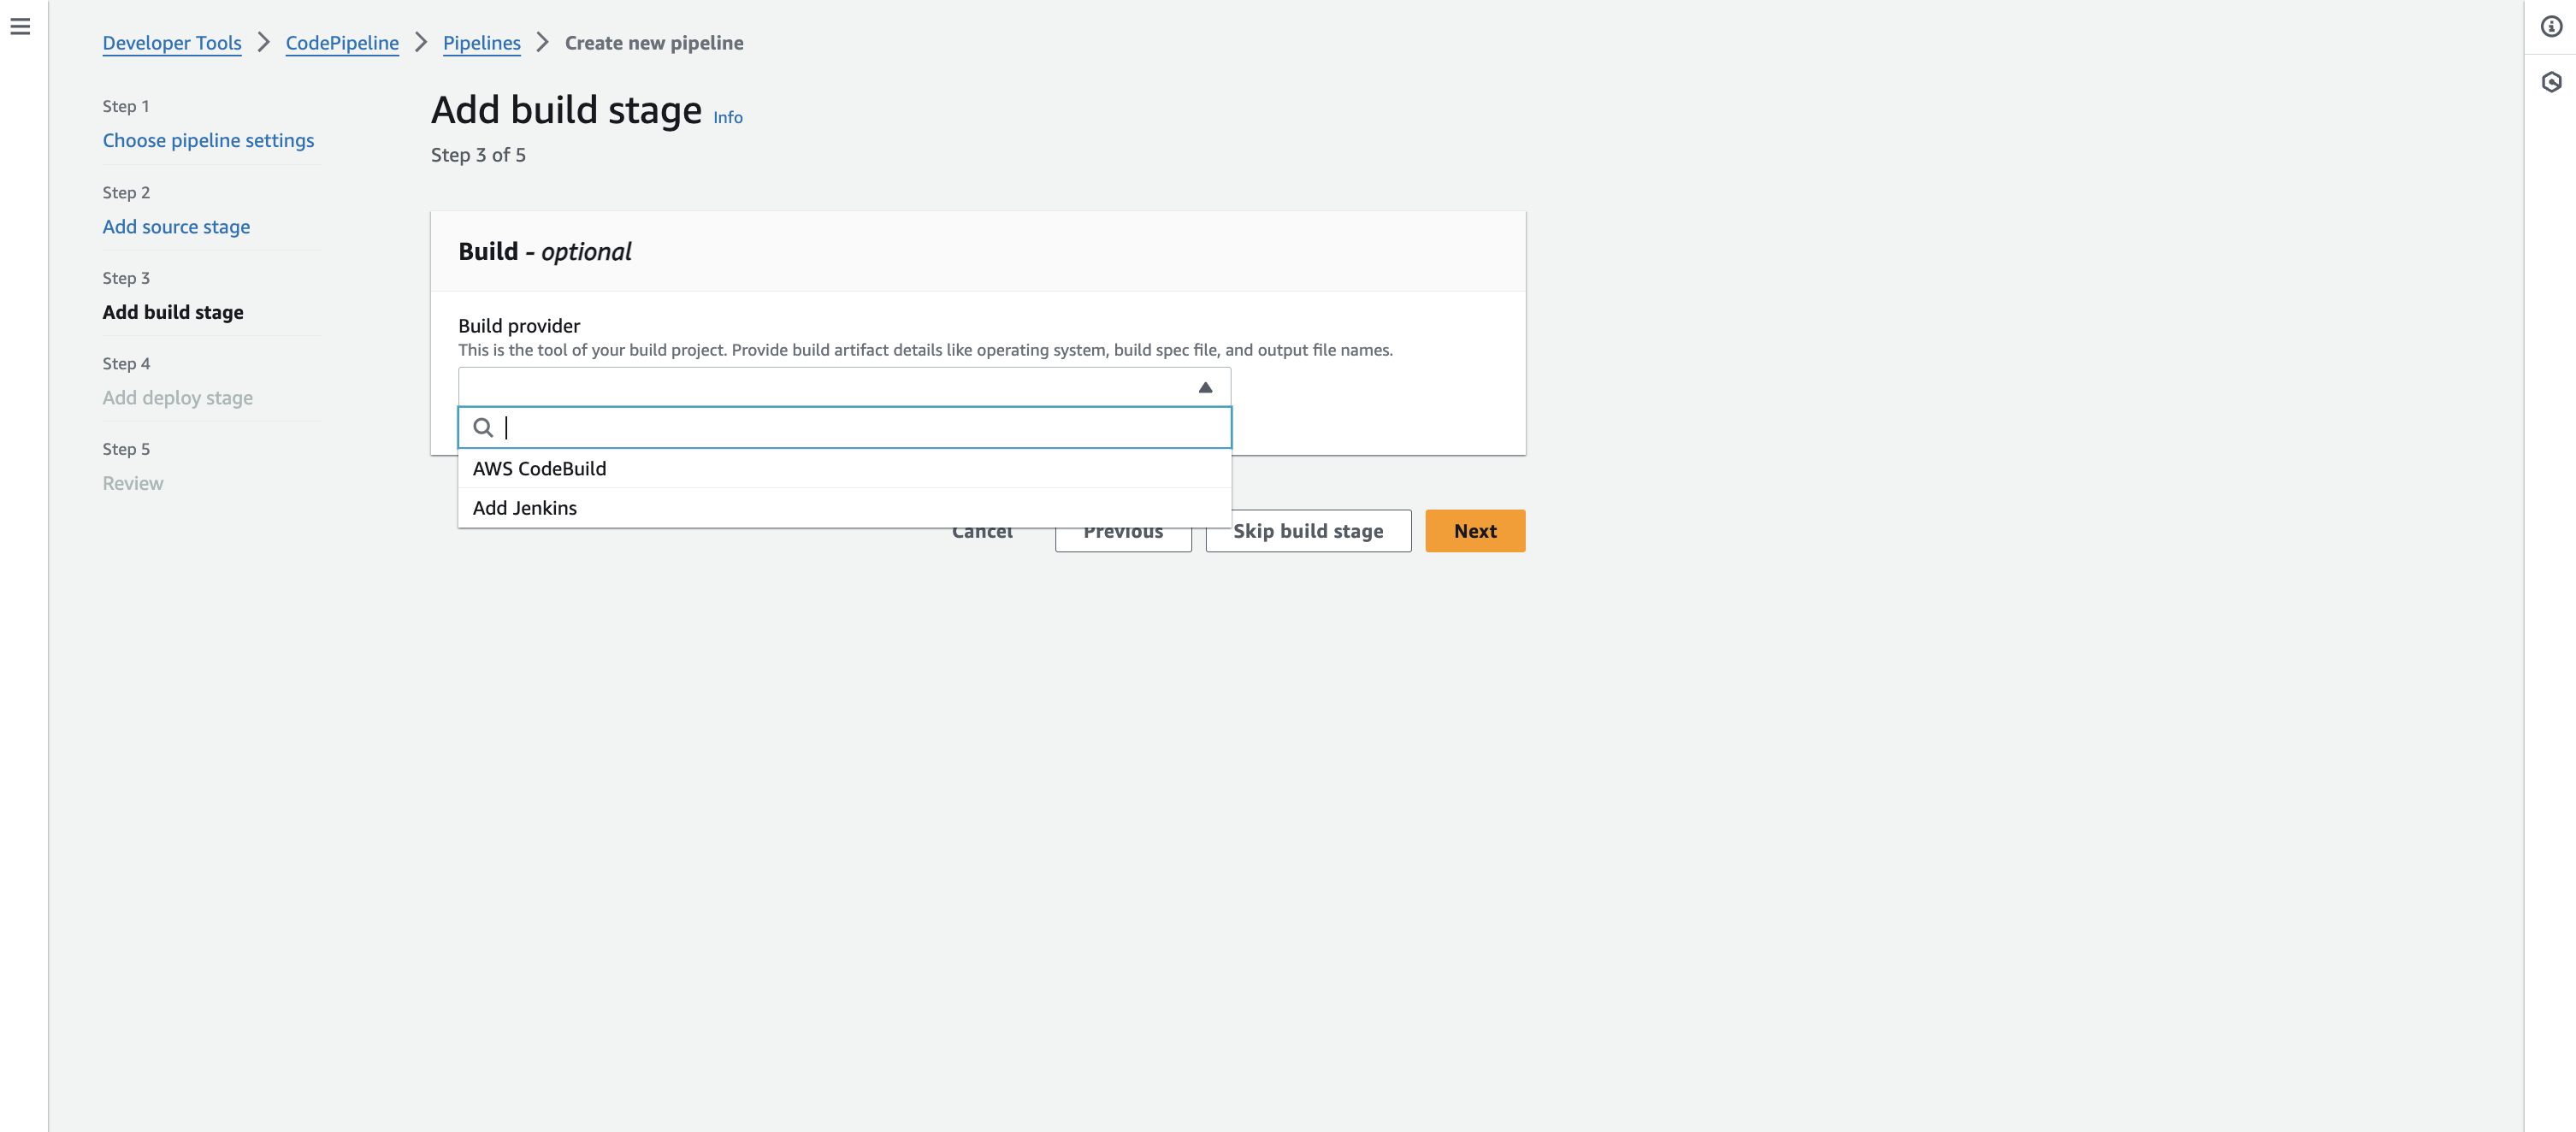
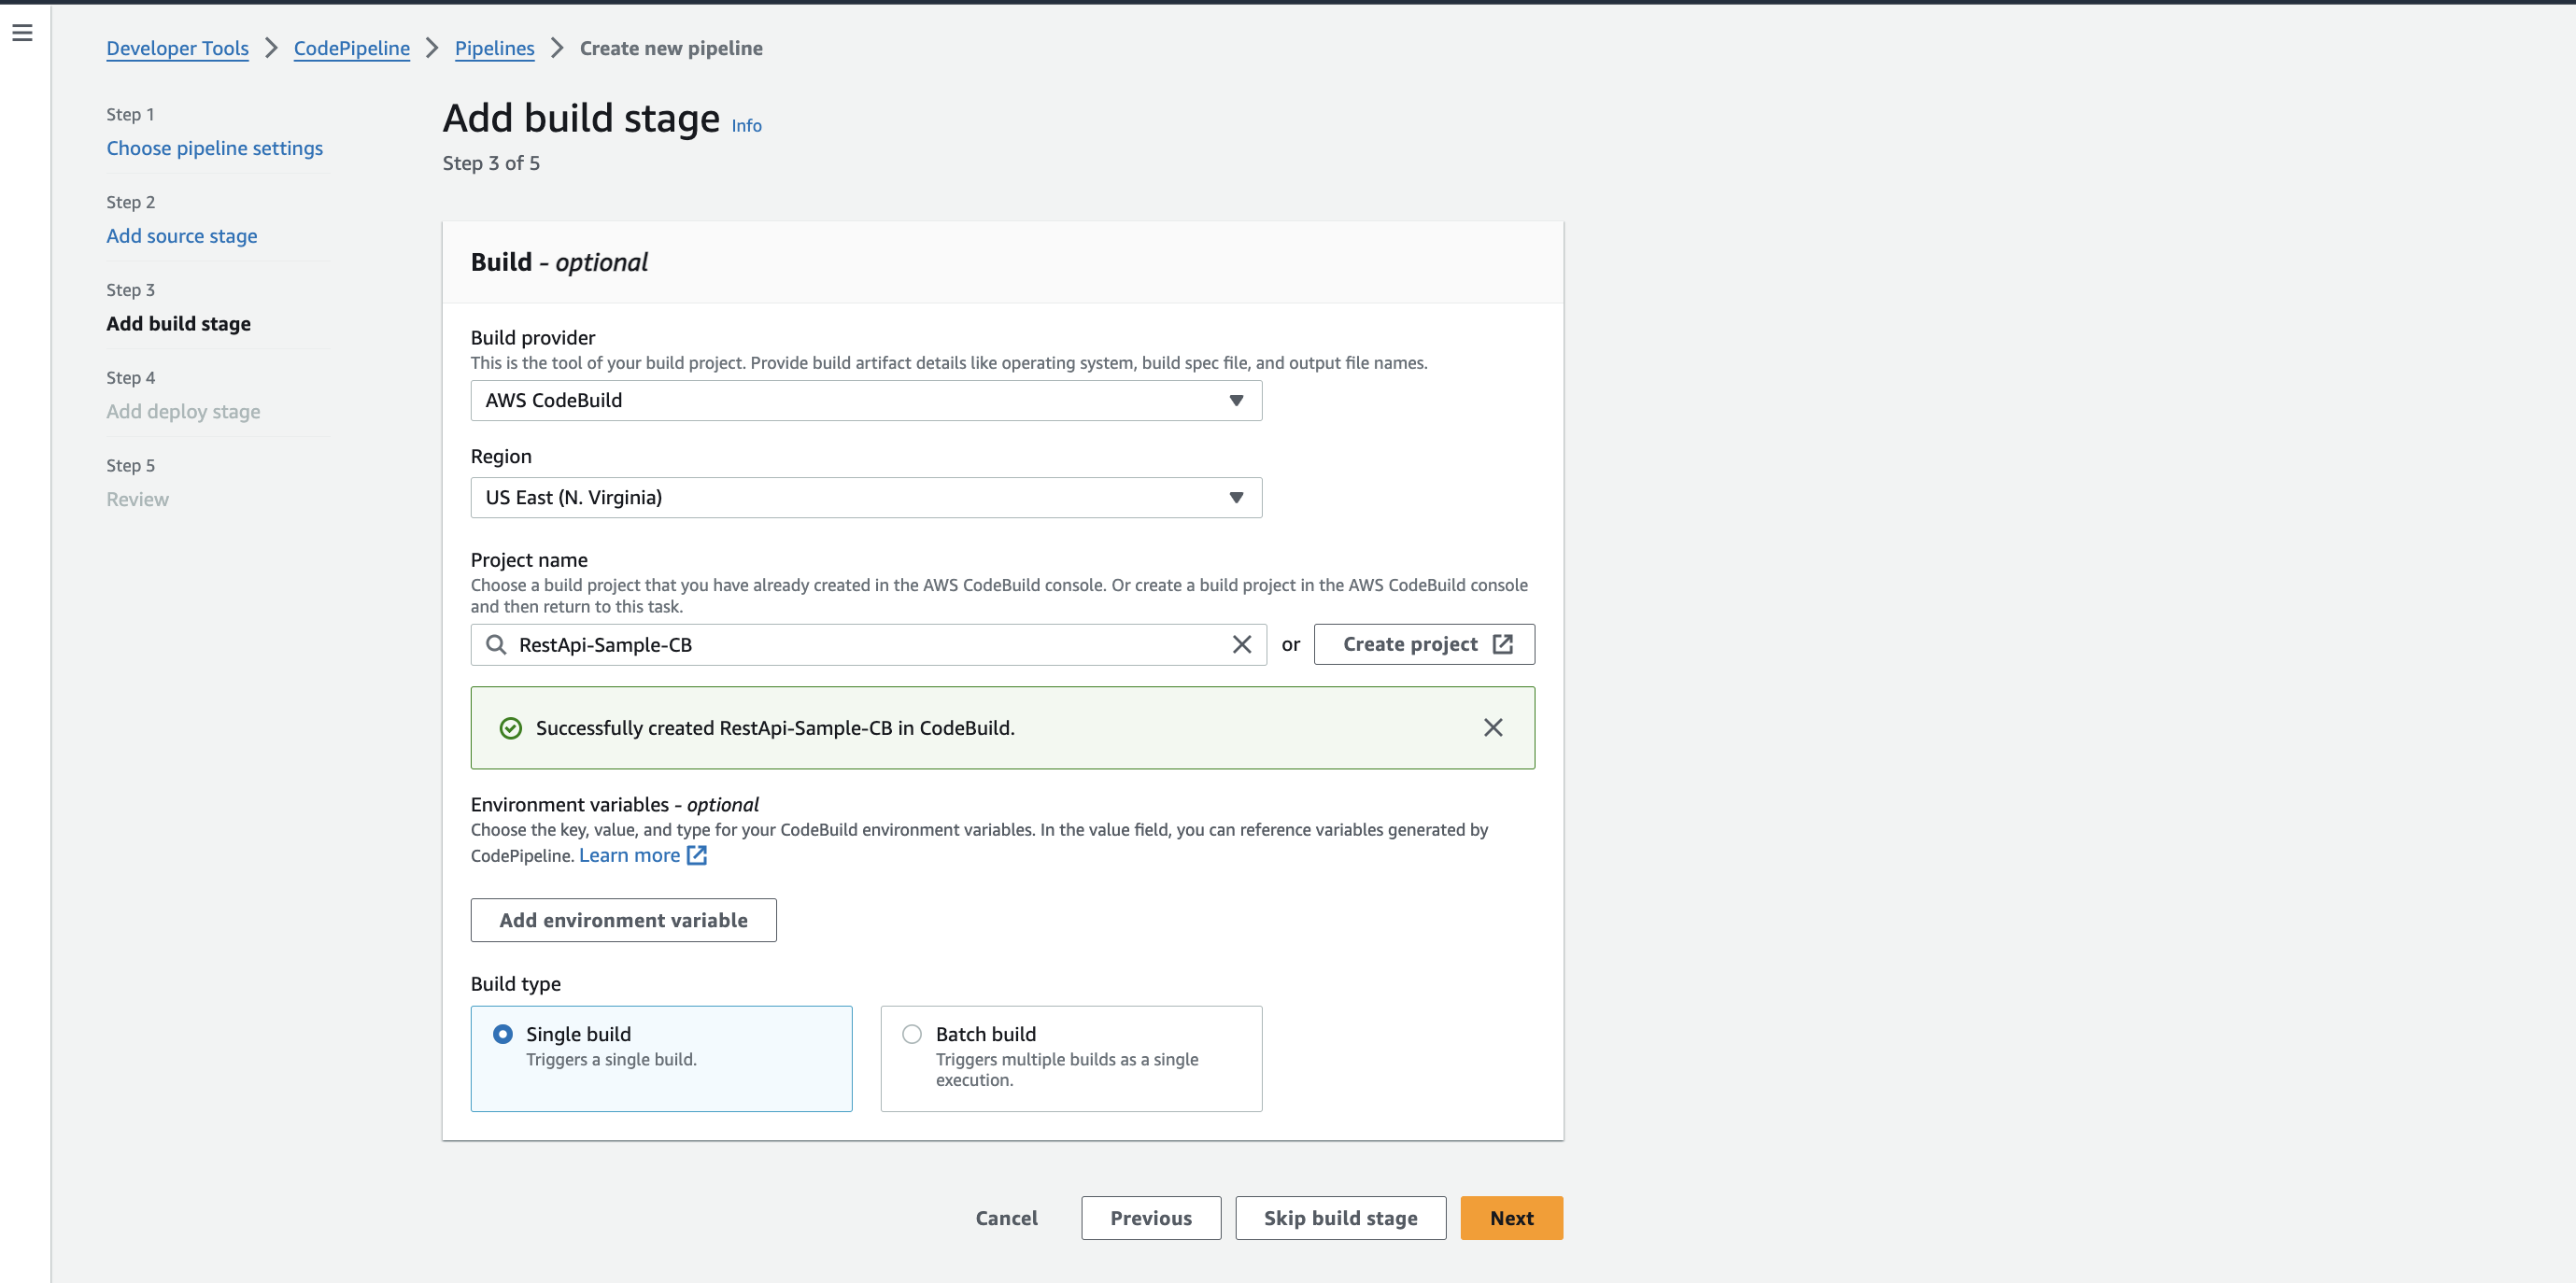
After that, you need to select the build provider. We have AWS CodeBuild and Jenkins to test and build the code here. In our case, AWS CodeBuild compiles typescript code and deploys it to AWS Elastic Beanstalk.
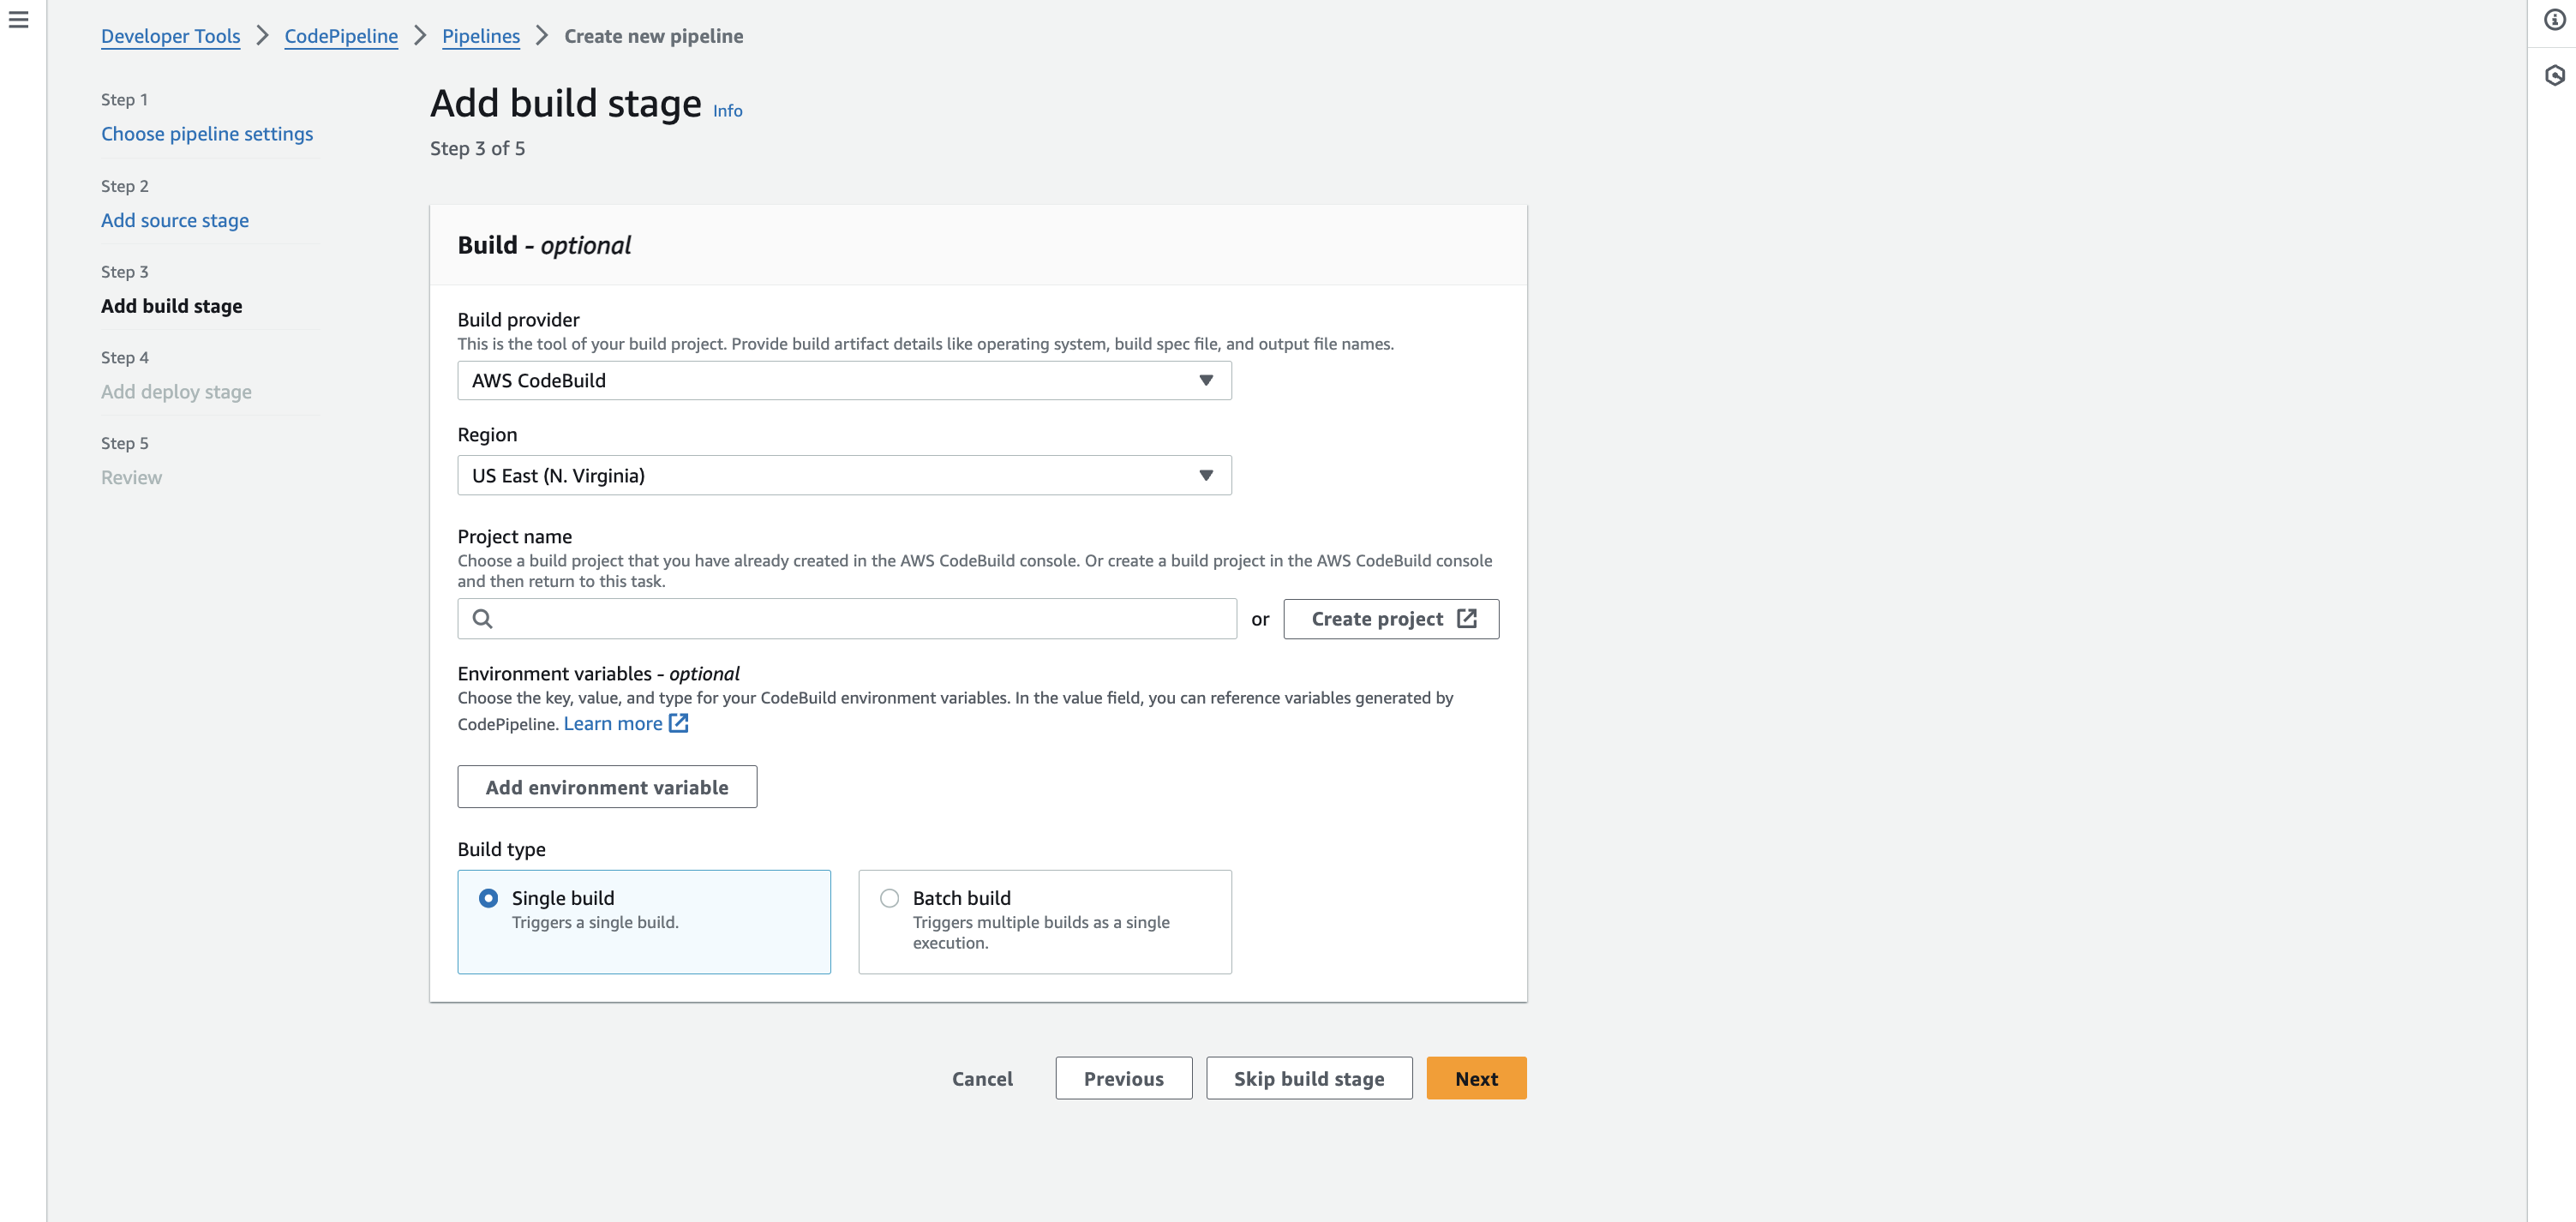
Once you select AWS CodeBuild, select Region, Project name, and Build type. Since we don’t have a CodeBuild project configured already, Let’s create one.
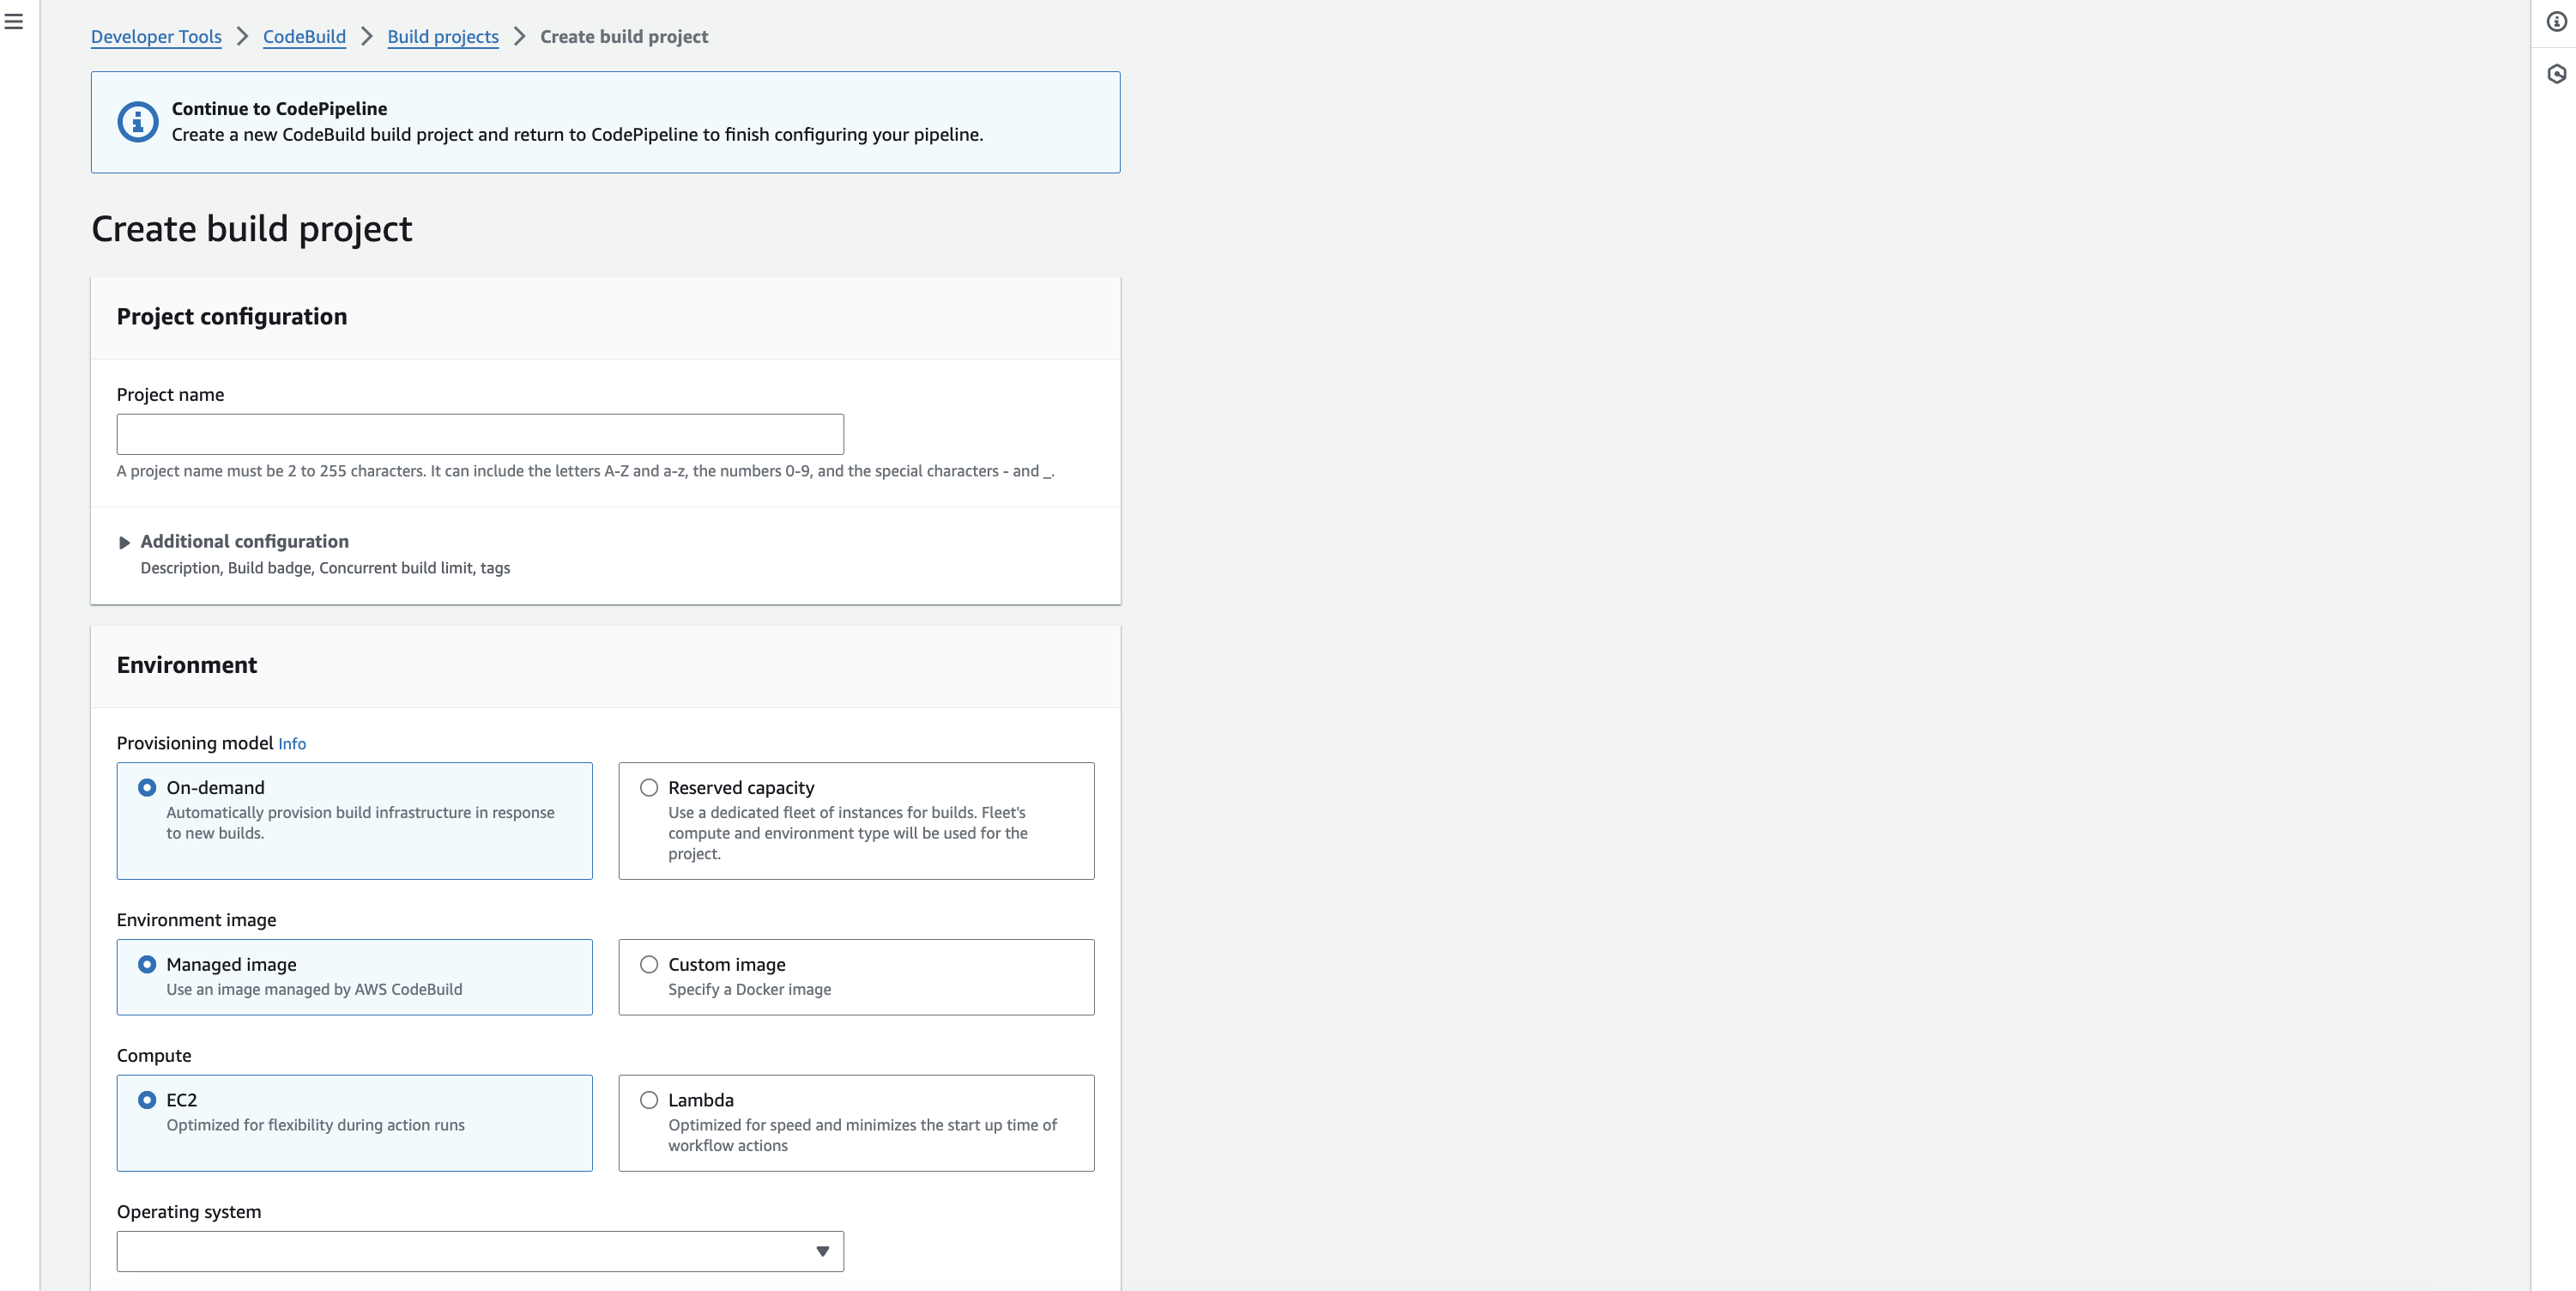

Configure the project name and create a new service role for CodeBuild. The remaining Configuration can be the default. Important configurations are,
- Provisioning model - It provides the computing power and infrastructure required to compile the code. We chose on-demand services that offer infrastructure and computation only if needed.
- Environment image - You can specify a docker image to provide the environment or a custom docker image to build the code. We will be using CodeBuild default environment image as our application is straightforward.
- Compute - You can run the CodeBuild in EC2 or lambda to test and build the code.
- Operating System - It lets us select the Operating system to run the instance and build and test code. Select
Ubuntuand the latest versions.
Buildspec
It is the important config file to run commands in the CodeBuild instance. Config that you define in buildspec file helps to install dependancy, build the project and run test command if required.
Here, we chose to Use a buildspec file, meaning we need to add that file to the application code.
Create buildspec.yml file and add the following code,
# Do not change version. This is the version of aws buildspec, not the version of your buldspec file.
version: 0.2

phases:
  install:
    runtime-versions:
      nodejs: 18
    commands:
      - npm install -g typescript
  pre_build:
    commands:
      - echo Installing source NPM dependencies...
      - npm install
  build:
    commands:
      - echo Build started on `date`
      - npm run build
      - npm prune --production
  post_build:
    commands:
      - echo Build completed on `date`
artifacts:
  files:
    - dist/**/*
    - package.json
    - package-lock.json
    - node_modules/**/*
Version and Phases:
- Version: It specifies
0.2as the version of the build specification. This line is a directive to AWS CodeBuild about which version of the build specification it should interpret. - Phases:
- Install Phase: Sets up the runtime environment. It specifies Node.js version 18 as the runtime version and installs TypeScript globally using npm (Node Package Manager).
- Pre-build Phase: Executes commands before the actual build starts. It includes installing NPM dependencies for the source code.
- Build Phase: ◦ The build phase executes some commands, including running a build script (presumably defined in
package.json) and then pruning the node modules to include only production dependencies. - Post-build Phase: ◦ After the build phase, it executes post-build commands. It typically includes cleanup or logging commands.
Artifacts:
- Once the build process completes, it stores the output as artifacts. In this case, it includes:
- The
distdirectory (It contains the application build). - The
package.jsonandpackage-lock.jsonfiles contain information about the project and its dependencies. - The
node_modulesdirectory, including all node modules necessary for the production environment (after pruning development dependencies).
- The
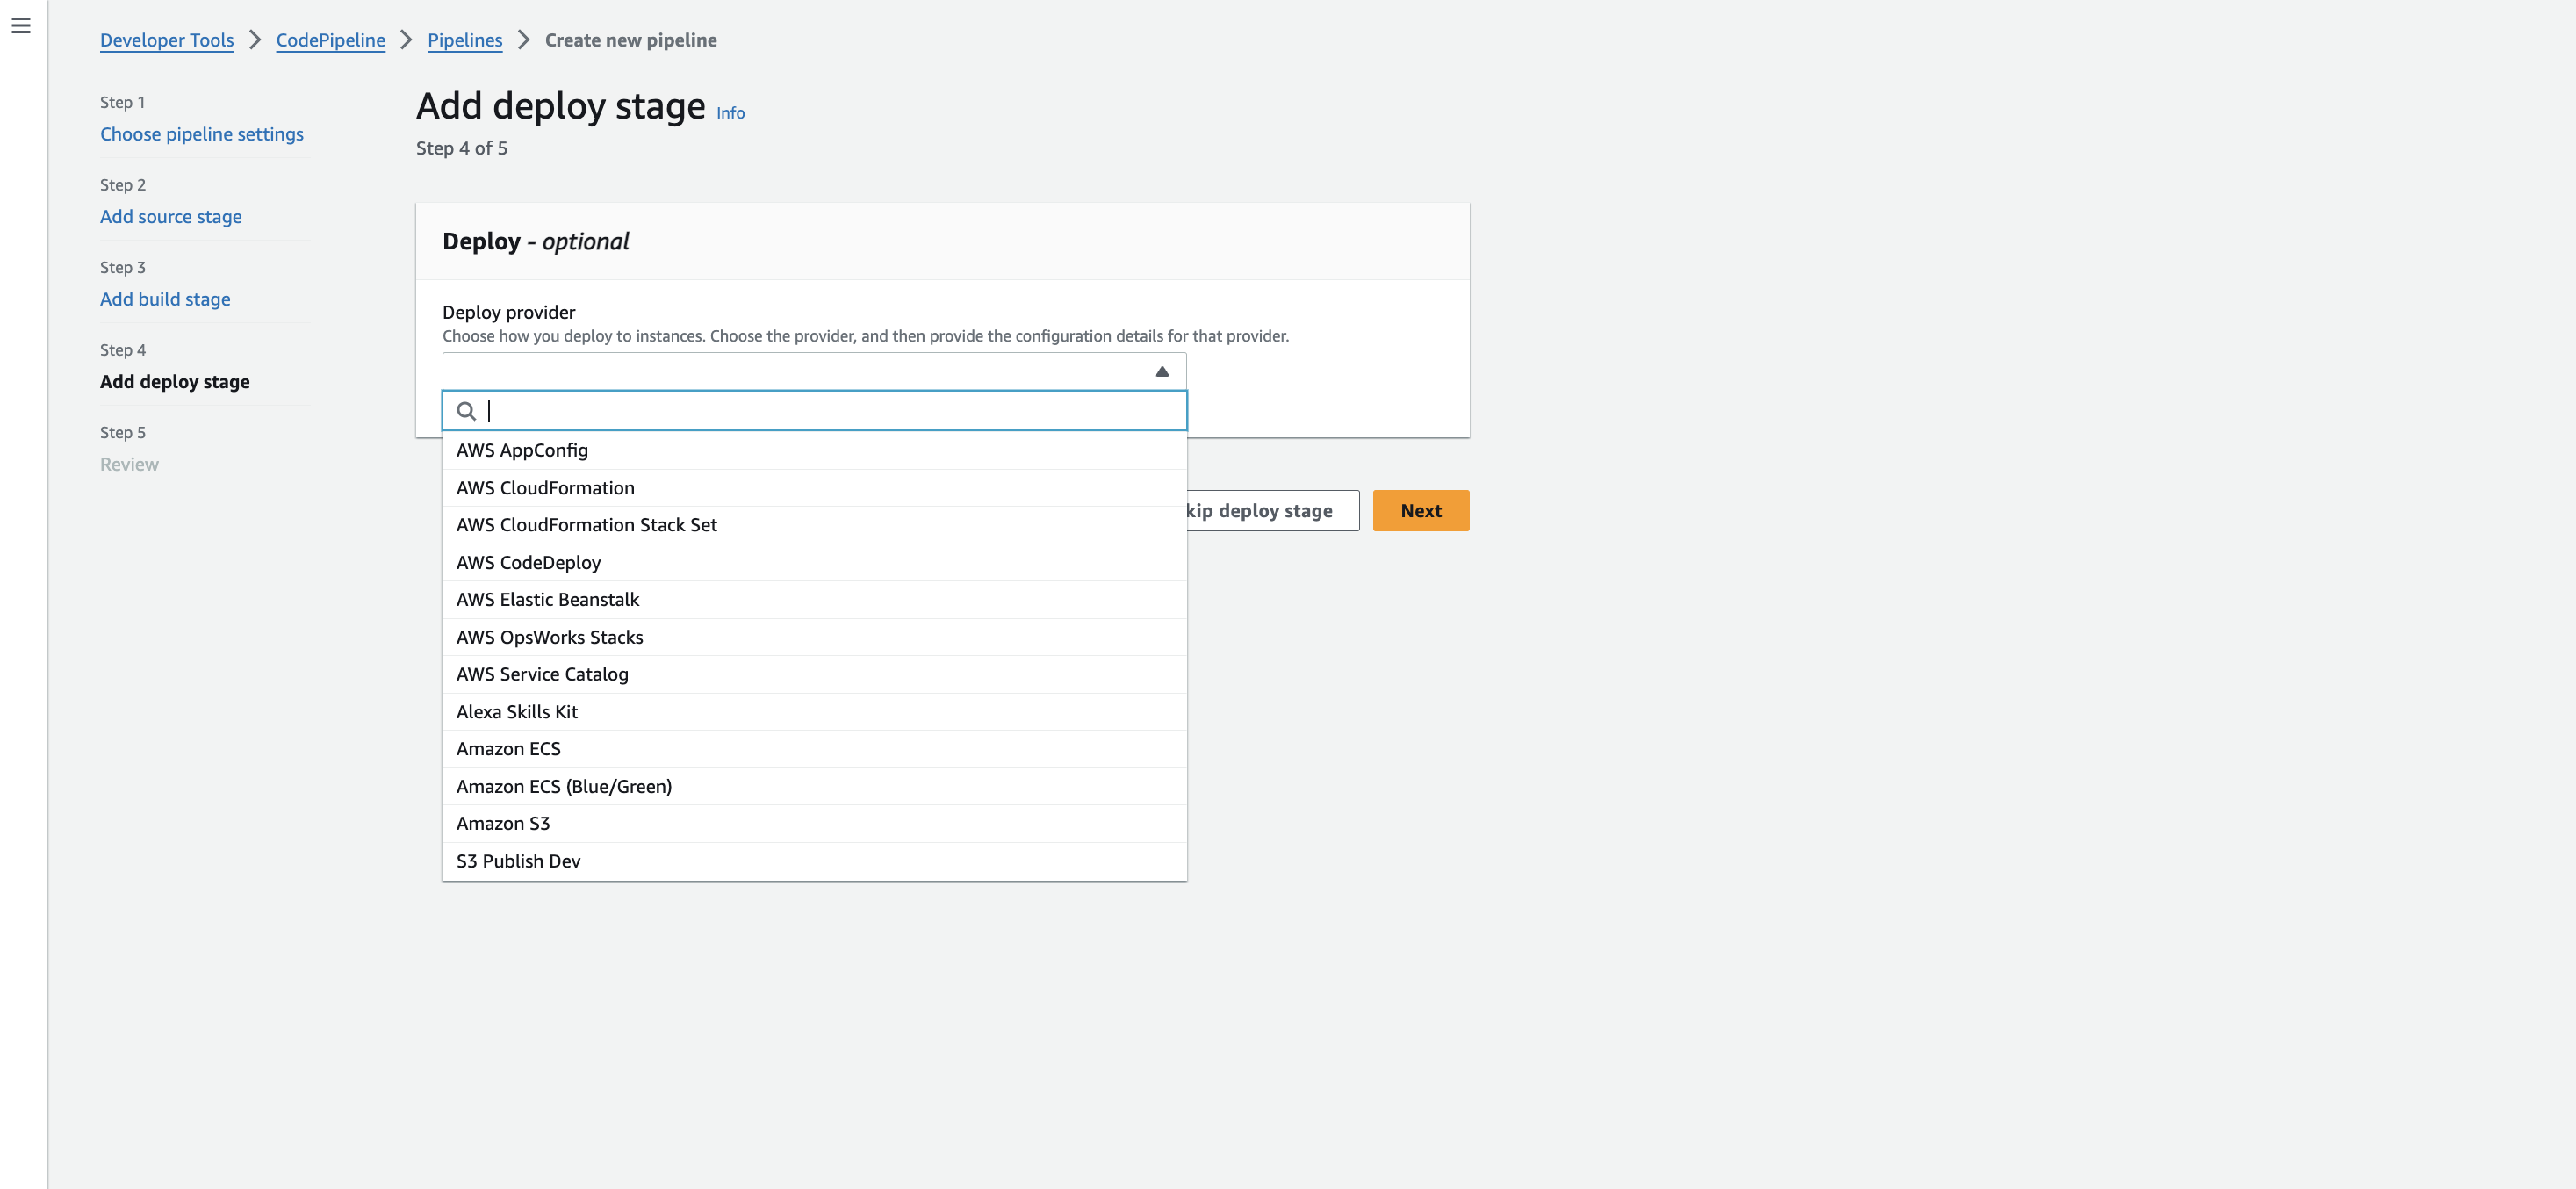
After that, click Continue with CodePipeline.
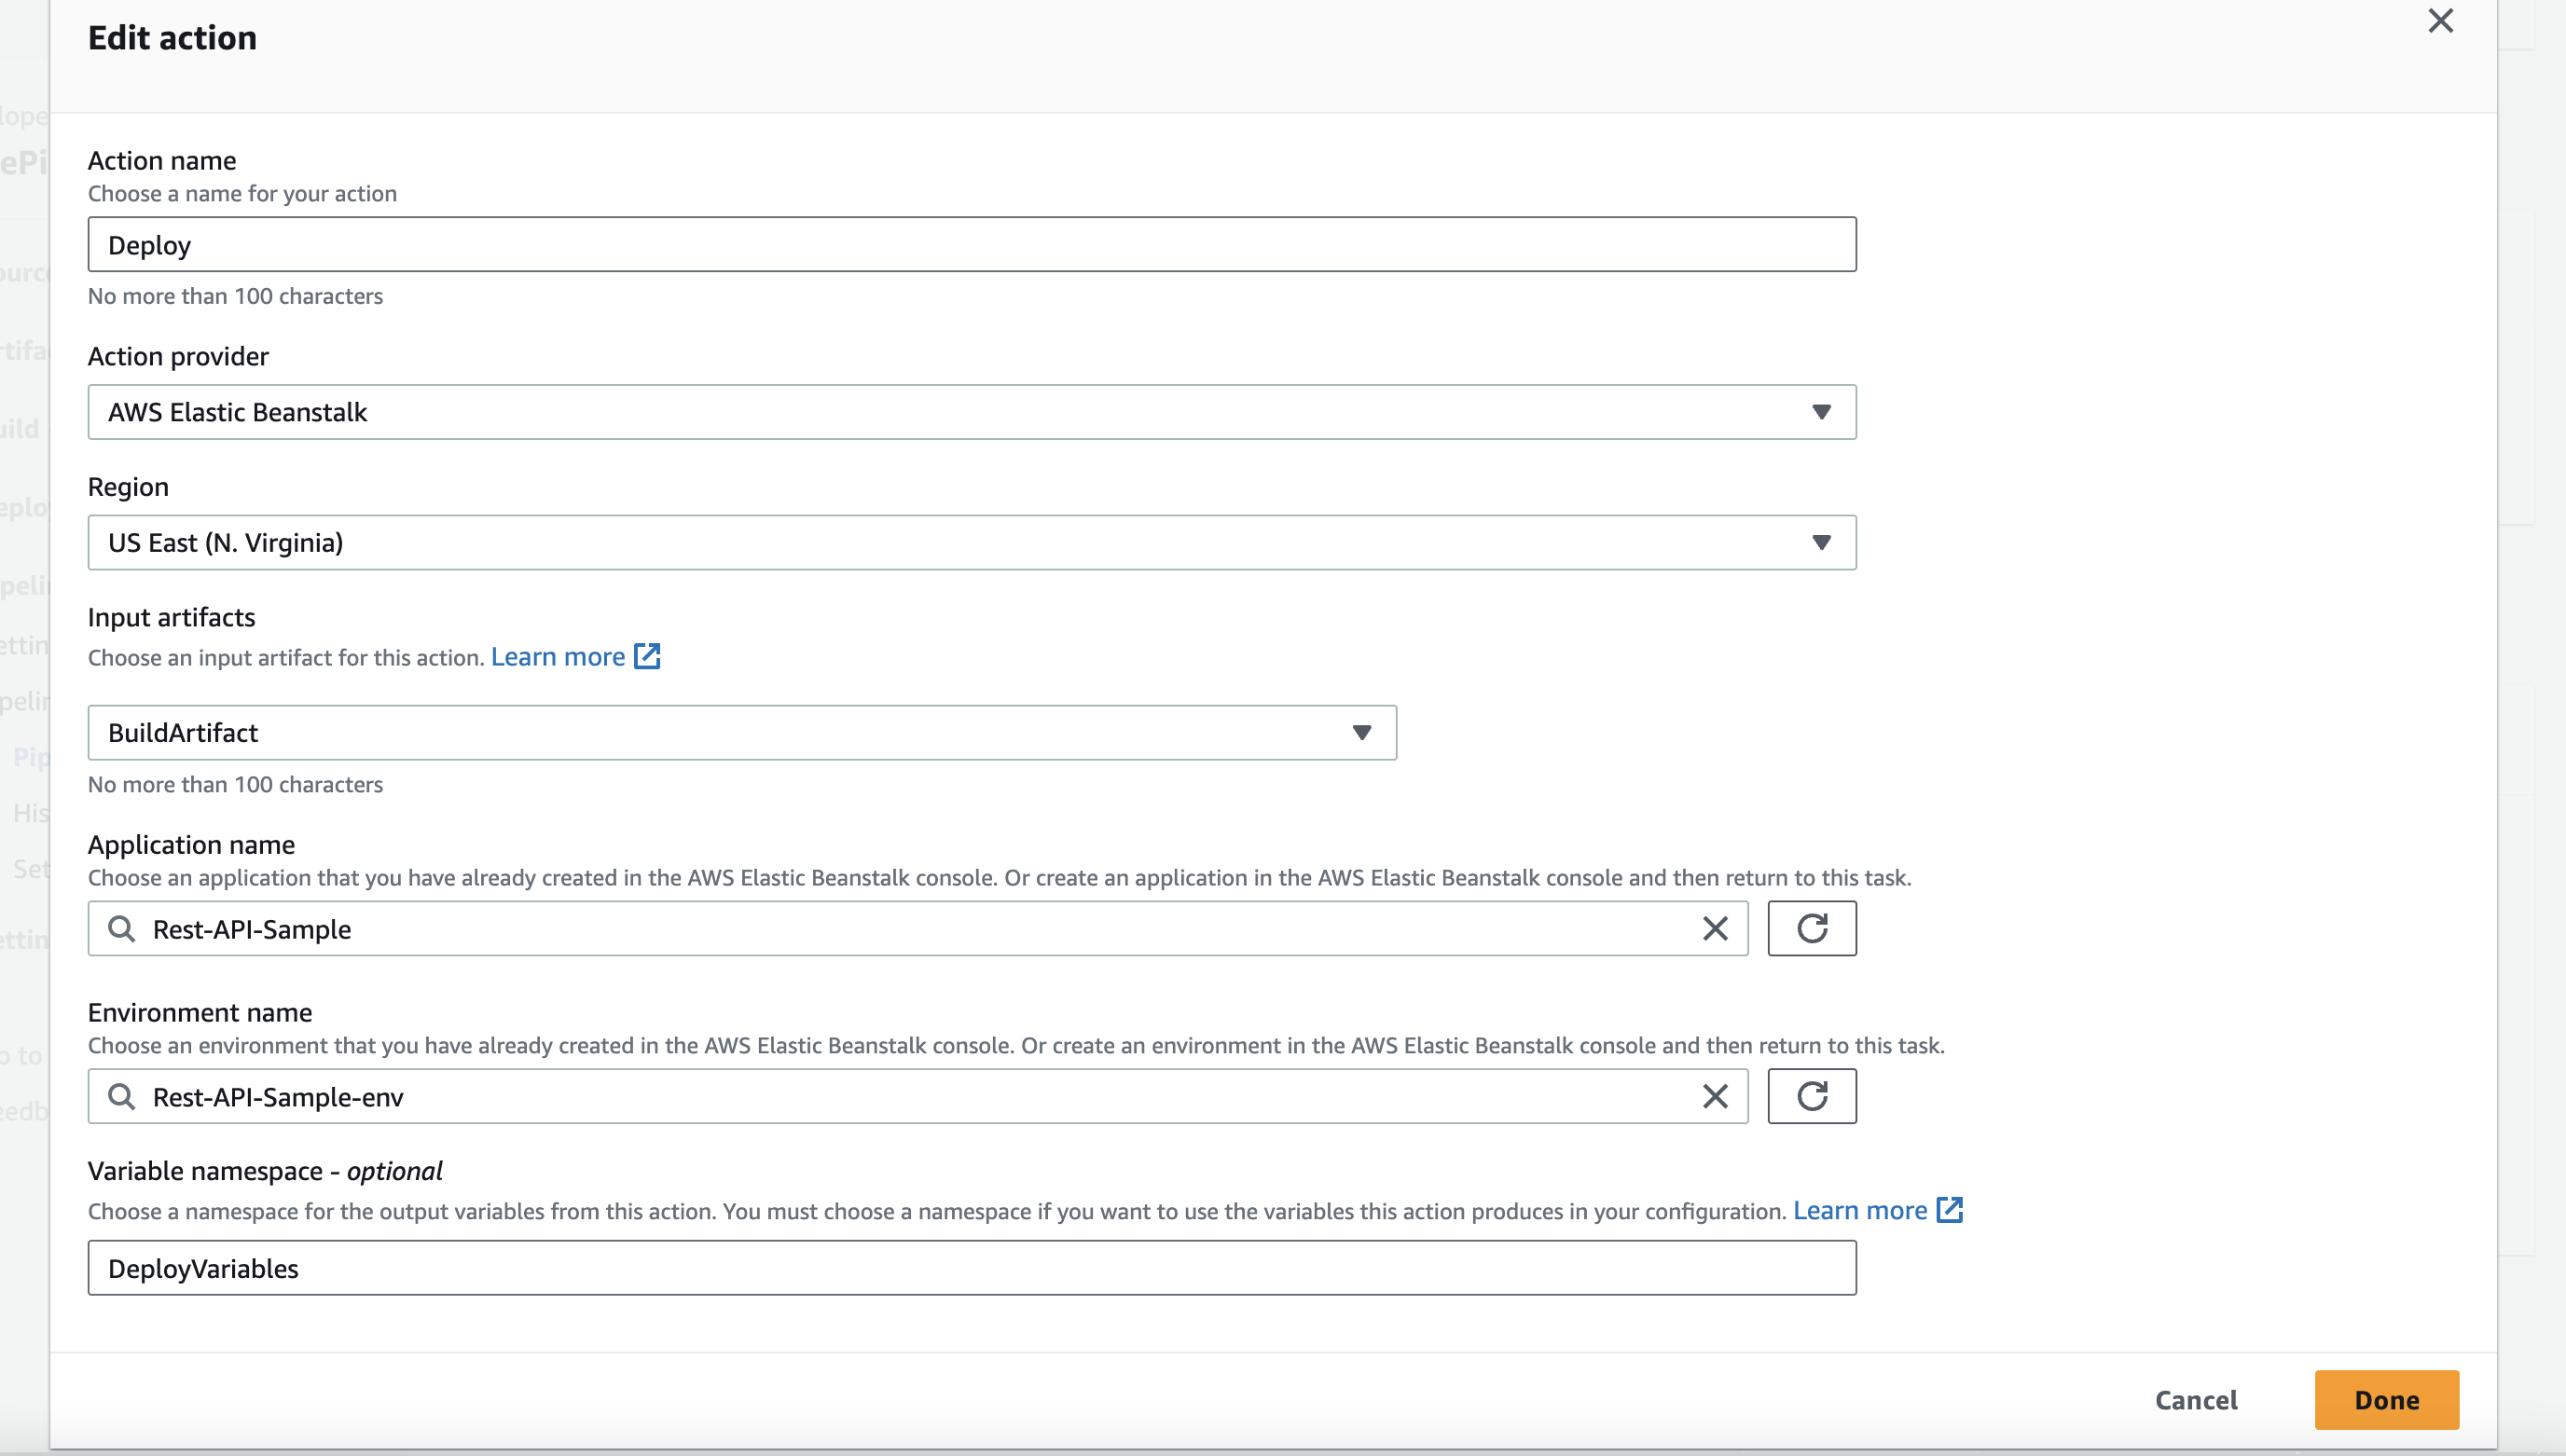
Finally, configure where to deploy the artifact. In our case, it’s AWS Elastic Beanstalk.
Finally, select the Region, Application name, and Environment name of the existing Elastic Beanstalk created in the previous application.
Once you complete the Configuration, you can see it creates CodePipeline, integrating CodeBuild and AWS Elastic Beanstalk for the deployment.
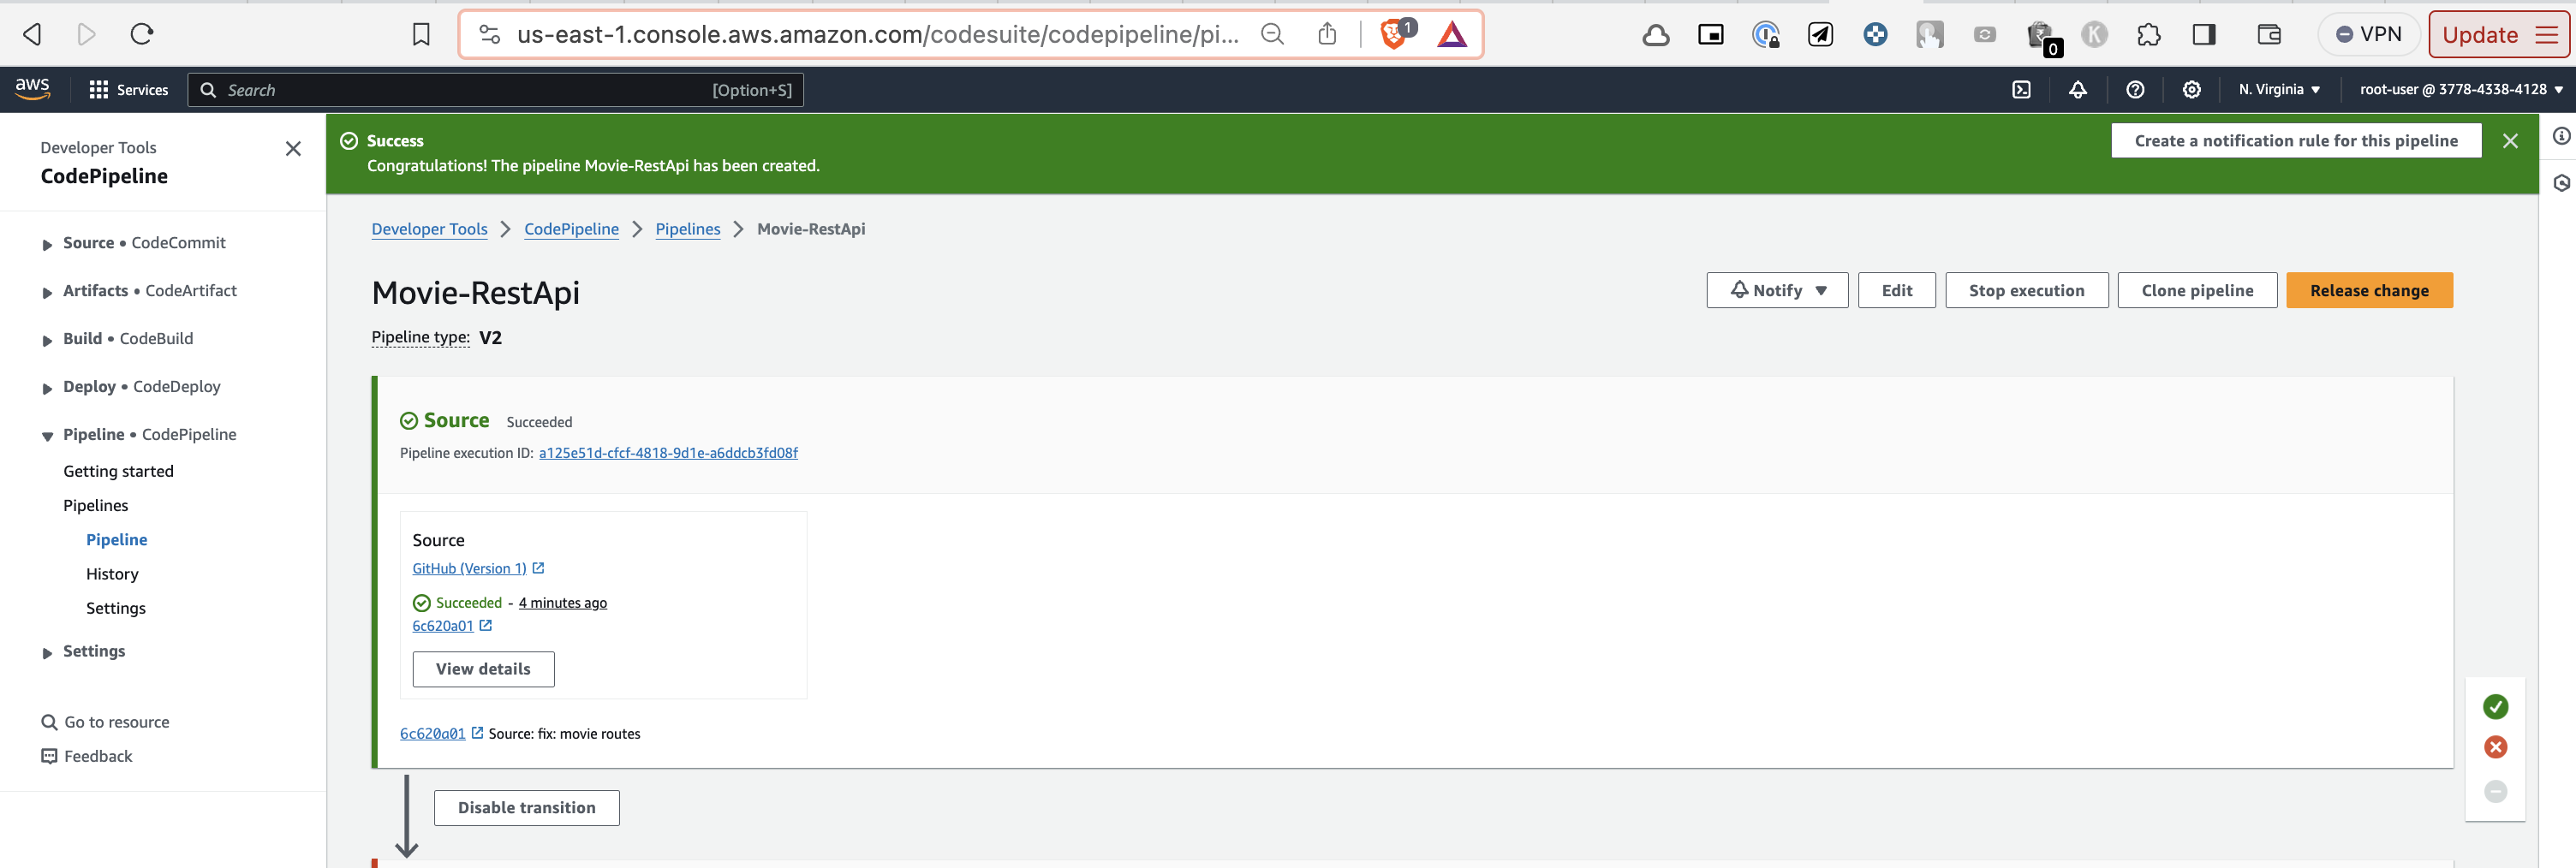
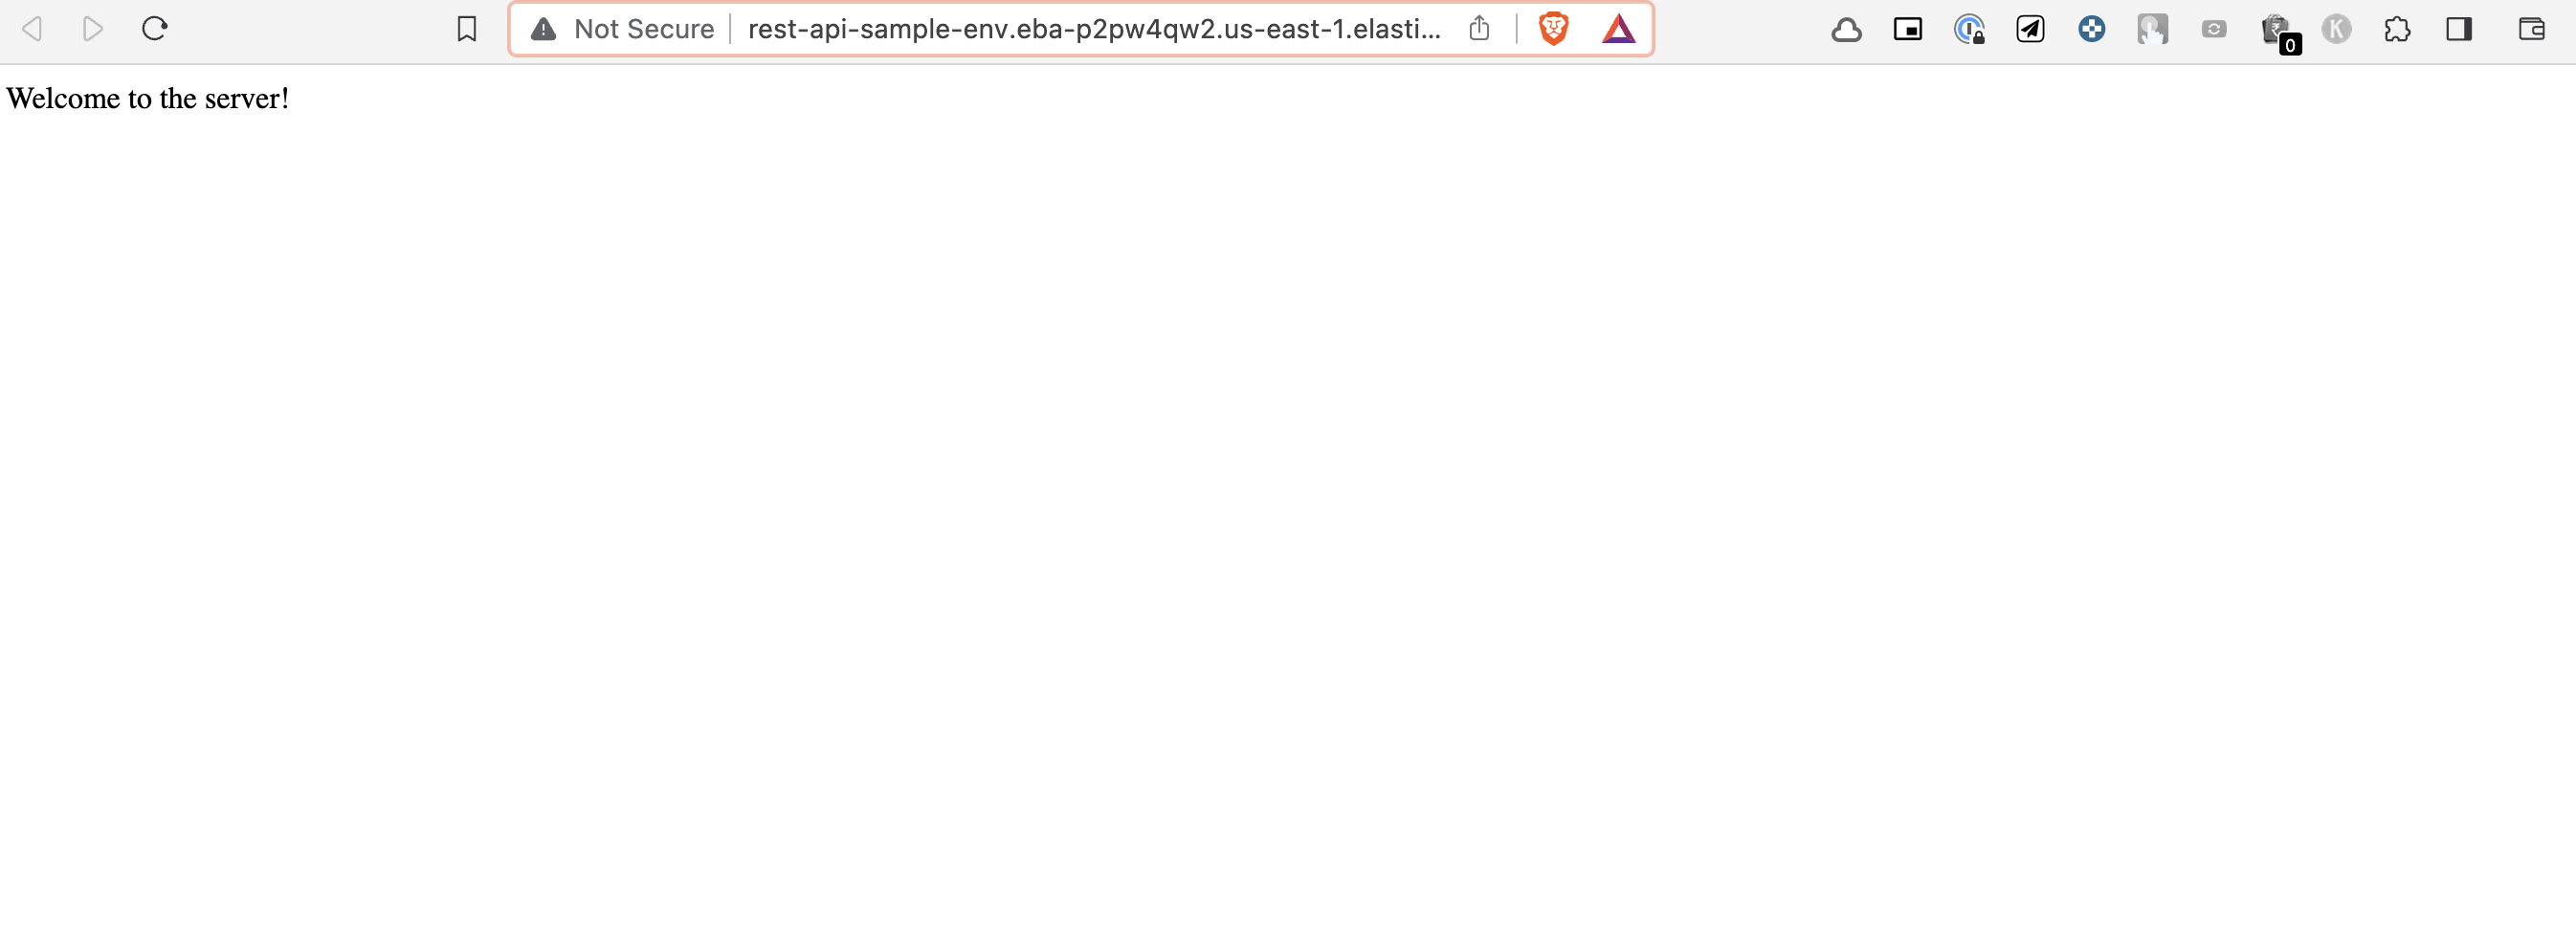
Now, you can visit the Elastic Beanstalk and click on the domain to visit the application URL.
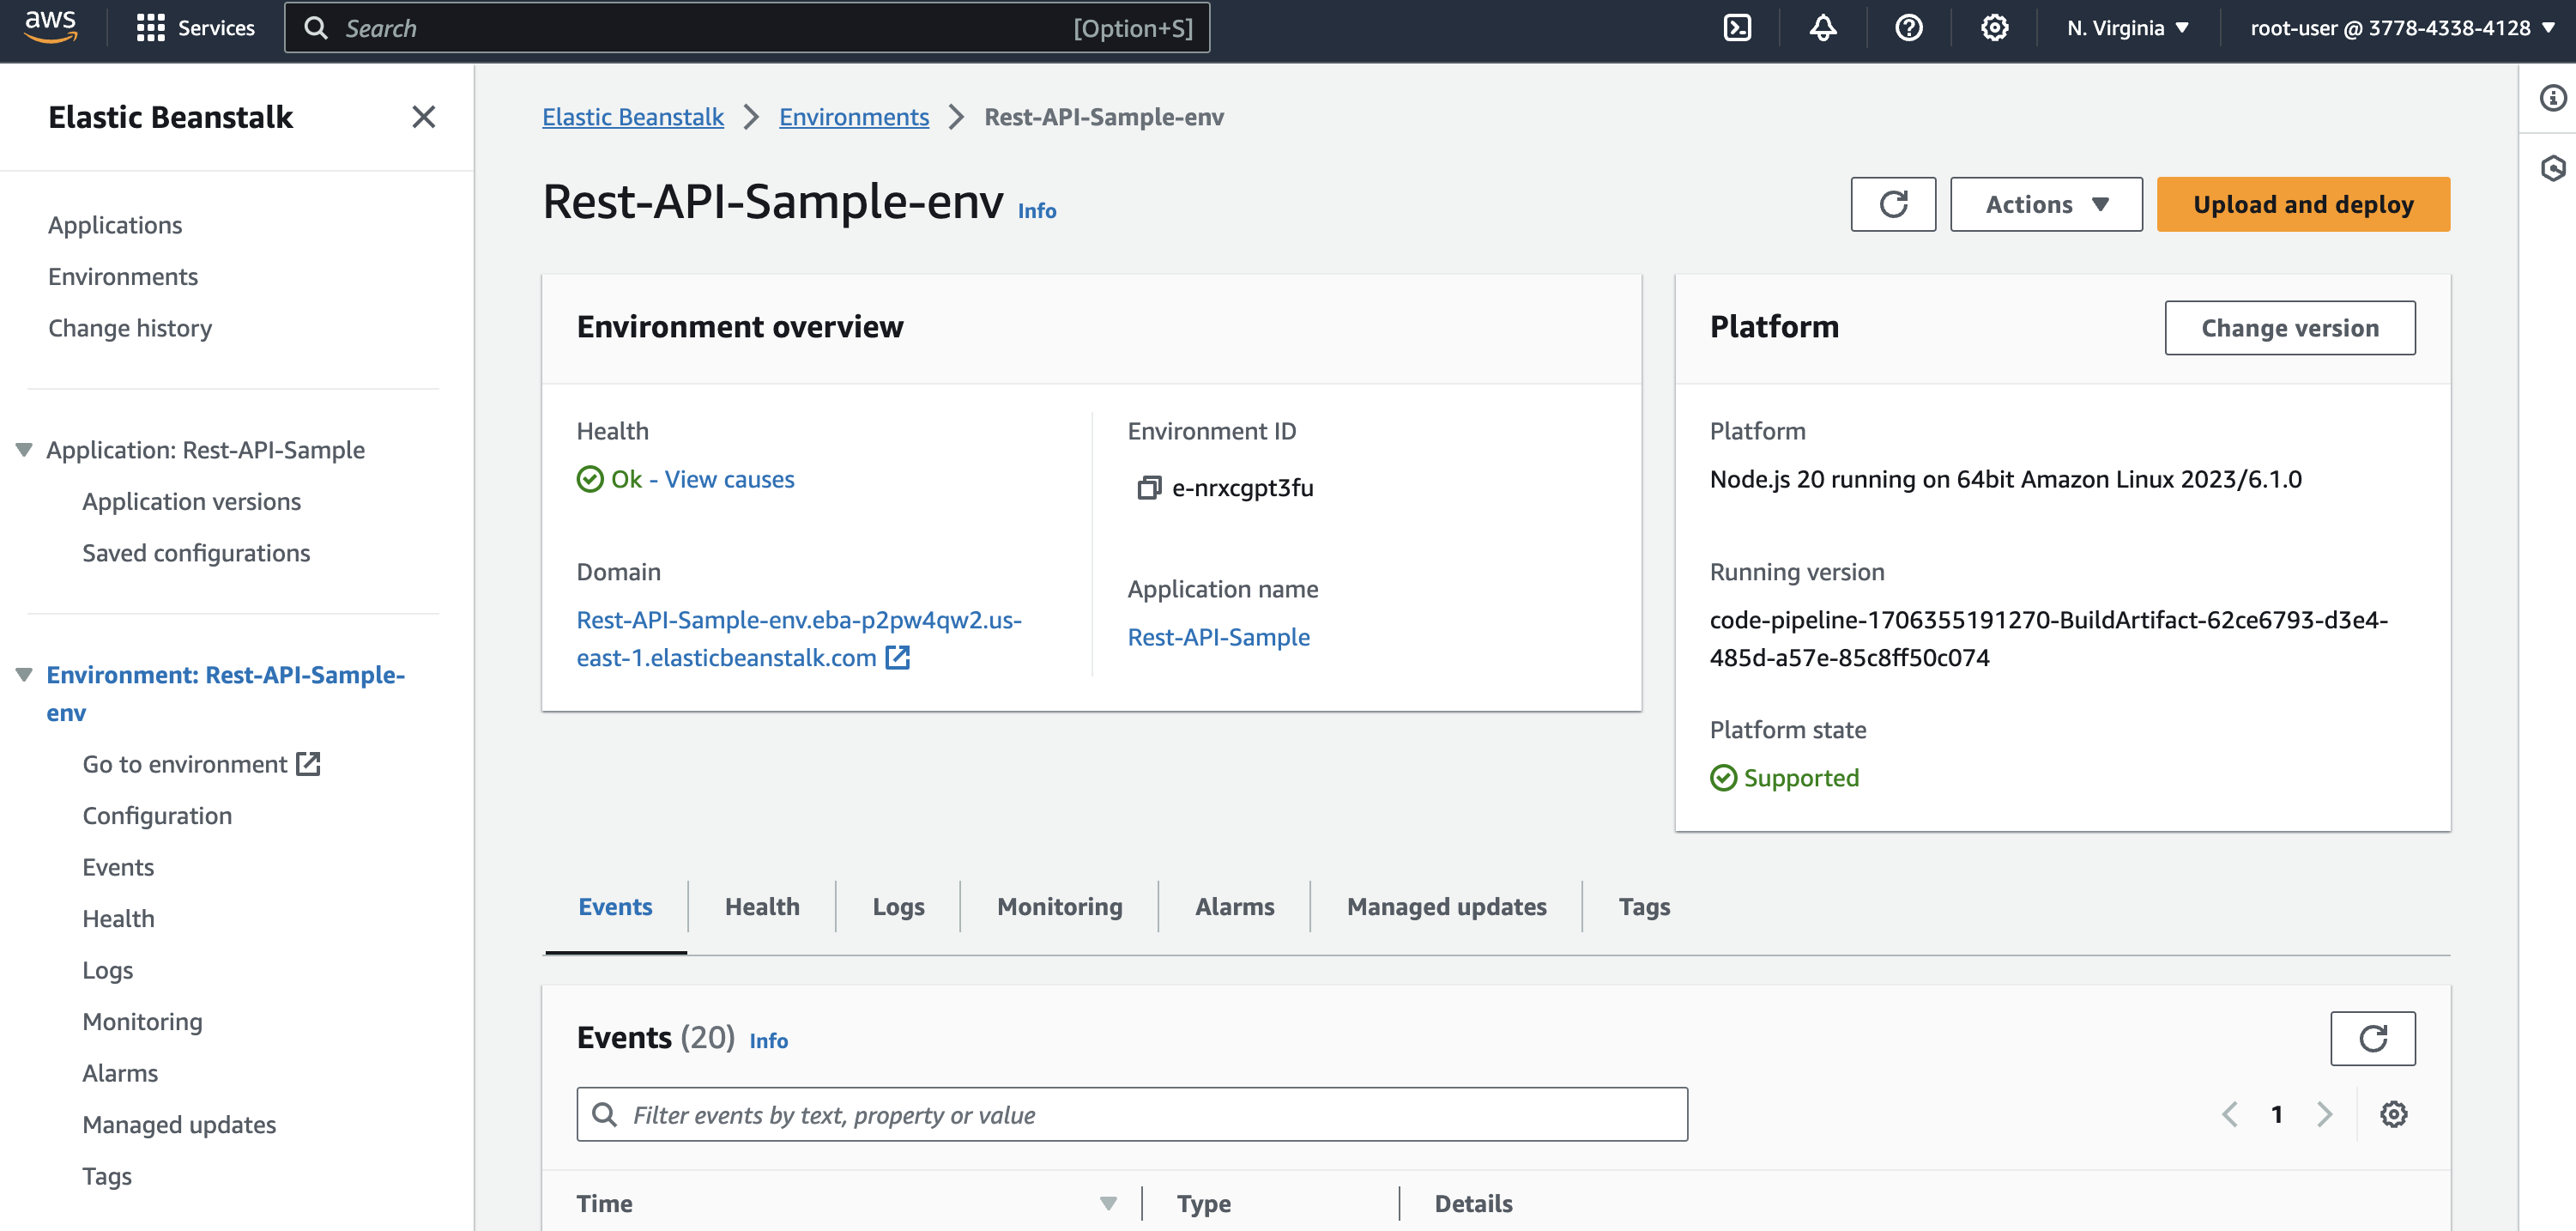
You can successfully see the application when you visit the URL.