Different ways & strategies to build and deploy Node.js for Production
Different ways & strategies to build and deploy Node.js for Production
Ever wondered what are all the different ways to build and deploy your Node.js application for production?. If you’re a backend developer or Node.js developer, Knowing how to build and deploy your Node.js application in production helps you in many ways. For example, it can improve your profile value or give you a different perspective on building applications or even your product.
Let me ask you something. How do you usually build and deploy your application?
If your answer is ‘PM2’. I recommend you to read this article till the end. I was in the same stage where I thought PM2 was the only way to deploy Node.js applications. But, then I realized there are several advanced ways to deploy the Node.js application. We will cover a few of them in this article. Let’s start with different ways to build and deploy Nodejs in production.
PM2 Deployment
Before we start with more advanced deployment strategies, we will see the Pm2 deployment along with test coverages. In that way, it helps you to understand the entire flow of the strategy.
Here’s a source code for the Node.js application: Nodejs API. You can follow up along with the tutorial.
To create the configuration for Pm2, run the init command,
pm2 initIt creates a configuration ecosystem.config.js for pm2 deployment. Change it to the following config,
module.exports = {
  apps: [
    {
      name: "app",
      script: "./server.js",
      instances: "max",
      env: {
        NODE_ENV: "development",
      },
      env_production: {
        NODE_ENV: "production",
      },
    },
  ],
};
After that, you need to change the script in package.json to run the application via pm2.
"start": "pm2-runtime start ecosystem.config.js --env production",Since we are using Heroku, Create a new app either via Heroku CLI or dashboard.

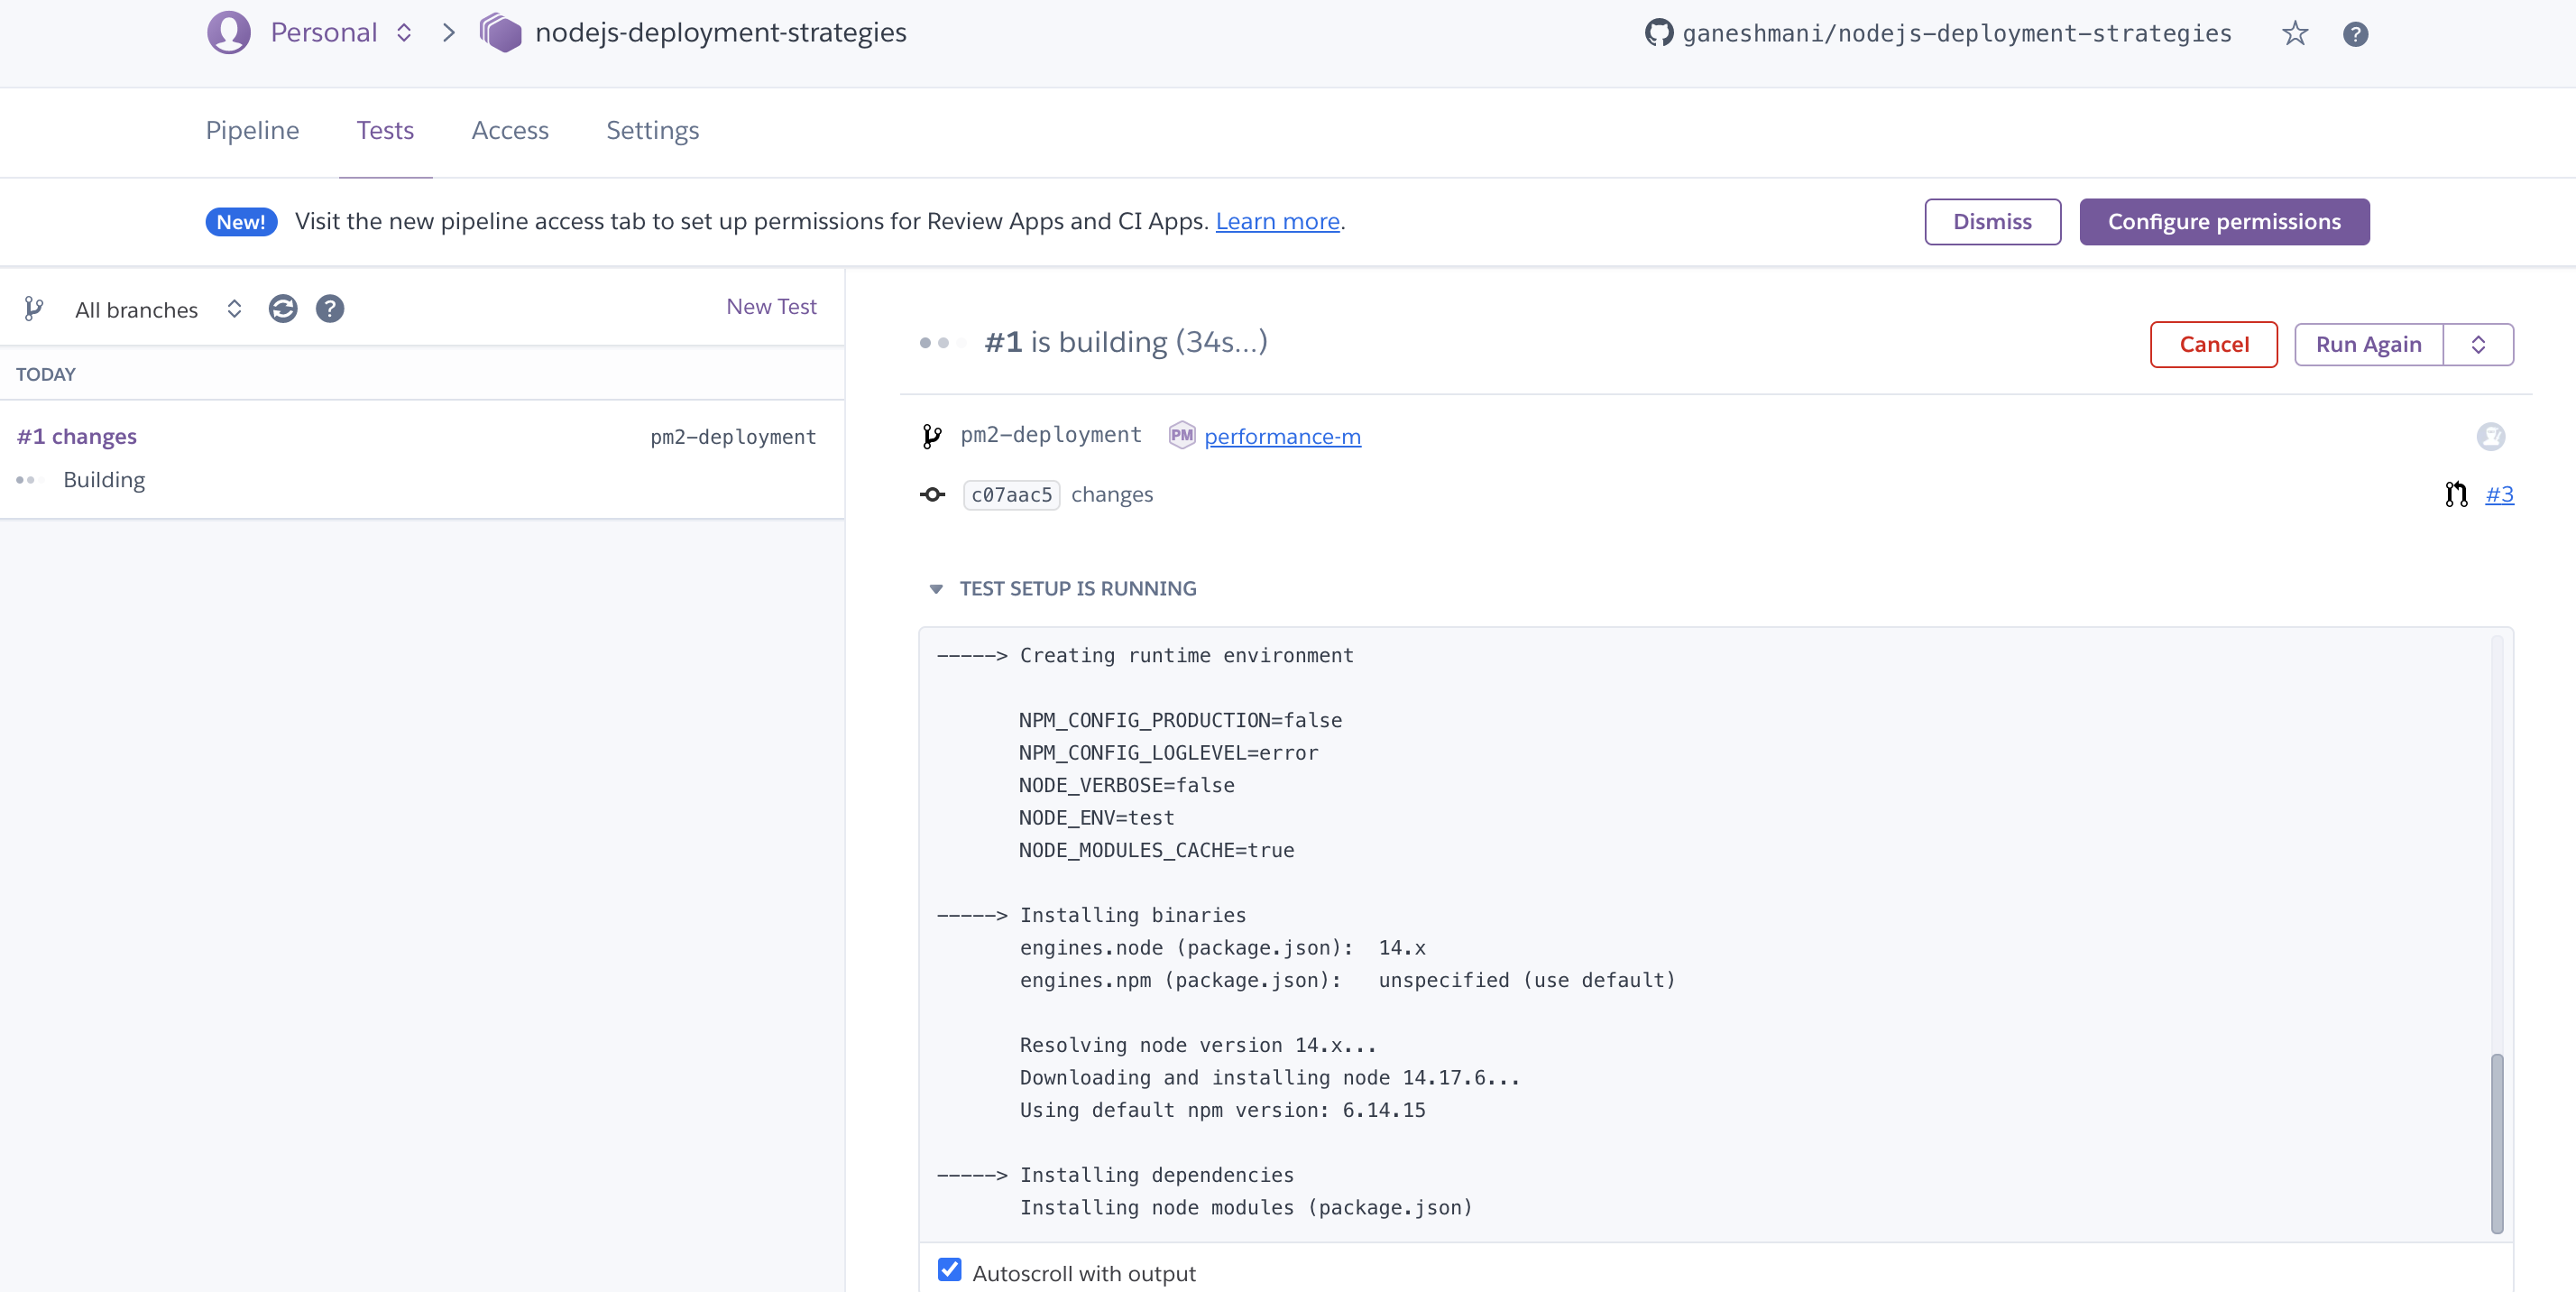
An important thing to note here is, we need to test suits before merging the change to the main branch, i.e., the Continous Integration process(CI). Fortunately, Heroku provides a CI pipeline as an add-on.
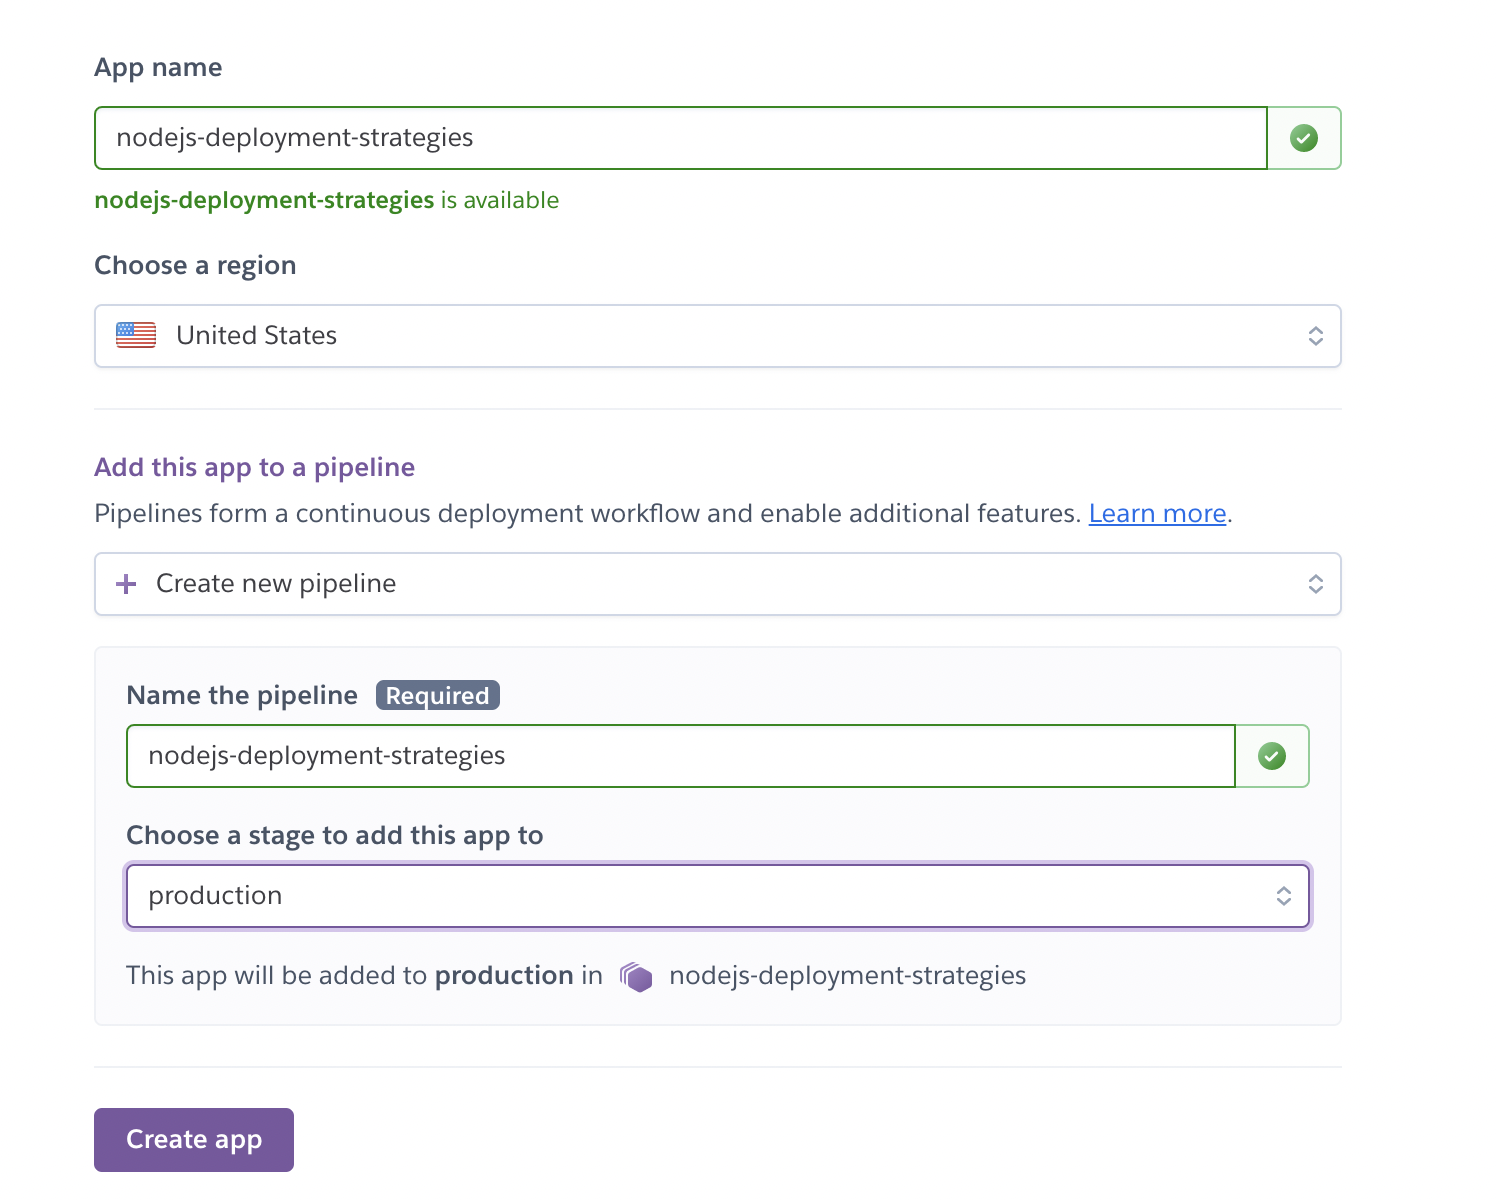
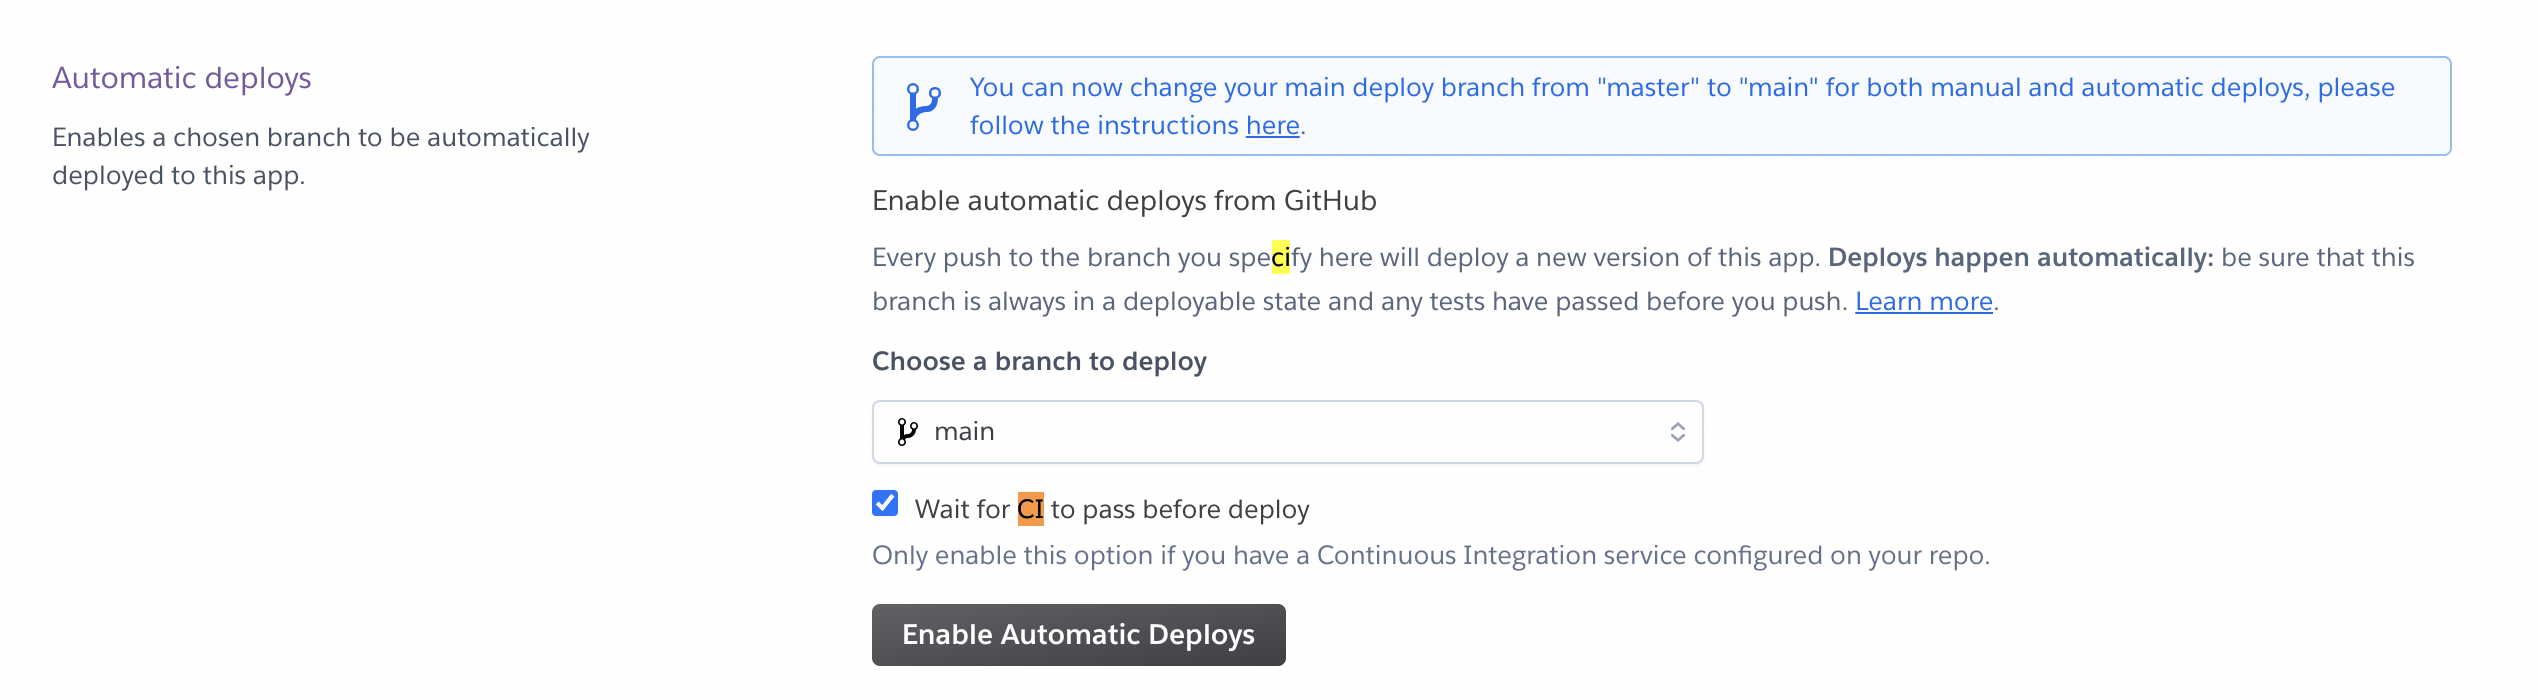
Once you create an application in Heroku, Go to settings ⇒ Connect to Github and select the repository. Make sure to select Wait for CI to pass before deploy. It’s important because we are deploying the application to the production environment.
Now, it’s time to configure the CI pipeline for the application. Go to Pipeline and connect to the Github repository.
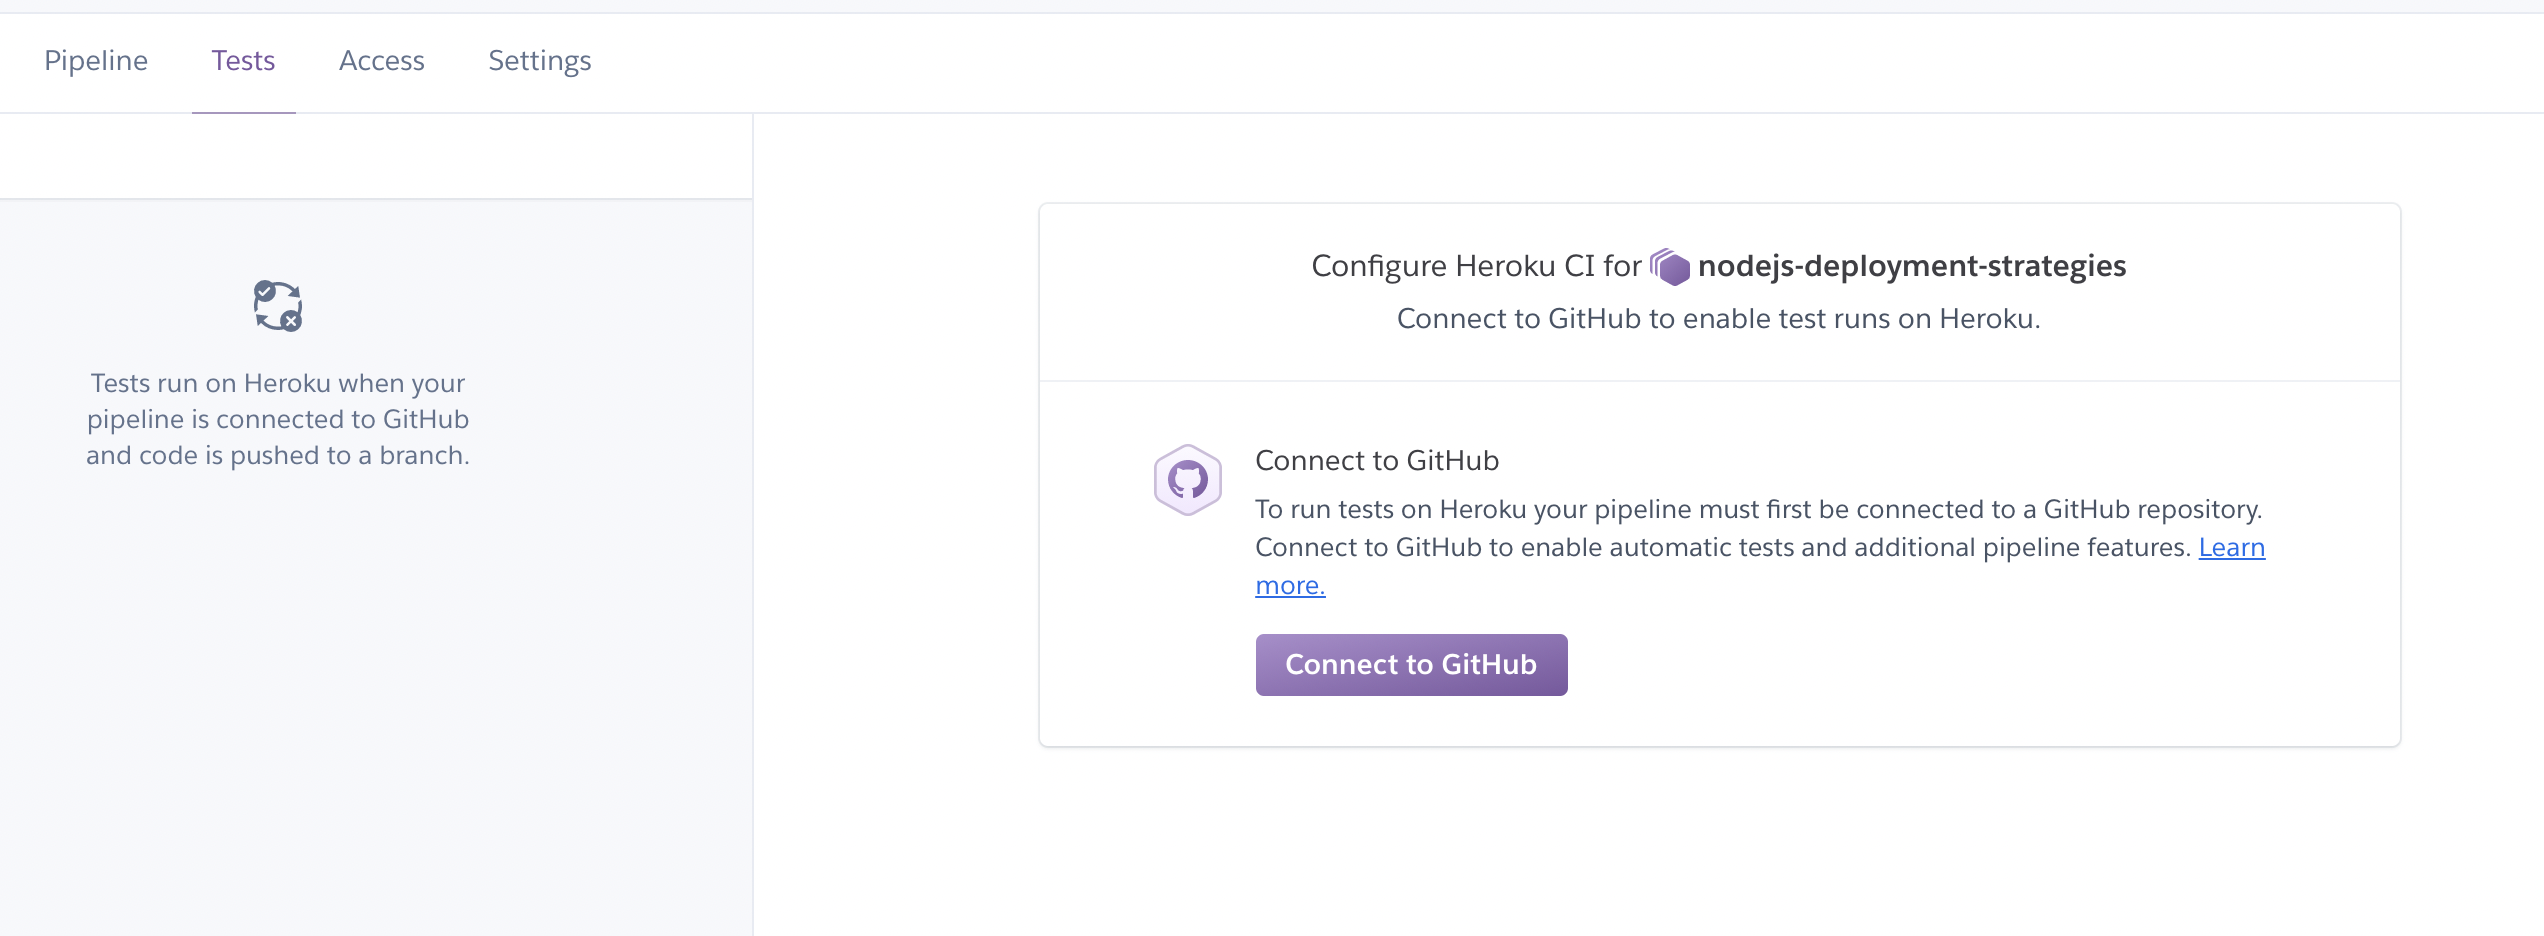
Once you connect the GitHub Repository, you need to configure app.json to run tests on this pipeline. It configures whether we need any add-ons such as test databases or caching for test suits. You need to configure them. Also, make sure you enable Heroku CI.
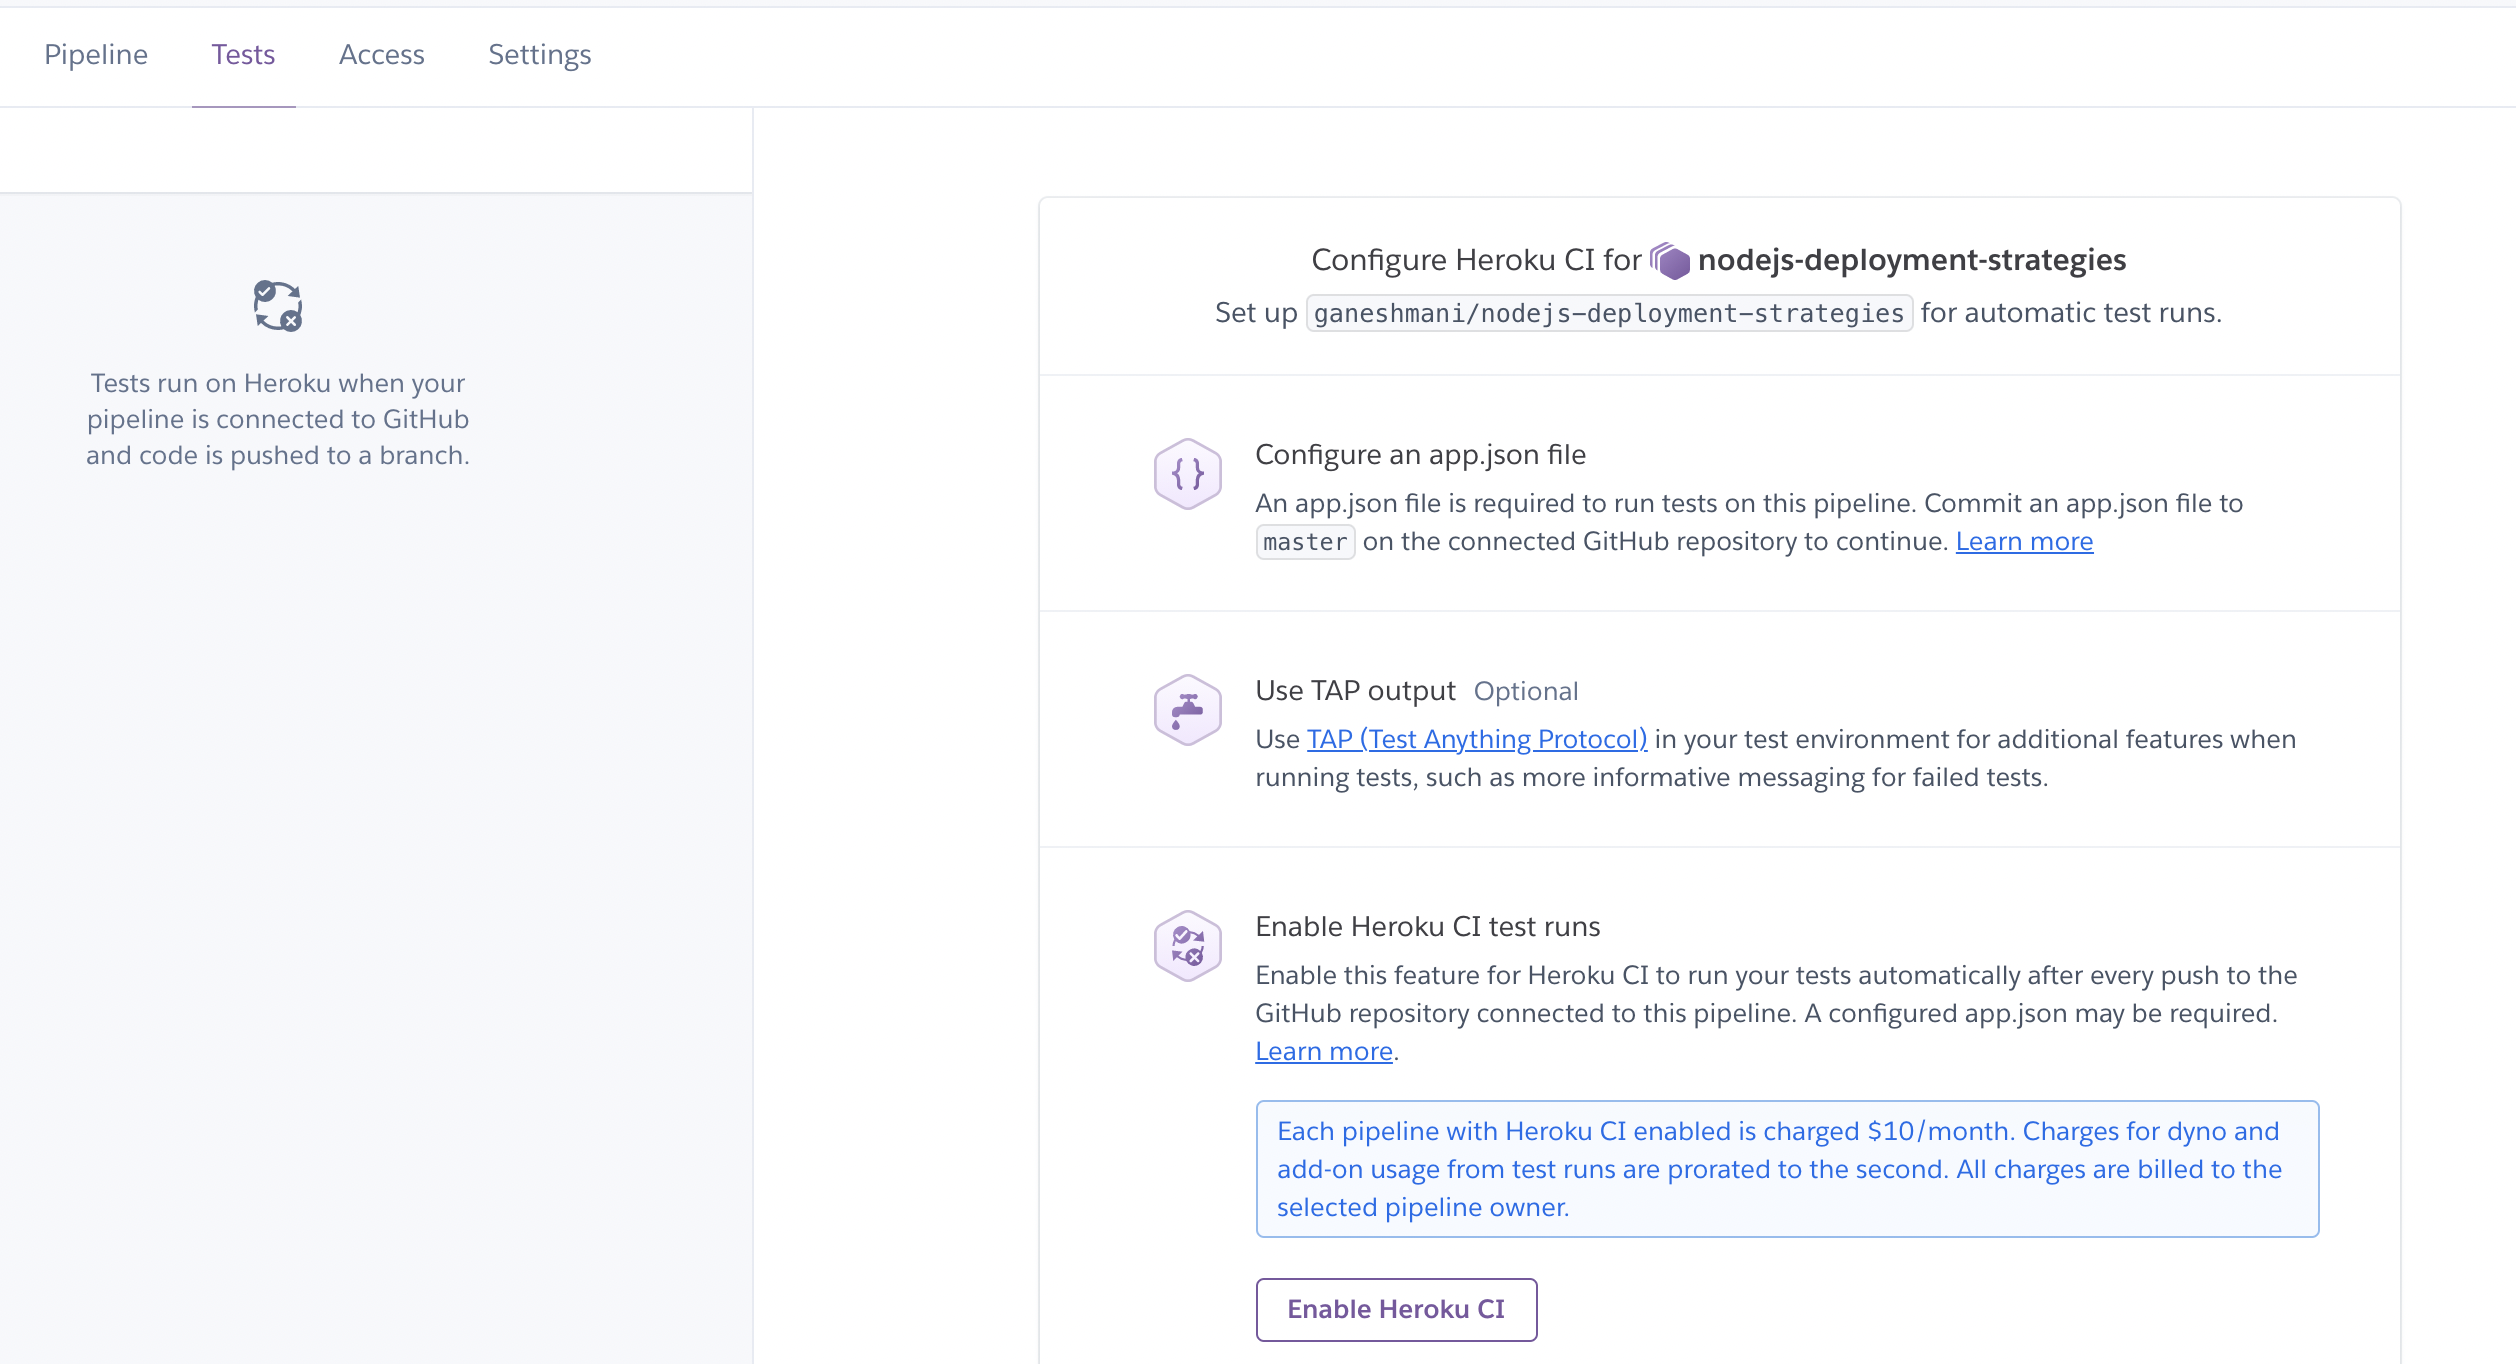
add app.json with the following configuration,
{
    "environments": {
      "test": {
        "addons":[
          "Heroku-PostgreSQL:in-dyno"
        ]
      }
    }
  }
After that, create a pull request and merge the changes to the main branch. Heroku CI will run the test cases and deploy them to production.
Docker Container Deployment
Let’s see how to deploy the Node.js application by containerizing it along with CI, CD pipeline. There are different ways to deploy docker containers to the production environment. For example, you can deploy to AWS on-premise or use managed services like AWS ECS to deploy and manage containers or use Hosting services like DigitalOcean, Heroku.
Here we are going to use Heroku and GitHub Actions to deploy docker containers to production. We will see how to deploy to AWS ECS in upcoming articles.
If you’re new to docker/containerization world as Nodejs developer, I recommend you to checkout this article first.
First and foremost, we need a Dockerfile for the application. create Dockerfile and add the following configuration.
FROM node:14-alpine
WORKDIR /usr/src/app
COPY package.json ./
COPY . /usr/src/app/
RUN npm install --production
USER node
EXPOSE 80

CMD ["node","index.js"]
To run containers for development, we can use docker-compose that works well while developing an application.
Here’s a docker-compose-yml for development purposes,
version: "3.6"
services:
  web:
    build:
      context: .
    environment:
      DATABASE_URL: postgres://postgres:postgres@postgres:5432/postgres
    depends_on:
      - postgres
    ports:
      - "8080:8080"
  postgres:
    image: postgres
    restart: always
    environment:
      POSTGRES_PASSWORD: postgres
    ports:
      - "5432:5432"
    volumes:
      - todo-db:/var/lib/postgresql/data

volumes:
  todo-db:
Make sure you add .dockerignore to avoid committing unnecessary files into the docker container.
**/node_modules/
**/.git
**/README.md
**/LICENSE
**/.vscode
**/npm-debug.log
**/coverage
**/.env
**/.editorconfig
**/.aws
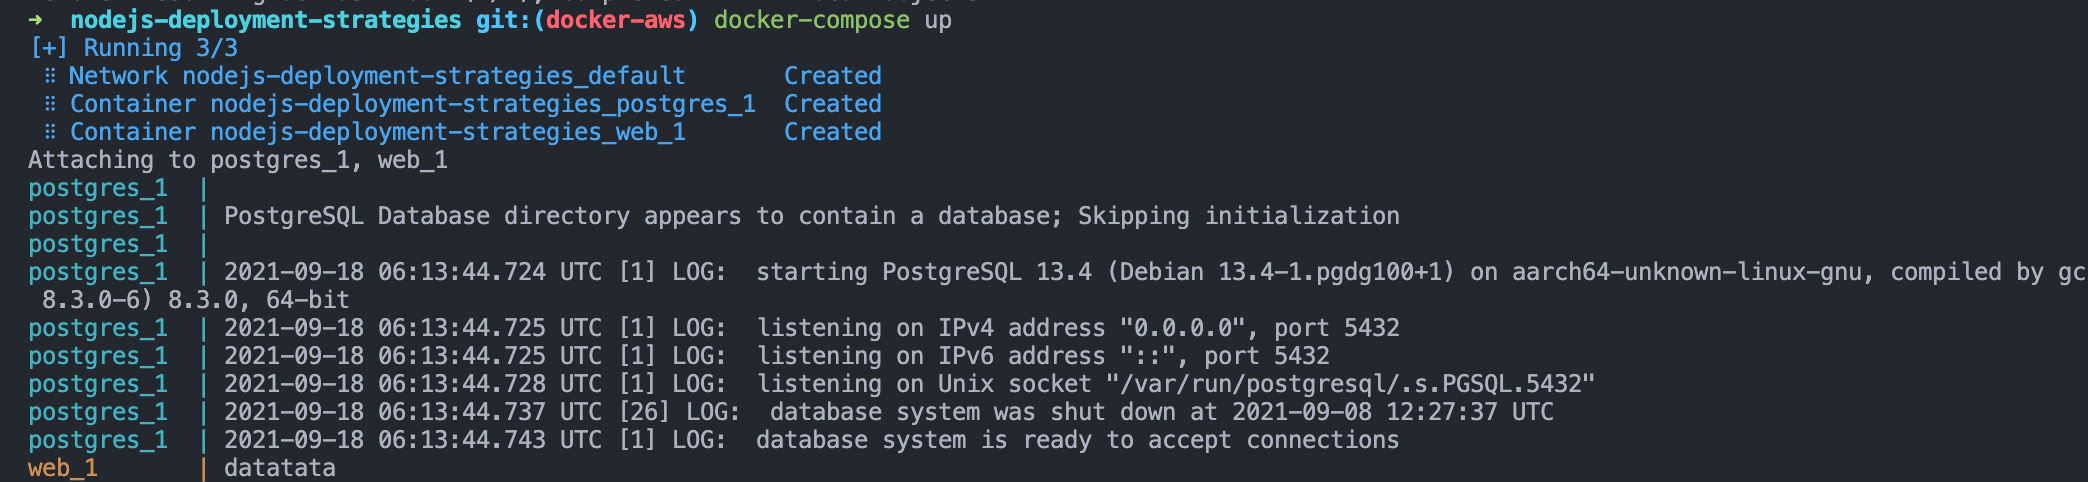
**/distFor Development
To run your application in the local machine, you can use the docker-compose up command that deploys the containers locally.
For Production
Deploying docker containers to production is not straightforward, like running the command docker-compose up. Technically, experts don’t recommend running docker compose on production in AWS or any other cloud providers. Instead, you need to push the images to container registry like AWS Container Registry, DigitalOcean Container Registry, Heroku Container Registry.
We will deploy our application to Heroku by pushing the image to the Heroku container registry using Github Actions.
If you’re new to GitHub Actions, check out this great tutorial on GitHub Actions from TechWorld with Nana
create a file .github/workflows/deploy.yml and add the following configuration.
# This is a basic workflow to help you get started with Actions
name: Deploy container to Heroku Server in Production

# Controls when the workflow will run
on:
  # Triggers the workflow on push or pull request events but only for the main branch
  push:
    branches: [docker-aws]
  pull_request:
    branches: [docker-aws]

  # Allows you to run this workflow manually from the Actions tab
  workflow_dispatch:

# A workflow run is made up of one or more jobs that can run sequentially or in parallel
jobs:
  # This workflow contains a single job called "build"
  build:
    # The type of runner that the job will run on
    runs-on: ubuntu-latest

    # Steps represent a sequence of tasks that will be executed as part of the job
    steps:
      - name: Checkout Repo
        uses: actions/checkout@v2
        with:
          ref: docker-aws
      # Building Heroku Deployment with Container Registry - Update
      - name: Build, Push and Release a Docker container to Heroku
        uses: gonuit/heroku-docker-deploy@v1.3.3
        with:
          email: ${{ secrets.HEROKU_EMAIL }}
          heroku_api_key: ${{ secrets.HEROKU_API_KEY }}
          heroku_app_name: ${{ secrets.HEROKU_APP_NAME }}
          dockerfile_directory: ./
          dockerfile_name: Dockerfile
          docker_options: "--no-cache"
          process_type: web
Let’s break down the config file. on hook defines the trigger point for the action. In our case, we need to run the GitHub Action when someone pushes or creates a pull request to docker-aws branch here.
on:
  # Triggers the workflow on push or pull request events but only for the main branch
  push:
    branches: [docker-aws]
  pull_request:
    branches: [docker-aws]

  # Allows you to run this workflow manually from the Actions tab
  workflow_dispatch:
jobs define the job that we need to run when there is a code push or merging pull requests. An interesting thing about GitHub Actions is that it contains many predefined actions that we can import into our config to use. Likewise, Here we have actions/checkout@v2 action to check out the branch in the server.
steps:
  - name: Checkout Repo
    uses: actions/checkout@v2
    with:
      ref: docker-aws
Finally, we have gonuit/heroku-docker-deploy@v1.3.3 action to build, push and release docker container to Heroku.
- name: Build, Push and Release a Docker container to Heroku
uses: gonuit/heroku-docker-deploy@v1.3.3
with:
email: ${{ secrets.HEROKU_EMAIL }}
heroku_api_key: ${{ secrets.HEROKU_API_KEY }}
heroku_app_name: ${{ secrets.HEROKU_APP_NAME }}
dockerfile_directory: ./
dockerfile_name: Dockerfile
docker_options: "--no-cache"
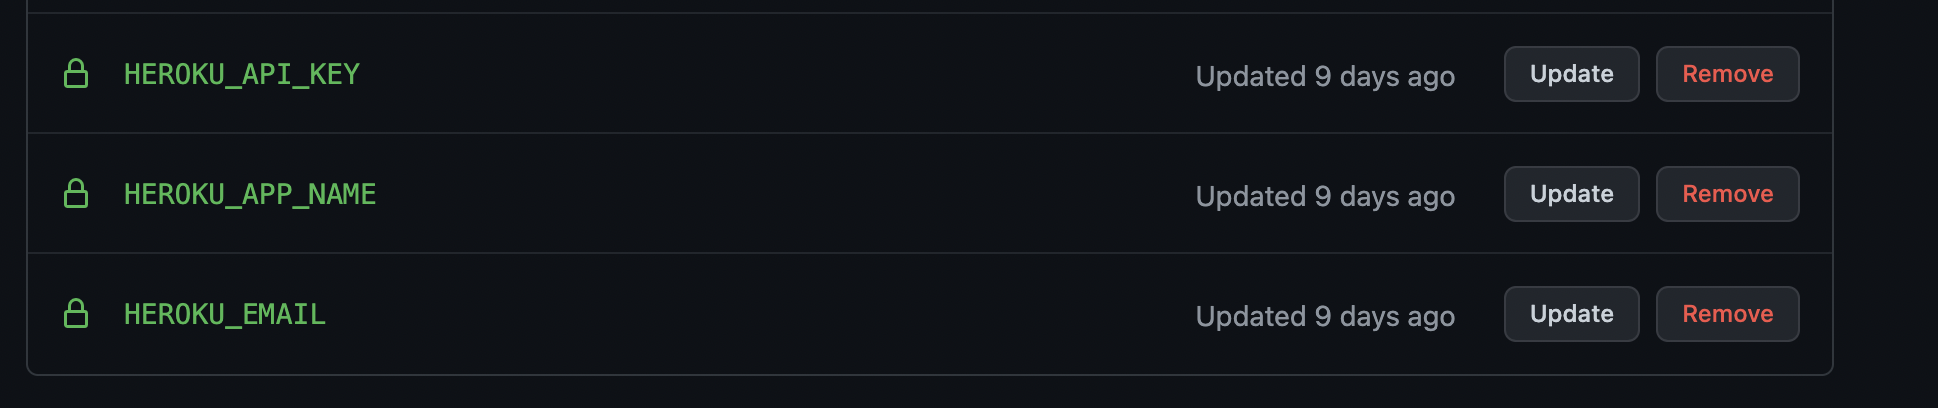
process_type: webOnce you configure it in your application, you can see the job running in GitHub Actions when you create and merge a PR.
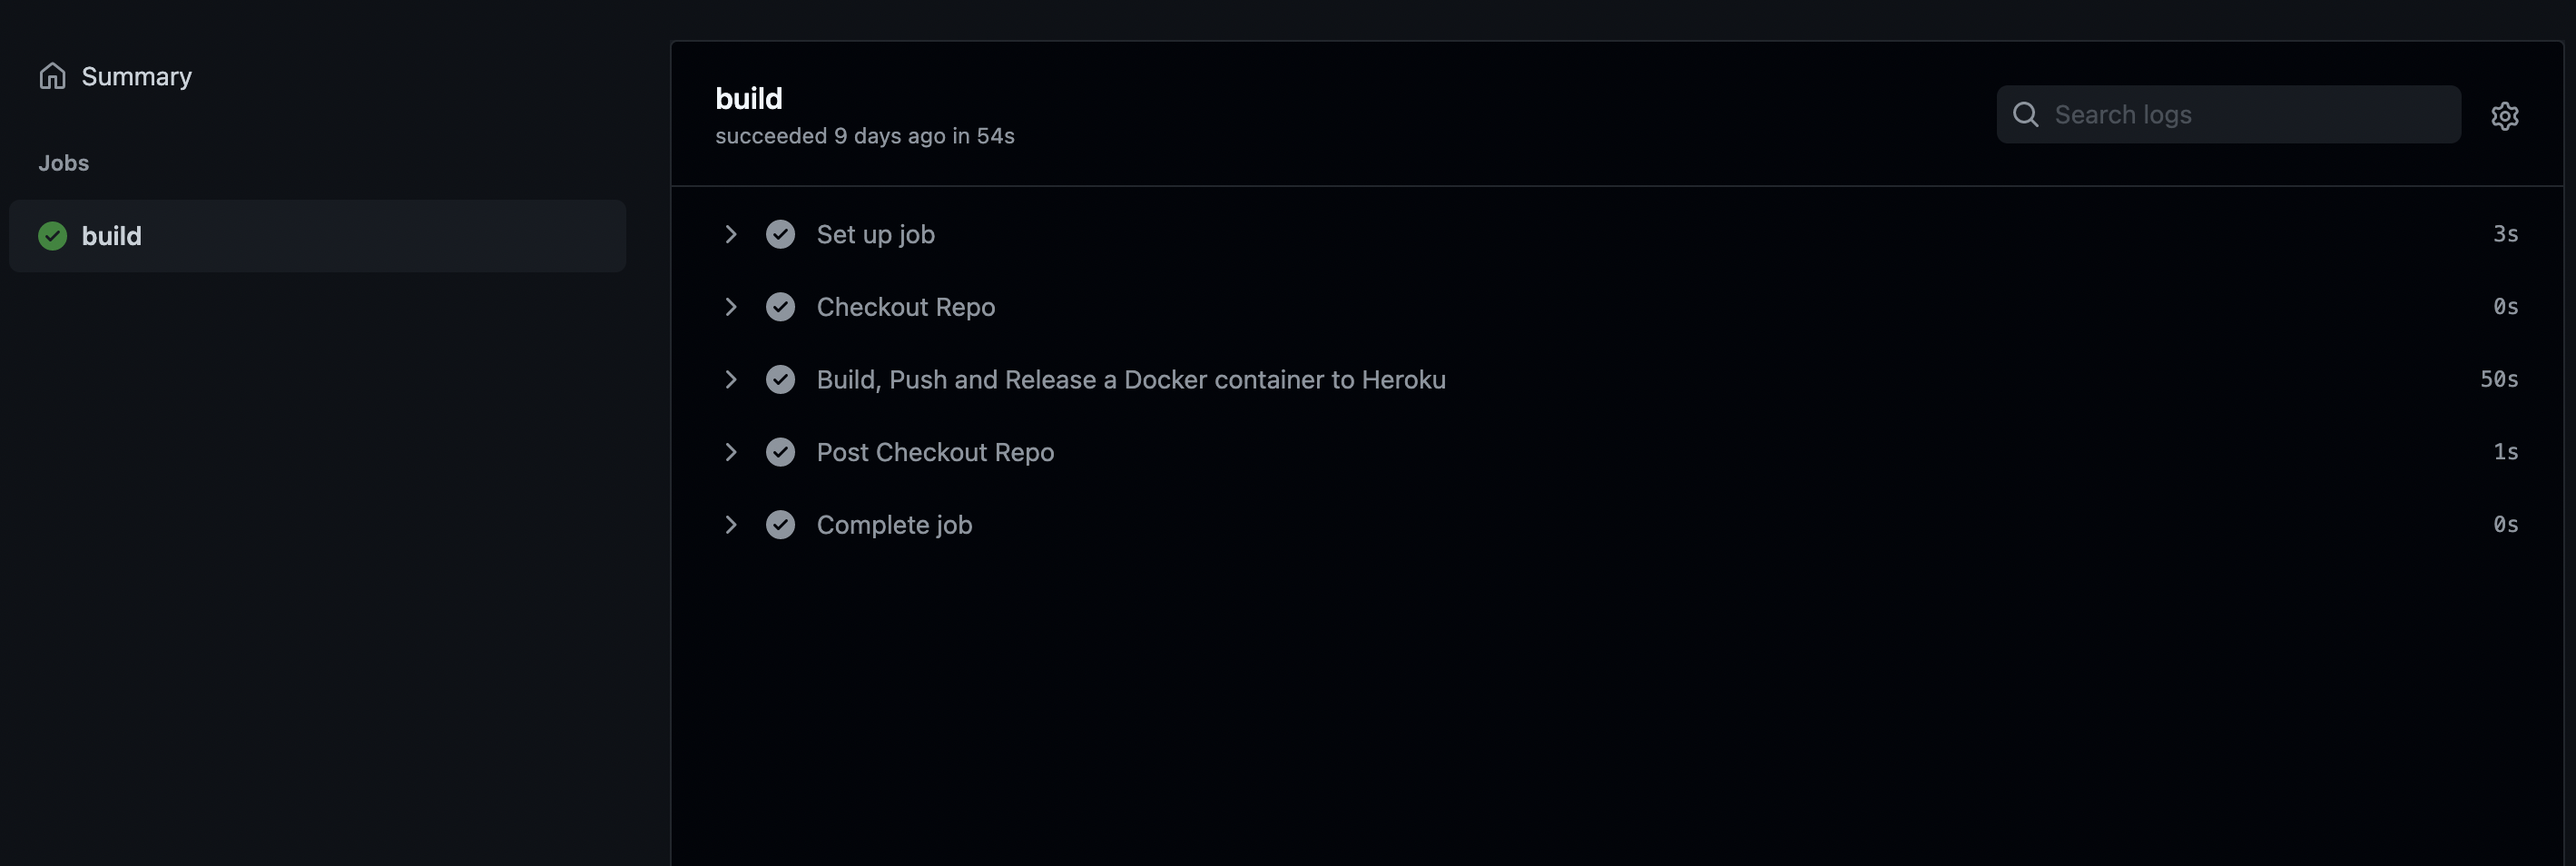
Note: Make sure to set up secrets in GitHub Repo.
Kubernetes Deployment
So far, we have seen deploying Nodejs application using Pm2, Docker container. Now, we are going to see the enhanced version of Container Deployment. We are still going to deploy the docker container but in a different way.
When deploying Containers by ourselves to the server, We need to consider and manage several aspects. For example, How does the container scale up or scale down based on the traffic?
Orchestrating containers is a tedious task when we do it manually. To solve this problem, we have solutions like Kubernetes. So let’s see how to deploy Nodejs applications using Docker and Kubernetes.
Note: If you’re new to Kubernetes, Checkout this article that is specifically for Nodejs devs. Kubernetes for Nodejs developers
TLDR, To deploy Nodejs application via Kubernetes, we need Configurations for Deployment and Services. Deployment is to build containers; Services define the traffic’s load balance across a different replica of containers. There are different types of services in Kubernetes.
If it’s a database, we need another configuration to persist the data in the container. It’s called PersistentVolumeClaim.
Application
create a directory infra and add app-depl.yml . Firstly, create Deployment configuration for Application.
apiVersion: apps/v1
kind: Deployment
metadata:
  name: node-app
spec:
  replicas: 1
  selector:
    matchLabels:
      app: node-app
  template:
    metadata:
      labels:
        app: node-app
    spec:
      containers:
        - name: node-app
          image: ganeshmani009/node-deployment-web
          resources:
            limits:
              memory: "128Mi"
              cpu: "500m"
          ports:
            - containerPort: 8080
          env:
            - name: DATABASE_URL
              value: postgres://postgres:postgres@postgres:5432/postgres
          imagePullPolicy: Always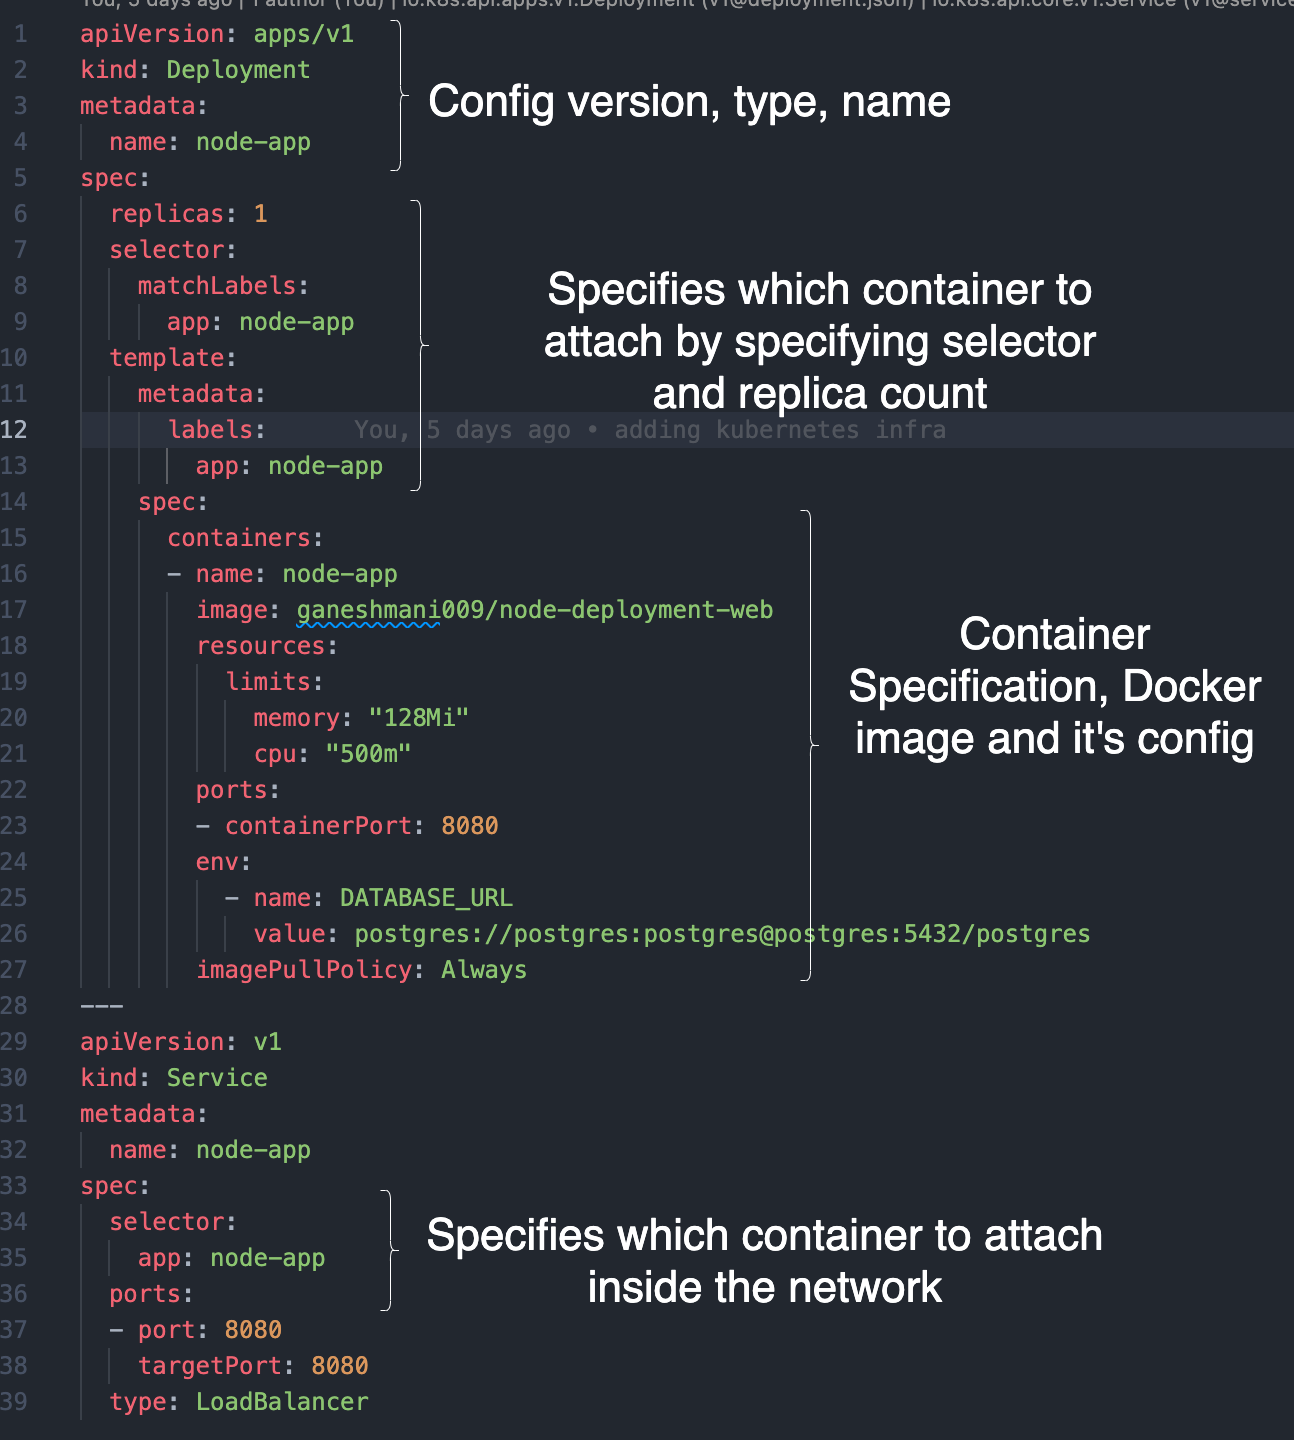
Database in Kubernetes
Create pg-depl.yml and add the following configuration.
apiVersion: v1
kind: PersistentVolumeClaim
metadata:
  name: pg-claim
spec:
  resources:
    requests:
      storage: 3Gi
  accessModes:
    - ReadWriteOnce
---
apiVersion: v1
kind: Service
metadata:
  name: postgres
spec:
  selector:
    app: postgres
  ports:
    - port: 5432
      targetPort: 5432
---
apiVersion: apps/v1
kind: Deployment
metadata:
  name: postgres
spec:
  selector:
    matchLabels:
      app: postgres
  template:
    metadata:
      labels:
        app: postgres
    spec:
      containers:
        - name: postgres
          image: postgres:13.4-alpine
          resources:
            limits:
              memory: "128Mi"
              cpu: "500m"
          ports:
            - containerPort: 5432
          env:
            - name: POSTGRES_PASSWORD
              value: postgres
          volumeMounts:
            - mountPath: /data/db
              name: storage
      volumes:
        - name: storage
          persistentVolumeClaim:
            claimName: pg-claim
One of the major differences between Application config and database configuration is PersistentVolumeClaim. It binds the database data inside Kubernetes. So that, even if there is no container running, it will persist the data.
apiVersion: v1
kind: PersistentVolumeClaim
metadata:
  name: pg-claim
spec:
  resources:
    requests:
      storage: 3Gi
  accessModes:
    - ReadWriteOnce
To test our application deployment in a local machine, you can use Minikube to create and run the Kubernetes cluster. First, Minikube creates a single-node Kubernetes cluster running in a virtual machine.
Note: Minikube is only intended for testing purposes, not for production. Make sure your install kubectl and Minikube.
Once you install minikube, you can create a cluster using the command,
minikube start --vmTo deploy the application locally, you need to go to the root directory of your application and run the kubectl command,
kubectl apply -f <Directory name of config - Here's its infra>
Here’s the complete source code