Building Nodejs Microservice - A Cloud-Native Approach - Part 1
Building Nodejs Microservice - A Cloud-Native Approach - Part 1
If you’re reading this article, i assume that you know how to build an Application using Nodejs. few may know how to build frontend as well.
Well, i have a task for you before getting into this article. Build me a Project Management Application using Nodejs.

if you implement something like this,

Then, you are not probably in 2021. Don’t get me wrong. there is nothing wrong with above approach. i still works well for lot of application requirements.
But, let me tell you how it’s going to make difference in application development. Let’s say that you implement your project using Monolith Architecture and your application starts to evolve, continous iteration and building features on top of it.
At some point of it, you will start to feel uncomfortable and your code become unmaintainable. it makes the application overly complicated and other developers fears to build features or maintain it.
Here are the side effects of it,
- Application gets overly complicated and hard to maintain
- Adaptation for new technology will not be an option.
- Implementing a new feature become a time consuming process etc.
That’s when the Microservices comes into picture,

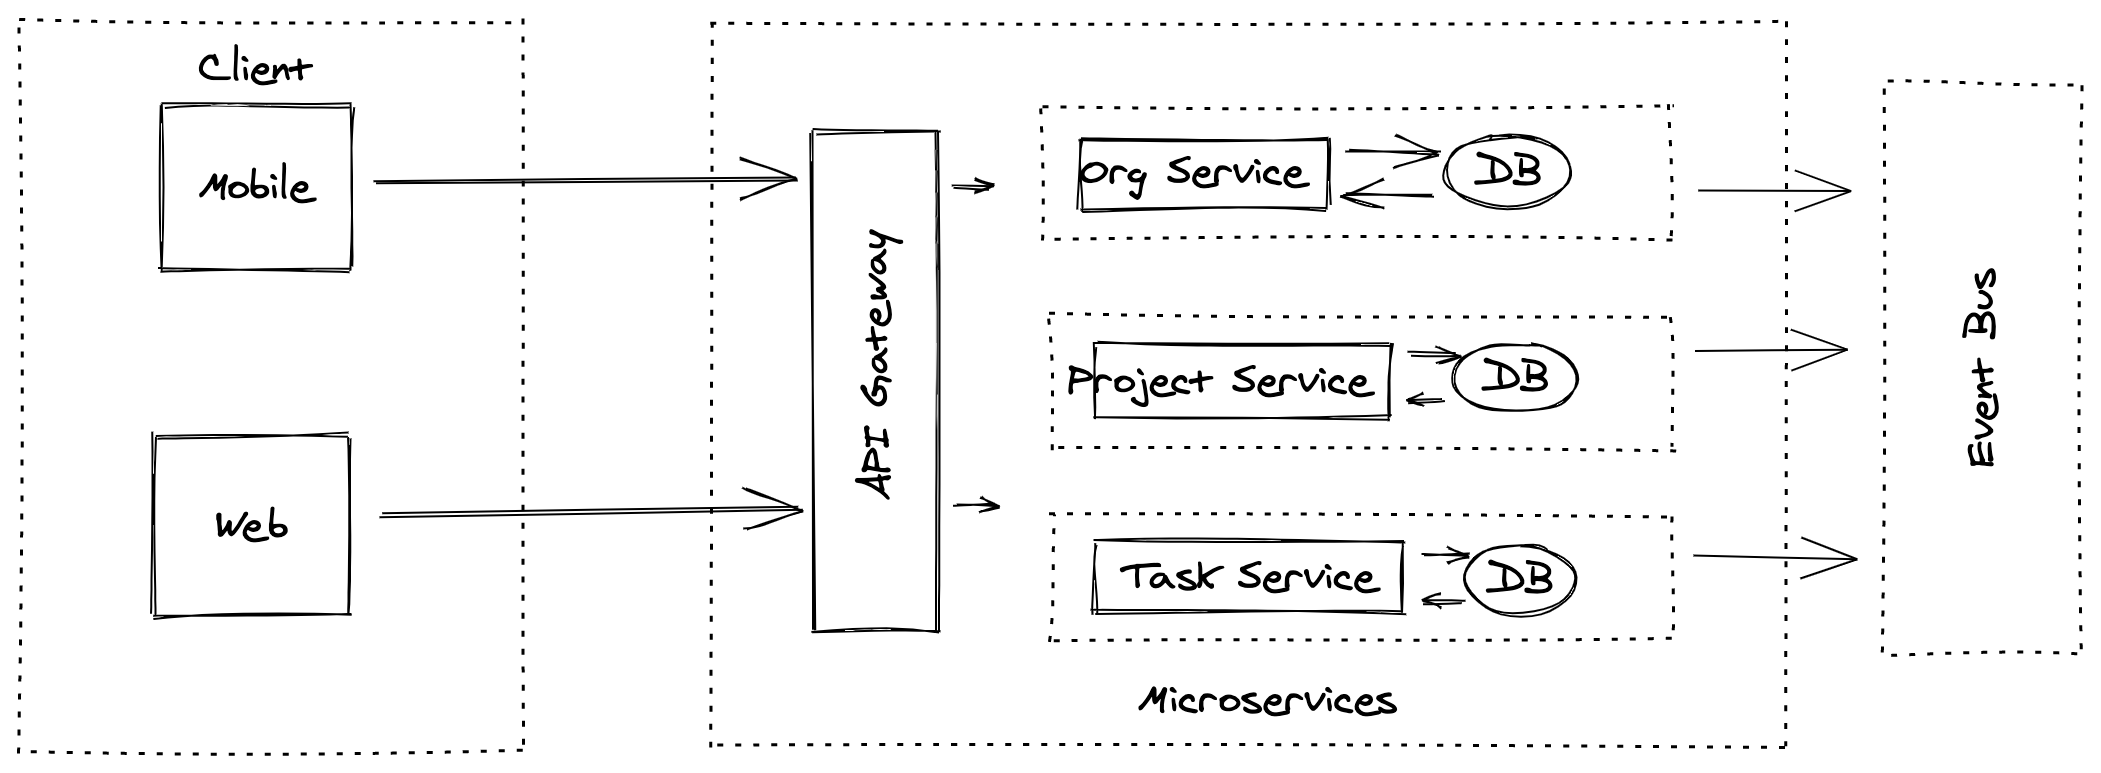
Let’s implement the sample application architecture in microservice way,

Now, the application modules are decomposed into isolates microservices. each services will be independent with it’s own code and dependancy.
So far, we have seen the difference between Monolith and Microservices. If you watch it carefully, i introduced an another term called Cloud Native Approach .
Well, let’s see what does it mean by that,
What is Cloud Native Application?
Cloud Native is a modern way to build a Large scale system. it is a systematic approach to build a large system which can change rapidly with zero downtime and resilient at the same time.
There are lot of open source applications evolved over the time to make it possible. tools such as Docker, Kubernetes, Helm , Prometheus and gRPC helps us to build such applications.
If somebody asks you, what does it mean by Cloud Native Application Development ?. just tell them that,
Cloud native application development is an approach to building and deploying applications quickly, while improving the quality and reducing risk.it is just a way to build scalable, resilient and fault-tolerant applications with zero down-time in deployment.
To learn more about Cloud-native Application, check this awesome docs from Microsoft
Cloud based approach follow 12 factor methodology which describes set of principle and best practices that we need to follow while building an cloud-native application.
Here we are going to implement two simple micro-services which are project and task services. it will be a simple Express Application.
Main purpose of this article is to make you understand how to build a Microservices in cloud native approach. we will not be focusing on business logic of each microservices.
Once you understand the outer layer. you can easily build your own business logic inside each services.
Note: I assume that you have basic knowledge on Docker and Kubernetes. if you are new to those topics. i suggest you to check these articles
Enough of the theory. let’s implement a Nodejs Microservices and see it in action

Project Service
Create a simple Express Application with the basic boilerplate code.
const express = require("express");
const bodyParser = require("body-parser");
const app = express();

app.use(bodyParser.json());
app.use(bodyParser.urlencoded({ extended: false }));

app.get("/project", (req, res) => {
  res.send("Welcome to ProjectService");
});

app.listen(4500, () => {
  console.log("Listening on PORT 4500");
});
Now, let’s dockerize our Nodejs Application. create a Dockerfile inside your project service directory.
FROM node:alpine

WORKDIR /usr/app

COPY package*.json ./

RUN npm install

COPY . .

EXPOSE 4500

CMD ["node","app.js"]
Don’t forgot to add .dockerignore inside your root directory
node_modulesTask Service
Do the same for Task service,
- Create a Simple Express Application
- Dockerize your
taskservice - add
.dockerginoreinside your task service
const express = require("express");
const bodyParser = require("body-parser");
const app = express();

app.use(bodyParser.json());
app.use(bodyParser.urlencoded({ extended: false }));

app.get("/task", (req, res) => {
  res.send("Welcome to TaskService");
});

app.listen(4501, () => {
  console.log("Listening on PORT 4501");
});
FROM node:alpine
WORKDIR /usr/app
COPY package*.json ./
RUN npm install
COPY . .
EXPOSE 4500
CMD ["node","app.js"]node_modules;Once you complete the docker configuration. you can build docker images using the command,


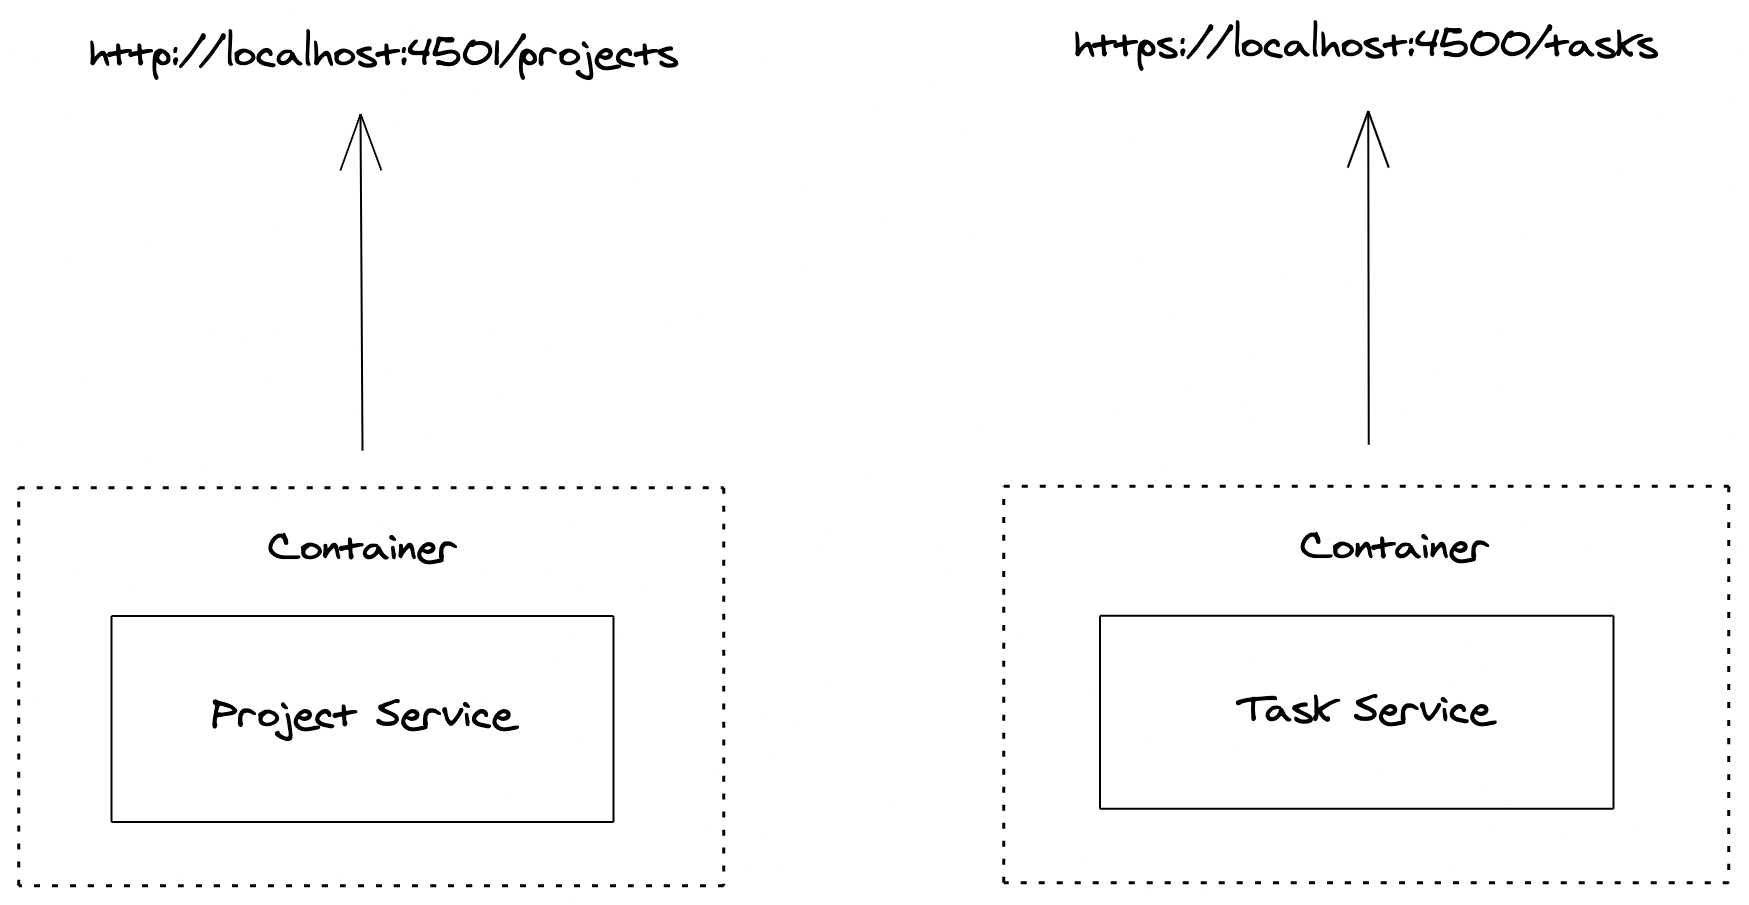
Now, we have our containerized microservices. if you run the docker container, each containers will be running in a separate ports.

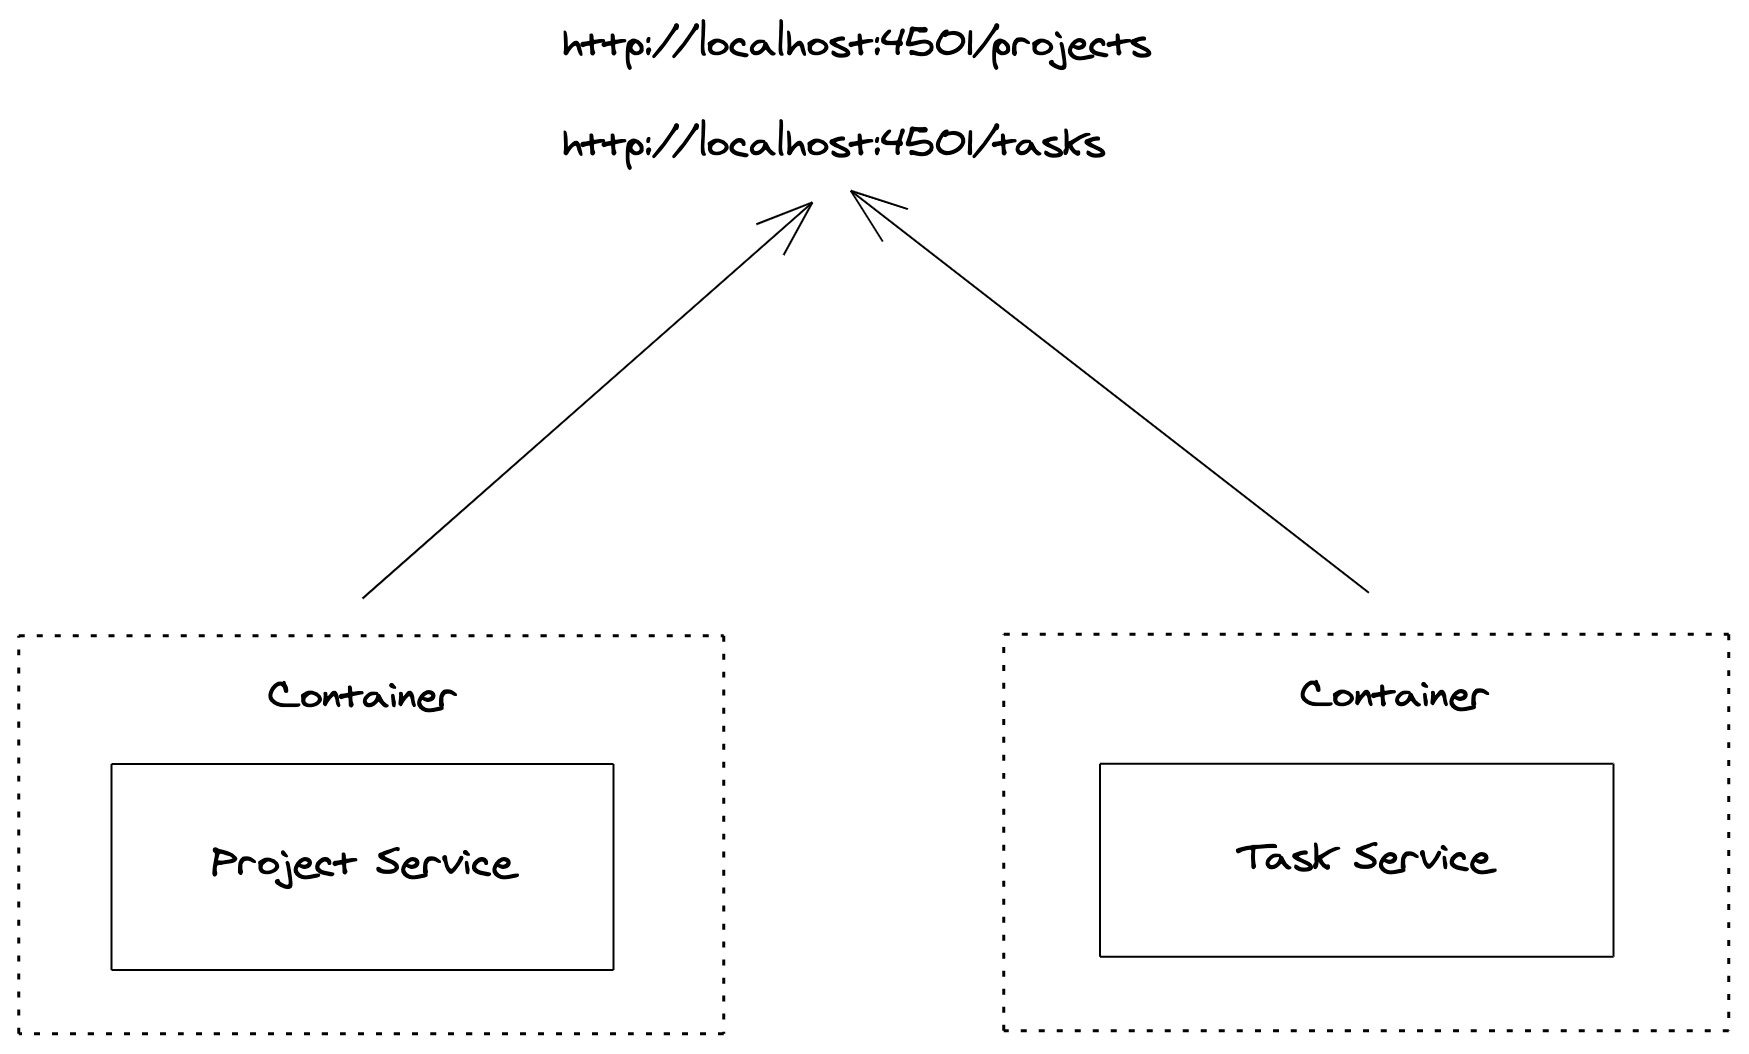
But wait, we want our application to run in a single port. right?

To achieve this, we need kubernetes. Kubernetes is a orchestration tool that helps us to manage our docker containers and load balance between them etc.
Infrastructure
Here, we want to route our the request to appropriate docker containers. let’s implement kubernetes on top of our Nodejs Microservices.
Note: If you’re new to Kubernetes, i recommend you to check this article to understand the basics of kubernetes
To explain it simpler, Kubernetes requires Service and Deployment to manage the pods inside Nodes.
Let’s create Service and Deployment config for each micro-services,
apiVersion: apps/v1
kind: Deployment
metadata:
  name: project-depl
spec:
  selector:
    matchLabels:
      app: projects
  template:
    metadata:
      labels:
        app: projects
    spec:
      containers:
        - name: projects
          image: ganeshmani009/projectservice
          resources:
            limits:
              memory: "128Mi"
              cpu: "500m"
          ports:
            - containerPort: 4500
---
apiVersion: v1
kind: Service
metadata:
  name: project-srv-clusterip
spec:
  selector:
    app: projects
  ports:
    - name: projects
      protocol: TCP
      port: 4500
      targetPort: 4500
Let’s break down Deoployment config to understand it better,
apiVersion: apps/v1
kind: Deployment
metadata:
  name: project-depl
spec:
  selector:
    matchLabels:
      app: projects
  template:
    metadata:
      labels:
        app: projects
    spec:
      containers:
        - name: projects
          image: ganeshmani009/projectservice
          resources:
            limits:
              memory: "128Mi"
              cpu: "500m"
          ports:
- containerPort: 4500metadata:
name: project-deplmetadata name specifies the name of deployment.
matchLabels:
  app: projects
matchLabels creates Pod with the specified name here. After that we create Pod with template
template:
  metadata:
    labels:
      app: projects
  spec:
    containers:
      - name: projects
        image: ganeshmani009/projectservice
        resources:
          limits:
            memory: "128Mi"
            cpu: "500m"
        ports:
          - containerPort: 4500
Kubernetes Services
apiVersion: v1
kind: Service
metadata:
  name: project-srv-clusterip
spec:
  selector:
    app: projects
  ports:
    - name: projects
      protocol: TCP
      port: 4500
      targetPort: 4500
Here, we specify the kind as Service, then metadata name as project-srv-clusterip.
selector specifies which pod that needs to be mapped with Service. here, it’s mentioned as projects.
port specifies the incoming port on the request. targetPort specifies the port to which the request needs to be forwarded to.
Task Service Infrastructure
apiVersion: apps/v1
kind: Deployment
metadata:
  name: task-depl
spec:
  selector:
    matchLabels:
      app: tasks
  template:
    metadata:
      labels:
        app: tasks
    spec:
      containers:
        - name: tasks
          image: ganeshmani009/taskservice
          resources:
            limits:
              memory: "128Mi"
              cpu: "500m"
          ports:
            - containerPort: 4501
---
apiVersion: v1
kind: Service
metadata:
  name: task-clusterip-srv
spec:
  selector:
    app: tasks
  ports:
    - name: tasks
      protocol: TCP
      port: 4501
      targetPort: 4501
To run the kubernetes cluster, we can use the command kubectl apply -f <file name>


One final thing that we need to set in kubernetes configuration is a controller to handle the request from outside world to kubernetes clusters. because, we can’t access the kuberetes clusters directly.
To do that, we need ingress control to access the clusters. let’s set ingress controller,
create ingress-srv.yml inside the infra directory and add the following config,
apiVersion: networking.k8s.io/v1beta1
kind: Ingress
metadata:
  name: ingress-srv
  annotations:
    kubernetes.io/ingress.class: nginx
spec:
  rules:
    - host: dialogapp.co
      http:
        paths:
          - path: /project
            backend:
              serviceName: project-srv-clusterip
              servicePort: 4500
          - path: /task
            backend:
              serviceName: task-clusterip-srv
              servicePort: 4501
Here, we use nginx as ingress controller. there are other controller that you can use in our kubernetes applications.
apiVersion: networking.k8s.io/v1beta1
kind: Ingress
metadata:
  name: ingress-srv
  annotations:
    kubernetes.io/ingress.class: nginx
On the above code, we specify apiVersion and king of configuration. then, we set some meta-data. important thing to note here is the annotation which is nginx here. if we want any other controller, our configuration will change based on that.
spec:
  rules:
    - host: dialogapp.co
      http:
        paths:
          - path: /project
            backend:
              serviceName: project-srv-clusterip
              servicePort: 4500
          - path: /task
            backend:
              serviceName: task-clusterip-srv
              servicePort: 4501
After that, we have rules which specifies host and http paths mainly. host is your application DNS. here, we specify our local server domain set in [hosts](https://setapp.com/how-to/edit-mac-hosts-file) config file.
Two important things to note here is,
path: it specifies the path that we want to access our particular microservices. let’s say that we want to access our Project Microservice in route/project-apiwe need to specify it in the path.backend: it specifies the kubernetes cluster that we want to access in the specified route.
Now, to run the ingress controller. we need to use the following command,

Finally, That complete our Microservice Configuration and setup.

Let’s access our microservice application routes in the browser and see whether it works or not,


It works as we expected. Now, we can build many microservices by following the same process and implement our business logics inside the microservices.
complete source can be found here