Modern React Redux Tutorials with Redux toolkit - 2020
Modern React Redux Tutorials with Redux toolkit - 2020
This tutorial explain how you can build an application using modern react redux with redux toolkit. Modern React Redux Tutorials with Redux toolkit - 2020.
Things are changing in front end application development. What we have been using to develop a frontend application is constantly changing to build things faster and efficient. One of them is redux, there are lots of state management options out there to react. but, we have to admit that redux is popular among them.
So, what changed in redux?.. well we are about to find out in this article. Buckle up to learn in this react with redux tutorial.
Note: I assume that you are familiar with redux concepts. If you are new to Redux, I recommend you to checkout this course.
Before we get into the article, let me show you what we are going to build in this article.
Demo
This is a simple Forum where you can post a question and comment on it.
What Changed in Redux?
Well, the core concepts of redux remain the same. But, the way we implement things is changed in the react-redux environment. With a package called redux-toolkit, we can implement redux in our react application in an easy way.
Setting up redux boilerplate is cumbersome in previous days. redux-toolkit solves that problem for us. Let’s see how to use redux-toolkit to build an application.
Core Concepts of Redux toolkit
there are few important changes in the redux toolkit, let’s see them
configureStore
we all know that redux store(createStore) handles the actions and reducer in redux. well, configure store is an wrapper around createStore with some default configuration options. it simplifies some configuration pains.
createAction
createAction returns an action creator function. one important change to note here is that we return an action creator function not an object. in old traditional way, it returns an object with type and payload.here, we return a function .
// Original approach: write the action type and action creator by hand
const INCREMENT = "INCREMENT";

function incrementOriginal() {
  return { type: INCREMENT };
}

console.log(incrementOriginal());
// {type: "INCREMENT"}

// Or, use `createAction` to generate the action creator:
const incrementNew = createAction("INCREMENT");

console.log(incrementNew());
// {type: "INCREMENT"}
createReducer
Let me show two versions of code, see and think which one is more easier to manage.
//redux action
const increment = (payload) => {
  return {
    type: "INCREMENT",
    payload,
  };
};

//redux reducer function
export default reducer = (state, action) => {
  switch (action.type) {
    case "INCREMENT":
      return {
        ...state,
        payload,
      };
    default:
      return state;
  }
};
Let’s look at an another version of code
const increment = createAction("INCREMENT");
const decrement = createAction("DECREMENT");

const counter = createReducer(0, {
  [increment]: (state) => state + 1,
  [decrement]: (state) => state - 1,
});
you can see the difference. right?. well that’s makes a lot difference when your application grows. it will easy to maintain in the later version.
createReducer takes initialState and action creator function and use a concepts lookup table which takes the object key and compares it with action creator and match with the reducer. In that way, you don’t need to manually write a if..else or switch case state to manage it.
createSlice
If you think, it’s cutting down from writing lots of code. well, there is more. createSlice provides an option to generate action creator and action types for. you only need to specify the reducer function, initial state, and name for the slice and createSlice take care of everything for you.
const counterSlice = createSlice({
  name: "counter",
  initialState: 0,
  reducers: {
    increment: (state) => state + 1,
    decrement: (state) => state - 1,
  },
});

const store = configureStore({
  reducer: counterSlice.reducer,
});

document.getElementById("increment").addEventListener("click", () => {
  store.dispatch(counterSlice.actions.increment());
});
Getting Started
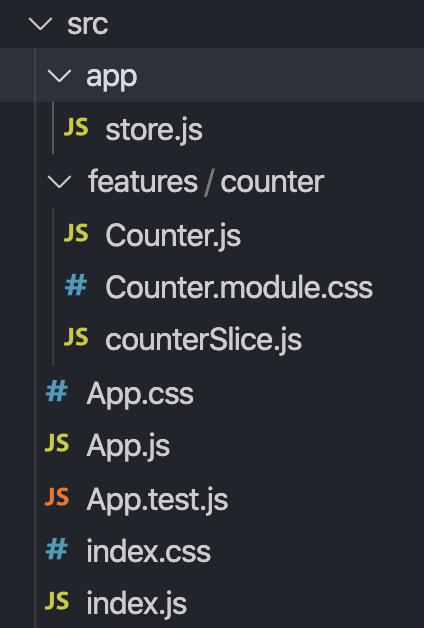
Let’s start with create-react-app with redux toolkit template included on it.
npx create-react-app my-app --template reduxAbove command creates a boilerplate for us with recommended folder structure(feature folder) and a simple example code.
Every domain is considered as a feature here. it’s better to wrap the functionalities of a particular domain in one feature folder. checkout this article to learn more about it.
Learning bit: https://github.com/erikras/ducks-modular-redux
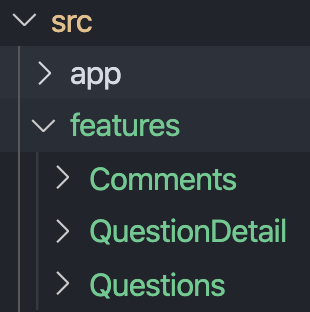
In our application, there are three domains that we need to cover. they are,
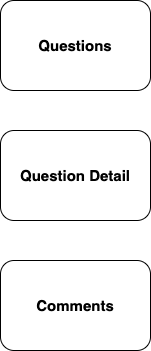
So, create folder structure based on the above domains.
Now, it is time to create redux part of our features.
Questions Feature
Let’s take the Questions part. it will contains functionalities such as
- Add Question
- Edit Question
- Remove Question
we need to use createSlice to create reducer and action creator function. before that, import create slice from toolkit.
    import { createSlice } from "@reduxjs/toolkit";

create a slice function with name, initial State and reducer function.

    export const questionSlice = createSlice({
      name: "questions",
      initialState: [],
      reducers: {
        addQuestion: (state, action) => {
          //Add Question reducer function
        },
        editQuestion: (state, action) => {
          //Edit Question Reducer function
        },
        removeQuestion: (state, action) => {
          //Remove Question Reducer function
        },
      },
    });
Once we create that, we can be able to get all the actions from the slice itself. Here, we have reducer functions addQuestion,editQuestion and removeQuestion. so, createSlice will generate three action creator function with exact name on it**.**
export const { addQuestion, editQuestion, removeQuestion } =
  questionSlice.actions;
After that, you can write the selector and export the reducer from here.
export const selectQuestions = (state) => state.questions;

export default questionSlice.reducer;
Once you’re done with your slice function. map the reducer with redux store.
import { configureStore } from "@reduxjs/toolkit";
import questionReducer from "../features/Questions/questionSlice";
export default configureStore({
  reducer: {
    questions: questionReducer,
  },
});
Now, we can use the action and selector in our component. create a component Questions.js with basic setup
    iimport React, { useState } from "react";
    import { useDispatch, useSelector } from "react-redux";
    import styled from "styled-components";

    import {
      selectQuestions,
      addQuestion,
      removeQuestion,
      editQuestion,
    } from "./questionSlice";


    const Questions = () => {

    const [showAddQuestion, setShowAddQuestion] = useState(false);

      const questions = useSelector(selectQuestions);
      const dispatch = useDispatch();


      const onSubmit = () => {

      };

      return (
        <Container>
          <QuestionsContainer>
    				//Questions Array comes Here
            {questions && questions.length > 0 ? (
              questions.map((question, index) => {
                return (
                   <div>{question}</div>
                );
              })
            ) : (
              <div>No Data Found</div>
            )}
          </QuestionsContainer>
          <AddQuestionButtonContainer onClick={() => setShowAddQuestion(true)}>
            <AddQuestionIcon src={plus_icon} />
            <AddQuestionName>Add Question</AddQuestionName>
          </AddQuestionButtonContainer>


    			//When User clicks the add Question, we need to show the Form
          {showAddQuestion ? (
            <FormContainer>
              <FormContainerDiv>
                <FormLabel>Title</FormLabel>
                <FormContainerTitleInput
                  type="text"
                  value={title}
                  onChange={(e) => setTitle(e.target.value)}
                />
              </FormContainerDiv>

              <FormContainerDiv>
                <FormLabel>Body</FormLabel>
                <FormContainerBodyInput
                  type="textarea"
                  value={body}
                  onChange={(e) => setBody(e.target.value)}
                />
              </FormContainerDiv>
              <AddQuestionButton onClick={onSubmit}>Submit</AddQuestionButton>
            </FormContainer>
          ) : (
            ""
          )}
        </Container>
      );
    };

    export default Questions;
On the above code, we are using redux hooks useDispatch and useSelector for redux actions and selector.
Firstly, we import the actions and selectors from the slice file.
import {
  selectQuestions,
  addQuestion,
  removeQuestion,
  editQuestion,
} from "./questionSlice";
After that, we use the selectQuestions in useSelector to get all the data from store.
const questions = useSelector(selectQuestions);Then, we render the data in our component
{
  questions && questions.length > 0 ? (
    questions.map((question, index) => {
      return (
        <QuestionListItem key={index}>
          <Link to={`/question/${question.id}`}>
            <QuestionTitle>{question.title}</QuestionTitle>
          </Link>
        </QuestionListItem>
      );
    })
  ) : (
    <div>No Data Found</div>
  );
}
finally, we have a form which user uses submits the question.
<FormContainer>
  <FormContainerDiv>
    <FormLabel>Title</FormLabel>
    <FormContainerTitleInput
      type="text"
      value={title}
      onChange={(e) => setTitle(e.target.value)}
    />
  </FormContainerDiv>

  <FormContainerDiv>
    <FormLabel>Body</FormLabel>
    <FormContainerBodyInput
      type="textarea"
      value={body}
      onChange={(e) => setBody(e.target.value)}
    />
  </FormContainerDiv>
  <AddQuestionButton onClick={onSubmit}>Submit</AddQuestionButton>
</FormContainer>
when user clicks the onSubmit, we need to dispatch action prior to it.
const onSubmit = () => {
  let data = {
    id: questions.length + 1,
    title: title,
    body,
  };

  dispatch(addQuestion(data));
};
Well, that’s pretty much of a getting the data and dispatching an action in redux lifecycle.
QuestionDetails Feature
import React, { useState } from "react";
import styled from "styled-components";
import { useSelector } from "react-redux";
import { useParams, useHistory } from "react-router-dom";

import Comments from "../Comments/Comments";

const Container = styled.div`
  width: 100vw;
  height: 100vh;
  background-color: #efecec;
`;

const QuestionsContainer = styled.div`
  display: flex;
  flex-flow: column;
  padding: 3.75rem 5rem;
  width: 20%;
  box-shadow: 0 0.125rem 0.375rem rgba(0, 0, 0, 0.2);
  border-radius: 0.3125rem;
  background: #fff;
  margin: auto;
`;

const Heading = styled.h2``;

const QuestionLabel = styled.h4`
  font-weight: 300;
`;

const QuestionDetail = (props) => {
  const { id } = useParams();
  if (!id) {
  }
  const questionDetail = useSelector((state) => {
    let question = state.questions.find((question) => question.id == id);

    return question;
  });

  return (
    <Container>
      <QuestionsContainer>
        <Heading>Title:</Heading>
        <QuestionLabel>{questionDetail && questionDetail.title}</QuestionLabel>
        <Heading>Body:</Heading>
        <QuestionLabel>{questionDetail && questionDetail.body}</QuestionLabel>
      </QuestionsContainer>
      {questionDetail ? <Comments id={questionDetail.id} /> : null}
    </Container>
  );
};

export default QuestionDetail;
it contains the details of the questions and comments component. from here, we pass the question id as a props to Comments component
Also, we use useSelector to fetch the questions data from the redux store.
Comments Feature
Now, it’s time to create slice for comments feature. Here, we need functionalities such as
- Add Comment
- Edit Comment
- Remove Comment
import { createSlice } from "@reduxjs/toolkit";

export const commentSlice = createSlice({
  name: "comments",
  initialState: [],
  reducers: {
    addComment: (state, action) => {
      //Add Comment Reducer
    },
    editComment: (state, action) => {
      //Edit Comment Reducer
    },
    removeComment: (state, action) => {
      //Remove Comment Reducer
    },
  },
});
After that, we export the action creator function, selectors and reducer functions.
export const { addComment, editComment, removeComment } = commentSlice.actions;

export const comments = (state) => state.comments;

export default commentSlice.reducer;
Finally, update the store with comments reducer function
import { configureStore } from "@reduxjs/toolkit";
import questionReducer from "../features/Questions/questionSlice";
import commentReducer from "../features/Comments/commentsSlice";
export default configureStore({
  reducer: {
    questions: questionReducer,
    comments: commentReducer,
  },
});
Comments.js
import React, { useState } from "react";
import styled from "styled-components";
import { useSelector, useDispatch } from "react-redux";

import { addComment } from "./commentsSlice";

const CommentsContainer = styled.div``;

const CommentHeading = styled.h4``;

const CommentLists = styled.ul`
  text-decoration: none;
  list-style: none;
  display: flex;
  flex-flow: column;
  padding: 1.75rem;
  max-height: 200px;
  overflow: auto;
`;

const AddCommentsInput = styled.input`
  width: 10%;
  height: 32px;
  border-radius: 8px;
`;

const CommentListItem = styled.div`
  padding: 10px;
`;

const CommentTitle = styled.div``;

const Comments = ({ id }) => {
  const [comment, setComment] = useState("");

  const comments = useSelector((state) => {
    let comments = state.comments.filter((comment) => comment.questionId == id);

    return comments;
  });
  const dispatch = useDispatch();

  const onAddComment = (e) => {
    if (e.key !== "Enter") {
      return;
    }

    if (e.key === "Enter") {
      let data = {
        id: comments && comments.length > 0 ? comments.length + 1 : 1,
        comment: comment,
        questionId: id,
      };

      dispatch(addComment(data));
      setComment("");
    }
  };
  return (
    <div>
      <CommentsContainer>
        <CommentHeading>Comments</CommentHeading>
        <CommentLists>
          {comments &&
            comments.map((comment) => (
              <CommentListItem key={comment.id}>
                <CommentTitle>{comment.comment}</CommentTitle>
              </CommentListItem>
            ))}
        </CommentLists>
        <AddCommentsInput
          type="text"
          value={comment}
          onChange={(e) => setComment(e.target.value)}
          onKeyPress={onAddComment}
        />
      </CommentsContainer>
    </div>
  );
};

export default Comments;
Complete source code can be found here
Summary
Let me give you a quick summary of what we have seen so far. there are four main concepts in redux toolkit. configureStore, createAction, createReducer and createSlice. each of them makes our redux development easier. Mainly, createSlice helps us to generates the action creator function and action types just by taking the reducers of the domain. All other concepts remains the same on the application development.
That’s it for this article. Learn it and Practice to get better at react redux application development. Happy Coding :-)