Node Authentication using passport.js - Part 1
Node Authentication using passport.js - Part 1
Authentication for a web application is difficult to setup manually.To make it easier, passport came into action.
What is Passport?
passport is an authentication middleware for node application. passport provides different set of strategies using a username and password, Facebook and Twitter.
The article is separated as two parts for better understanding of the passport authentication concepts
we can use different ways to login in a web application such as Facebook,Twitter, Google and local(username and password)
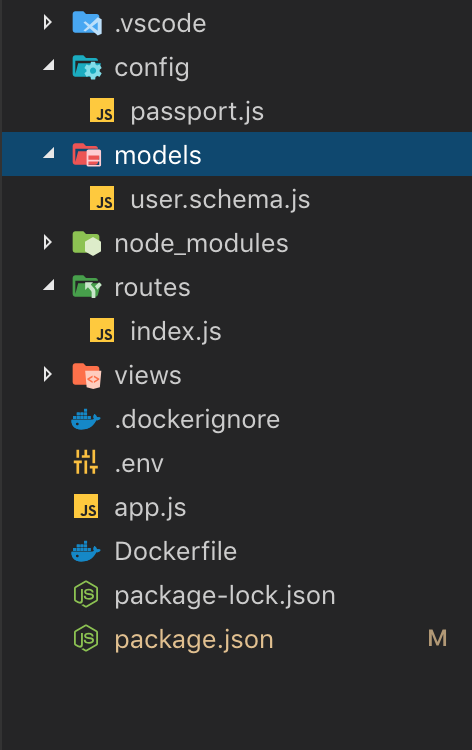
In this article, we will use local strategy for the web application and folder structure will looks like:
Project Structure :
Firstly, we are going to install all the dependencies needed for an application. Therefore, we install the packages needed for an application
"dependencies": {
    "bcrypt-nodejs": "0.0.3",
    "body-parser": "^1.18.3",
    "connect-flash": "^0.1.1",
    "cookie-parser": "^1.4.4",
    "cors": "^2.8.5",
    "express": "^4.16.4",
    "express-handlebars": "^3.0.2",
    "express-session": "^1.16.1",
    "method-override": "^3.0.0",
    "mongoose": "^5.5.2",
    "morgan": "^1.9.1",
    "passport": "^0.4.0",
    "passport-local": "^1.0.0"
  },
Most importantly, passport and passport-local are the packages are used for passport authentication.
on the other hand, we need to create models which is nothing but Schema for user. create a file called user.schema.js
const mongoose = require("mongoose");
const bcrypt = require("bcrypt-nodejs");
const Schema = mongoose.Schema;

let userschema = new Schema({
  email: String,
  password: String,
});

userschema.methods.generateHash = function (password) {
  return bcrypt.hashSync(password, bcrypt.genSaltSync(8), null);
};

// checking if password is valid
userschema.methods.validPassword = function (password) {
  return bcrypt.compareSync(password, this.password);
};

let User = mongoose.model("User", userschema);

module.exports = User;
we need to create a file called passport where we need to setup the passport strategy. that is to say, create a file called config/passport.js .
Firstly, we will see how to setup the signup using passport authentication.Therefore, add the following code in the config/passport.js
const LocalStrategy = require("passport-local").Strategy;

let User = require("../models/user.schema");

module.exports = function (passport) {
  // used to serialize the user for the session
  passport.serializeUser(function (user, done) {
    done(null, user.id);
  });

  // used to deserialize the user
  passport.deserializeUser(function (id, done) {
    User.findById(id, function (err, user) {
      done(err, user);
    });
  });

  passport.use(
    "local-signup",
    new LocalStrategy(
      {
        // by default, local strategy uses username and password, we will override with email
        usernameField: "email",
        passwordField: "password",
        passReqToCallback: true, // allows us to pass back the entire request to the callback
      },
      function (req, email, password, done) {
        // asynchronous
        // User.findOne wont fire unless data is sent back
        process.nextTick(function () {
          // find a user whose email is the same as the forms email
          // we are checking to see if the user trying to login already exists
          User.findOne({ email: email }, function (err, user) {
            // if there are any errors, return the error
            if (err) return done(err);

            // check to see if theres already a user with that email
            if (user) {
              return done(
                null,
                false,
                req.flash("signupMessage", "That email is already taken.")
              );
            } else {
              // if there is no user with that email
              // create the user
              var newUser = new User();

              // set the user's local credentials

              newUser.email = email;
              newUser.password = newUser.generateHash(password);

              // save the user
              newUser.save(function (err) {
                if (err) throw err;
                return done(null, newUser);
              });
            }
          });
        });
      }
    )
  );
};
In the above file, we setup the passport local strategy for signup and insert the user into the database.
After that, we need to create a route file where we need to handle the signup url.So,create a file called routes/index.js
module.exports = function (app, passport) {
  app.get("/", isLoggedIn, (req, res) => {
    console.log("req user", req.user);
    res.render("home", {
      user: req.user,
    });
  });

  app.get("/signup", (req, res) => {
    res.render("signup");
  });

  app.post(
    "/signup",
    passport.authenticate("local-signup", {
      successRedirect: "/", // redirect to the secure profile section
      failureRedirect: "/signup", // redirect back to the signup page if there is an error
      failureFlash: true, // allow flash messages
    })
  );

  app.get("/logout", function (req, res) {
    req.logout();
    res.redirect("/");
  });

  // route middleware to make sure a user is logged in
  function isLoggedIn(req, res, next) {
    // if user is authenticated in the session, carry on
    if (req.isAuthenticated()) return next();

    // if they aren't redirect them to the home page
    res.redirect("/login");
  }
};
So far, we added the route for signup and after successful signup, we redirect them to home page. So, we need to create view files for signup and home page.
create a folder called views and add the the following files
    - views
       - layouts
        ------ main.handlebars  <!-- show our home page with
    ------ home.handlebars    <!-- show our home -->
    ------ login.handlebars   <!-- show our login form -->
that is to say, main.hanldebars should looks like
<!DOCTYPE html>
<html>
  <head>
    <meta charset="utf-8" />
    <title>Worker App</title>
    <link rel="icon" href="/images/favicon.png" />
    <link
      rel="stylesheet"
      href="https://cdnjs.cloudflare.com/ajax/libs/semantic-ui/2.4.1/semantic.min.css"
    />
  </head>
  <body>
    {{{body}}}
  </body>
</html>
signup.handlebars should looks like
{{#if message}}
  <div class="ui negative message transition hidden">
    <i class="close icon"></i>
    <div class="header">
      {{message}}
    </div>
  </div>
{{/if}}
<div class="ui middle aligned center aligned grid container">
  <div class="column">
    <h2 class="ui teal image header">
      <img src="/images/favicon.png" alt="cloudnweb" class="image" />
      <div class="content">
        Cloudnweb.dev
      </div>
    </h2>
    <form action="/signup" method="POST" class="ui large form">
      <div class="ui stacked segment">

        <div class="field">
          <div class="ui left icon input">
            <i class="user icon"></i>
            <input type="text" name="email" placeholder="Enter Email Address" />
          </div>
        </div>
        <div class="field">
          <div class="ui left icon input">
            <i class="lock icon"></i>
            <input
              type="password"
              name="password"
              placeholder="Enter Password"
            />
          </div>
        </div>
        <input
          type="submit"
          class="ui fluid large teal submit button"
          value="Sign Up"
        />
      </div>
    </form>

  </div>
</div>
home.handlebars should look like
<div class="ui small menu">
  <a href="" class="active item">
    Home
  </a>
  <div class="right menu">
    <div class="item">
      <h4>{{user.email}}</h4>
    </div>
    <div class="item">
      <a href="/logout" class="ui primary button">Log Out</a>
    </div>
  </div>
</div>
Finally, add the following code in the app.js
const express = require("express");
const exphbs = require("express-handlebars");
const mongoose = require("mongoose");
const app = express();
const passport = require("passport");
const flash = require("connect-flash");
const morgan = require("morgan");
const cookieParser = require("cookie-parser");
const bodyParser = require("body-parser");
const session = require("express-session");

require("dotenv").config();

app.engine("handlebars", exphbs({ defaultLayout: "main" }));
app.set("view engine", "handlebars");

app.use(morgan("dev"));
app.use(cookieParser());
app.use(bodyParser.urlencoded({ extended: true }));
app.use(bodyParser.json());

const MONGODB_URI = process.env.MONGODB_URL;

mongoose.connect(MONGODB_URI, { useNewUrlParser: true });

var db = mongoose.connection;
db.on("error", console.error.bind(console, "connection error:"));
db.once("open", function () {
  console.log("connected");
});

app.use(session({ secret: "ilearnnodejs" }));
app.use(passport.initialize());
app.use(passport.session());
app.use(flash());

require("./config/passport")(passport);
require("./routes/index")(app, passport);

const PORT = process.env.PORT;

app.listen(PORT, () => {
  console.log(`app is listening to port ${PORT}`);
});
Now, we can run the application in command as node app.js
we will see how to login using passport authentication in part 2 : https://cloudnweb.dev/2019/04/node-authentication-using-passport-js-part-2/